

Google Tag Manager Integration
Integrating Personalize with Google Tag Manager (GTM) allows you to unlock advanced personalization features while streamlining your tracking and data collection process. GTM simplifies the implementation of tracking codes and event triggers, and when paired with Personalize, it helps deliver highly personalized content based on user behavior.
This guide provides step-by-step instructions to add the Personalize Edge SDK to your website using the Contentstack Personalize Actions GTM Template.
For an example Stack, Personalize project, and GTM container, see the Reference Project section at the bottom of this page.Prerequisites
- Contentstack account
- Personalize-enabled Organization with permissions
- Access to Personalize project
- Event created in your Personalize project
- Attribute created in your Personalize project
- Access to your Google Tag Manager account
What You Will Learn
How to create a GTM account and container and install it on your site.
How to create tags for the Initialize, Trigger Impressions, Trigger Event, Set UserId, and Set Attributes actions using the Contentstack Personalize Actions template.
How to preview and publish your GTM container.
Steps for Execution
- Create an GTM Account, Container and Install a Web Container
- Set up and Manage Tags in Google Tag Manager
- Preview and Publish your GTM Tags
- Preview and Publish your GTM Tags
Create an GTM Account, Container and Install a Web Container
To get started with Google Tag Manager, you first need to create a Google Tag Manager account that will serve as the topmost level of organization for your company. Then, create one Tag Manager container for each of your company's websites and apps. Please refer to the official GTM documentation to create an account and container.
Note: Before you begin, ensure you have access to your website code to add the code snippets.
After you have created your account and container, follow these steps to install the necessary code snippets for your website's Google Tag Manager container:
- In the Install Google Tag Manager dialog, there are instructions to be followed (mentioned in the following screenshot) for all pages of your website.
- Copy the first block of code and paste it in the <head> tag of all your pages. For example, in the following sample HTML code, you would paste your first Google Tag Manager code snippet after the opening <head> HTML tag. Note that the following example uses 'GTM-N2*****G,' but you must replace the ID with your container ID.
<!DOCTYPE html> <html lang="en"> <head> <!-- Google Tag Manager --> <script>(function(w,d,s,l,i){w[l]=w[l]||[];w[l].push({'gtm.start':<p></p> new Date().getTime(),event:'gtm.js'});var f=d.getElementsByTagName(s)[0],<p></p> j=d.createElement(s),dl=l!='dataLayer'?'&l='+l:'';j.async=true;j.src=<p></p> 'https://www.googletagmanager.com/gtm.js?id='+i+dl;f.parentNode.insertBefore(j,f);<p></p> })(window,document,'script','dataLayer',''GTM-N2*****G');</script><p></p> <!-- End Google Tag Manager --> <title>Example Webpage</title><p></p> </head> <body> <!-- Content of your website --> <h1>Welcome to My Website</h1> <p>This is a sample paragraph on my webpage. </body> </html> - Copy the second block of code and paste it immediately after the <body> opening tag. For example, in the following sample HTML code, you would paste your second Google Tag Manager code snippet immediately after the opening <body> HTML tag. Note that the following example uses 'GTM-N2*****G,' but you must replace the ID with your container ID.
<!DOCTYPE html> <html lang="en"> <head> <!-- Google Tag Manager --> <script>(function(w,d,s,l,i){w[l]=w[l]||[];w[l].push({'gtm.start': new Date().getTime(),event:'gtm.js'});var f=d.getElementsByTagName(s)[0], j=d.createElement(s),dl=l!='dataLayer'?'&l='+l:'';j.async=true;j.src= 'https://www.googletagmanager.com/gtm.js?id='+i+dl;f.parentNode.insertBefore(j,f); })(window,document,'script','dataLayer',''GTM-N2*****G');</script> <!-- End Google Tag Manager --> <title>Example Webpage</title> </head> <body> <!-- Google Tag Manager (noscript) --> <noscript><iframe src="https://www.googletagmanager.com/ns.html?id="GTM-N2*****G" height="0" width="0" style="display:none;visibility:hidden"></iframe></noscript> <!-- End Google Tag Manager (noscript) --> <!-- Content of your website --> <h1>Welcome to My Website</h1> <p>This is a sample paragraph on my webpage.</p> </body> </html> - (Optional) Test your website by entering your website's link and then clicking Test.
- Then click the OK button.
Note: If you are using a web framework, there may be an easier way to install the GTM tag. For example, Next.js provides a custom integration for GTM: Google Tag Manager.
This adds the code snippets to your website. Next, we use Google Tag Manager to set up and manage tags.
Set up and Manage Tags in Google Tag Manager
For this guide, we will be creating 5 tags for the Trigger Impressions, Trigger Event, Set Attributes, Set UserId, and the Initialize actions:
- Initialize: Set up the Personalize Edge SDK for your website to enable dynamic personalization.
- Trigger Impressions: Captures and tracks when a personalized experience is displayed to users.
- Trigger Event: Records specific user interactions, such as clicks or conversions, to inform personalization strategies.
- Set Attributes: Sends user attributes to Personalize, allowing for tailored content based on user profiles.
- Set UserId: Associates a unique identifier when an unknown user becomes a known user after logging in with a user.
Set up the tag for Initialize action
Use the following steps to set up the tag for the Initialize action in GTM.
- In the Workspace tab, click Tags to open the dashboard.
- In the Tags section, click the New button to create a new tag.
- Replace Untitled Tag with the name of your tag (for example, 'Initialization Tag').
- In the Tag Configuration section,
- Click the Choose a tag type to begin setup area.
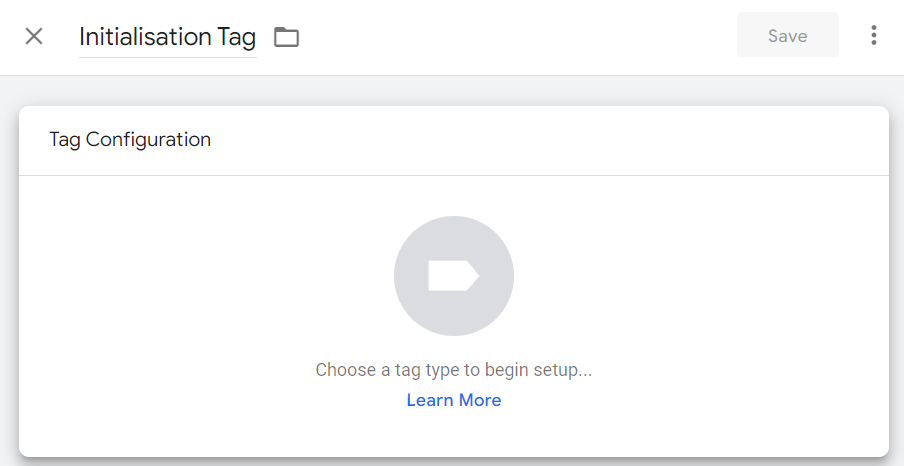
- Click Discover more tag types in the Community Template Gallery to open the Import Tag Template page.
- From the Community Template Gallery, search and select Contentstack Personalize Actions template.
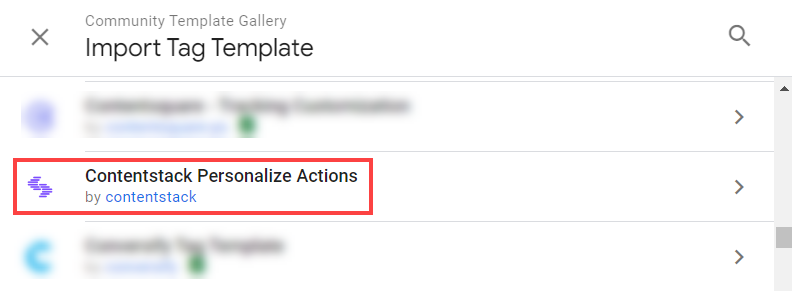
- Click the Add to workspace button and then click the Add button.
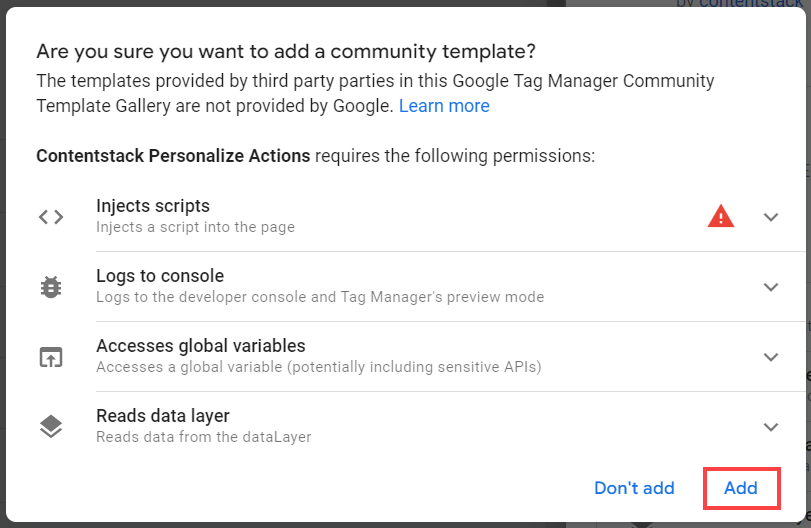
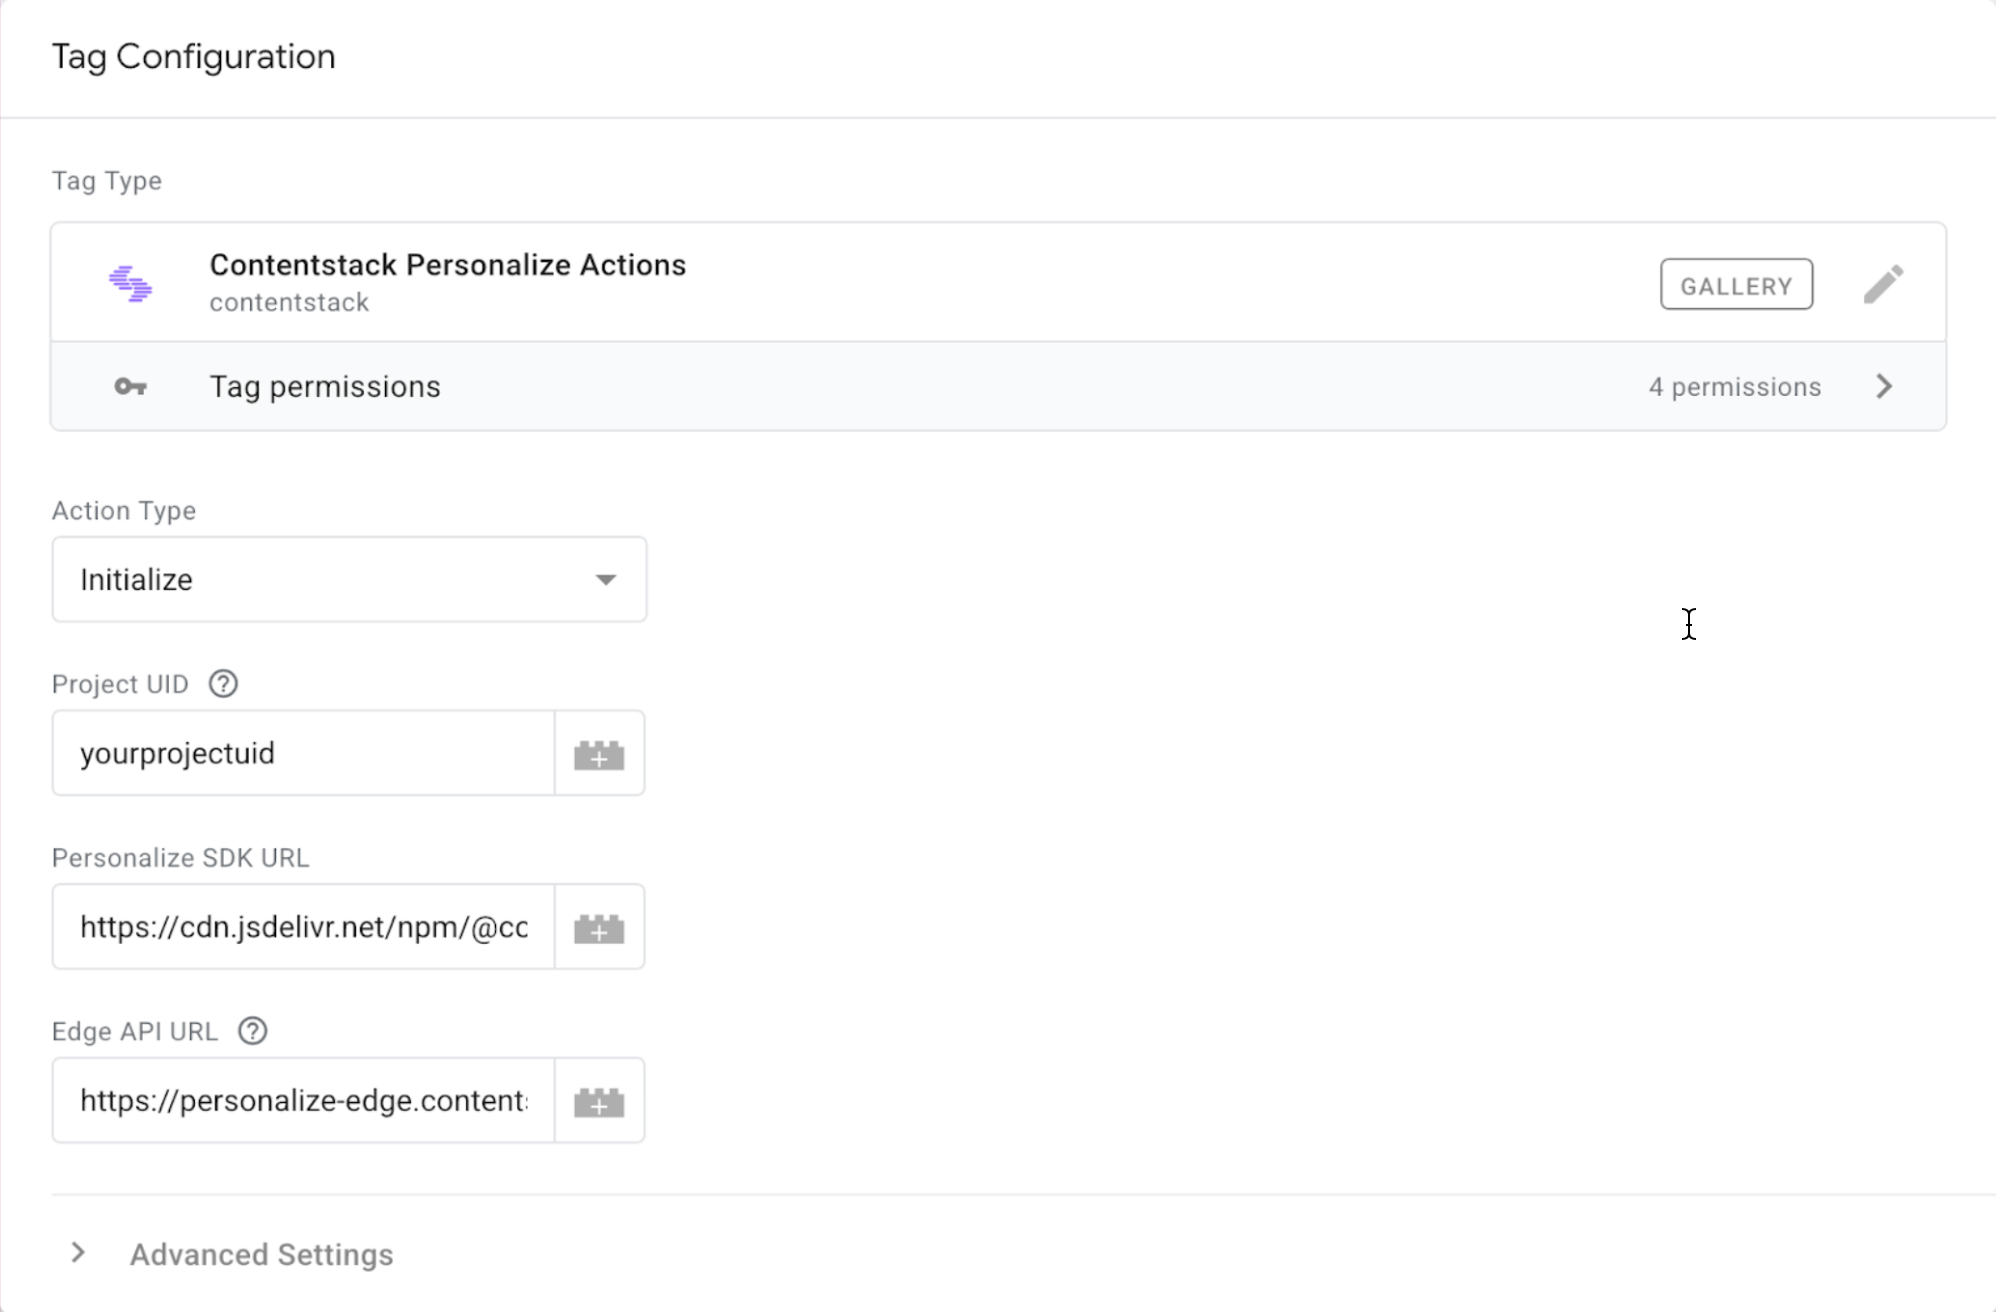
- In the Action Type drop-down list, select Initialize.
- Enter your Personalize Project UID fetched from the Projects Settings page.
- The Personalize SDK URL will be prefilled. Unless you are hosting a version of the Personalize Edge SDK yourself, leave this field unchanged.
- Enter your Edge API URL. By default, the AWS NA URL is added. You can choose to update this to the URL of other data centers and regions.
- In the Advanced Settings, configure the Tag Sequencing. Tag Sequencing is used to specify tags to fire immediately before or after the current tag.
- Click the Choose a tag type to begin setup area.
- Click Save.
Set up the tag for Trigger Impressions action
Use the following steps to set up the tag for the Trigger Impressions action in GTM.
- In the Workspace tab, click Tags to open the dashboard.
- In the Tags section, click the New button to create a new tag.
- Replace Untitled Tag with the name of your tag (for example, 'Headline Test Impression Tag').
- In the Tag Configuration section,
- Click the Choose a tag type to begin setup area.
- Click Discover more tag types in the Community Template Gallery to open the Import Tag Template page.
- From the Community Template Gallery, search and select Contentstack Personalize Actions template.
- In the Action Type drop-down list, select Trigger Impressions.
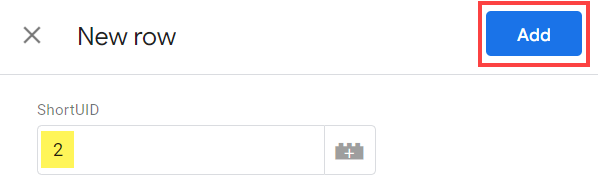
- To add your Experiences Short UID, obtained from the Experiences landing page in Personalize, click the Add Row button and enter the Short UID in the ShortUID field and then click the Add button.
- In the Advanced Settings, under Tag firing options, select Once per page.
- Configure the Tag Sequencing. Tag Sequencing is used to specify tags to fire immediately before or after the current tag. Here, mark the checkbox for Fire a tag before Headline Test Impression Tag fires.
- Click Select tag and select the previously created Initialization tag and mark the checkbox for Don't fire Headline Test Impression Tag if Initialization Tag fails or is paused.
- In the Triggering section, configure an event/trigger for which you want the tag to be executed.
- Click the Choose a trigger to make this tag fire area.
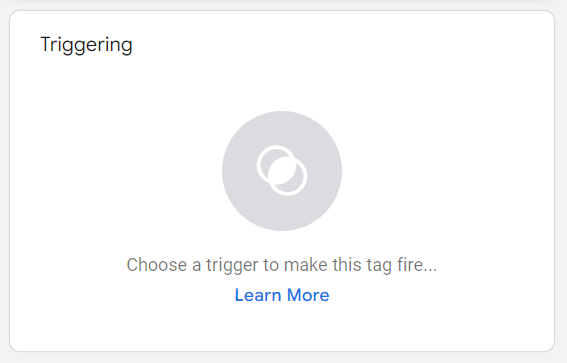
- On the Choose a trigger modal, click the New trigger button.
- Replace Untitled Trigger with the name of your trigger (for example, 'Home Page Trigger').
- In the Trigger Configuration section,
- Click the Choose a trigger type to begin setup area.
- Click the Page View trigger type.
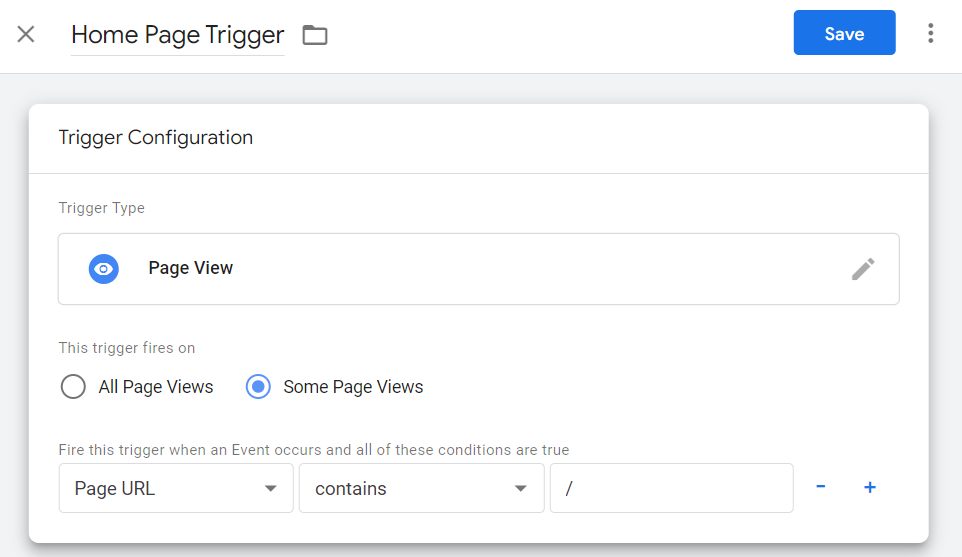
- Configure the trigger as shown in the screenshot below and then click the Save button to save the trigger configuration.
- Click the Choose a trigger to make this tag fire area.
- Click the Save button to save the tag configuration.
Set up the tag for Trigger Event action
Use the following steps to set up the tag for the Trigger Event action in GTM.
- In the Workspace tab, click Tags to open the dashboard.
- In the Tags section, click the New button to create a new tag.
- Replace Untitled Tag with the name of your tag (for example, 'Read More Conversion Tag').
- In the Tag Configuration section,
- Click the Choose a tag type to begin setup area.
- Click Discover more tag types in the Community Template Gallery to open the Import Tag Template page.
- From the Community Template Gallery, search and select Contentstack Personalize Actions template.
- In the Action Type drop-down list, select Trigger Event.
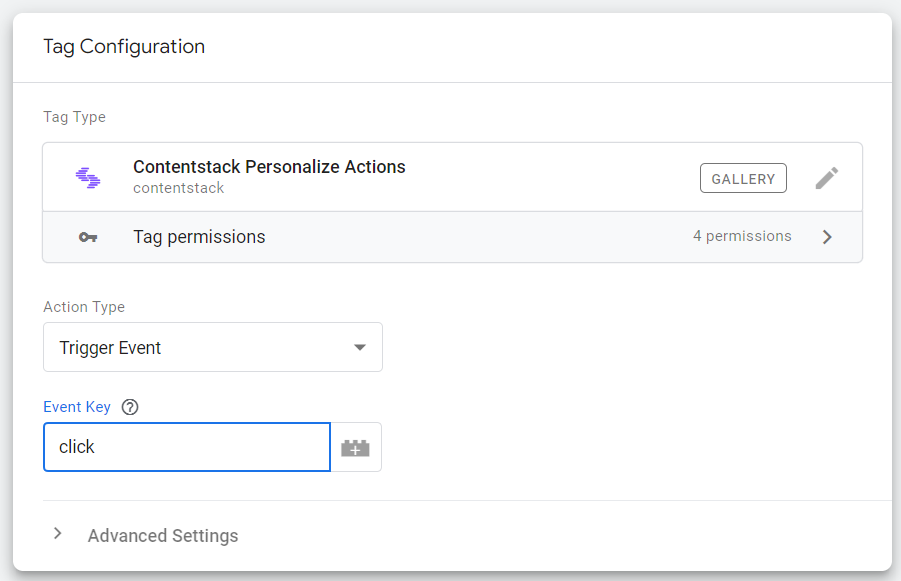
- To add your Event Key, obtained from the Events landing page in Personalize, click the Event Key field and enter the event key.
- In the Advanced Settings, under Tag firing options, select Once per event.
- Configure the Tag Sequencing. Tag Sequencing is used to specify tags to fire immediately before or after the current tag. Here mark the checkbox for Fire a tag before Read More Conversion Tag fires.
- Click Select tag and select the previously created Initialization tag and mark the checkbox for Don't fire Read More Conversion Tag if Initialization Tag fails or is paused.
- In the Triggering section, configure an event/trigger for which you want the tag to be executed.
- Click the Choose a trigger to make this tag fire area.
- On the Choose a trigger modal, click the New trigger button.
- Replace Untitled Trigger with the name of your trigger (for example, 'Click - Read More’').
- In the Trigger Configuration section,
- Click the Choose a trigger type to begin setup area.
- In the Choose trigger type modal under the Click section, click the All Elements trigger type.
- Configure the trigger as follows:
This trigger fires on: Select Some Clicks.
- For the conditions, click the first drop-down list field and select Choose Built-In Variable > Click ID. Select the equals operator and then enter read-more for the criteria.
- Then click the Save button to save the trigger configuration.
- Click the Save button to save the tag configuration.
This adds your tag for the Trigger Event action in GTM.
Set up the tag for Set UserId action
Use the following steps to set up the tag for the Set UserId action in GTM.
- In the Workspace tab, click Tags to open the dashboard.
- In the Tags section, click the New button to create a new tag.
- Replace Untitled Tag with the name of your tag (for example, 'Set UserId Tag').
- In the Tag Configuration section,
- Click the Choose a tag type to begin setup area.
- Click Discover more tag types in the Community Template Gallery to open the Import Tag Template page.
- From the Community Template Gallery, search and select Contentstack Personalize Actions template.
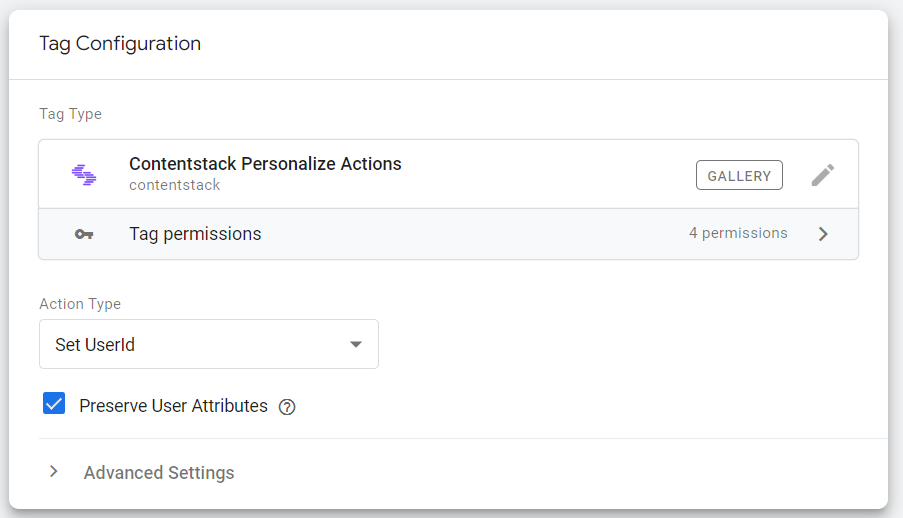
- In the Action Type drop-down list, select Set UserId.
- Mark the checkbox for Preserve User Attributes.
- In the Advanced Settings, under Tag firing options, select Once per event.
- Configure the Tag Sequencing. Tag Sequencing is used to specify tags to fire immediately before or after the current tag. Here mark the checkbox for Fire a tag before Set UserId Tag fires.
- Click Select tag and select the previously created Initialization tag and mark the checkbox for Don't fire Set UserId Tag if Initialization Tag fails or is paused.img src="https://images.contentstack.io/v3/assets/blt2d43f51baca745a8/blt18969151adecbc45/69c3e38816a1f889281c682c/Don_t_Fire_Set_User_ID_Tag.png" alt="Don_t_Fire_Set_User_ID_Tag.png" height="auto" />
- In the Triggering section, configure an event/trigger for which you want the tag to be executed.
- Click the Choose a trigger to make this tag fire area.
- On the Choose a trigger modal, click the New trigger button.
- Replace Untitled Trigger with the name of your trigger (for example, 'LoggedInEventTrigger').
- In the Trigger Configuration section,
- Click the Choose a trigger type to begin setup area.
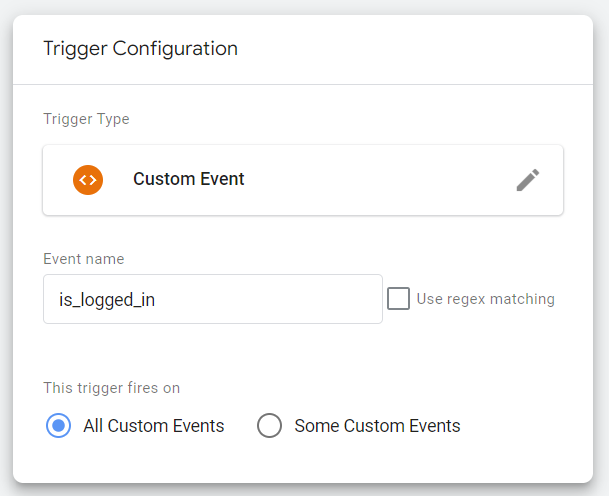
- In the Choose trigger type modal under the Other section, click the Custom Event trigger type.
- Enter is_logged_in in the Event name field.
- Then click the Save button to save the trigger configuration.
- Click the Save button to save the tag configuration.
This adds your tag for the Set UserId action in GTM.
Set up the tag for Set Attributes action
Use the following steps to set up the tag for the Set Attributes action in GTM.
- In the Workspace tab, click Tags to open the dashboard.
- In the Tags section, click the New button to create a new tag.
- Replace Untitled Tag with the name of your tag (for example, 'Rewards Program Tag').
- In the Tag Configuration section,
- Click the Choose a tag type to begin setup area.
- Click Discover more tag types in the Community Template Gallery to open the Import Tag Template page.
- From the Community Template Gallery, search and select Contentstack Personalize Actions template.
- In the Action Type drop-down list, select Set Attributes.
- In the Attributes field, define the key-value pairs to set. The keys should match an attribute key you have defined in the personalize project.
- In the Advanced Settings, under Tag firing options, select Once per event.
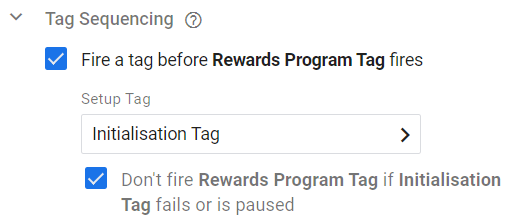
- Configure the Tag Sequencing. Tag Sequencing is used to specify tags to fire immediately before or after the current tag. Here mark the checkbox for Fire a tag before Rewards Program Tag fires.
- Click Select tag and select the previously created Initialization tag and mark the checkbox for Don't fire Rewards Program Tag if Initialization Tag fails or is paused.
- In the Triggering section, configure an event/trigger for which you want the tag to be executed.
- Click the Choose a trigger to make this tag fire area.
- On the Choose a trigger modal, click the New trigger button.
- Replace Untitled Trigger with the name of your trigger (for example, 'Subscribe Trigger').
- In the Trigger Configuration section,
- Click the Choose a trigger type to begin setup area.
- In the Choose trigger type modal under the Click section, click the All Elements trigger type.
- Configure the trigger as follows:
This trigger fires on: Select Some Clicks.
- For the conditions, click the first drop-down list field and select Choose Built-In Variable > Click ID. Select the equals operator and then enter subscribe for the criteria.
- Then click the Save button to save the trigger configuration.
- Click the Save button to save the tag configuration.
Preview and Publish your GTM Tags
After setting up your GTM Tags, you can preview and test your container configuration before publishing. Google Tag Manager’s preview and debug mode lets you test a container configuration on a site before publishing. It connects to Tag Assistant, allowing you to see which tags fired and their order. Please refer to the official GTM documentation for more information on Preview and Debug Mode.
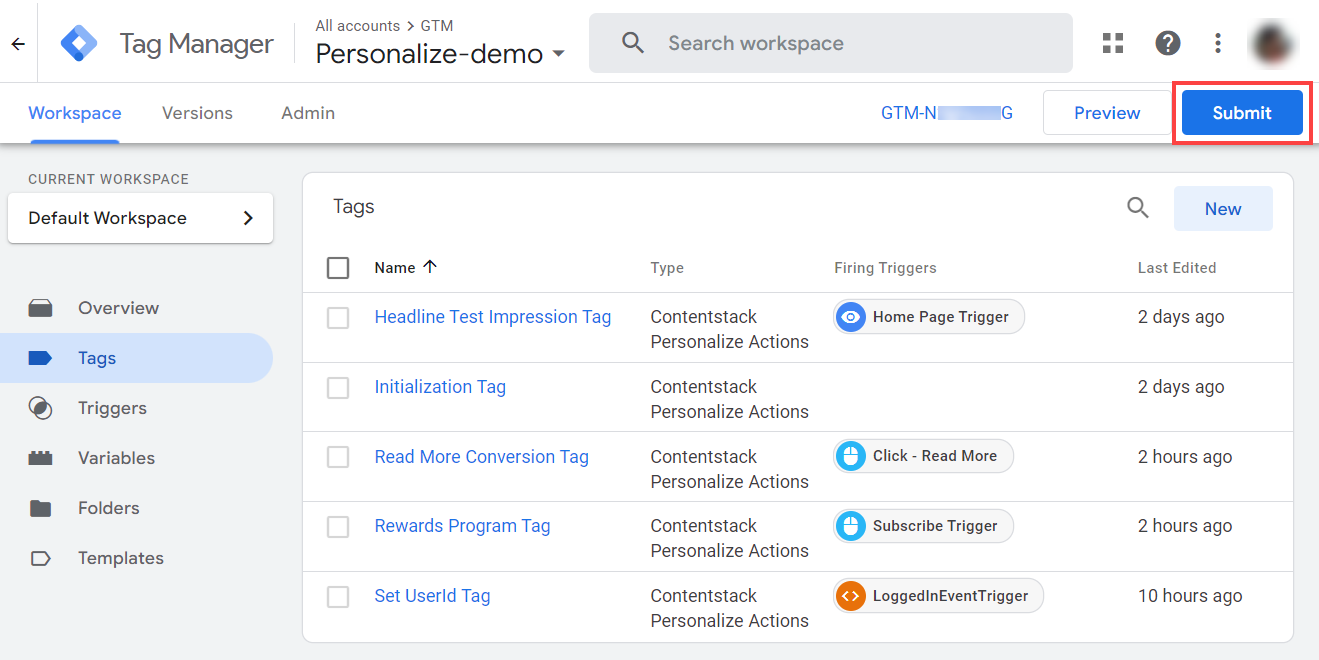
After previewing and ensuring everything is working as expected, navigate back to your Workspace where we created the Container and then click the Submit button to publish a container with the tags you created.
This completes the set up for the GTM integration for Personalize.
Additional Resource: For more information on the Publishing, versions, and approvals, please refer to the official GTM documentation.
Troubleshooting
Common Issues
- Tags Not Firing: Ensure that triggers are correctly set up and that your conditions are properly defined.
- Data Not Sent to Personalize: Double-check API keys and ensure that all required fields are correctly configured.
Debugging Tips
- Use GTM’s “Preview” mode to test tags in real-time and ensure they are fired as expected.
- Check your browser’s developer console for any error messages related to the tag execution.
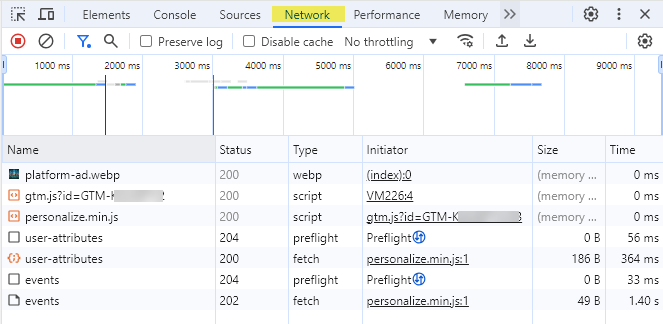
- Check your browser’s developer console for network calls via the Network tab in Google Chrome (Inspect Element > Network) for any error messages related to the tag execution. The following network call shows the user attributes being set on the edge API from GTM:
For further assistance, refer to the Google Tag Manager documentation or contact support.
Reference Project
You can refer to the following project for a reference implementation: https://github.com/contentstack-personalize-examples/nextjs-example-launch-gtm. It is built using the Next.js framework and is hosted on Contentstack Launch here: https://personalize-demo-with-gtm.contentstackapps.com.
You can find the Google Tag Manager container available in the GitHub repository as the gtm-container.json file. You can import the same into your Tag Manager account to get started with the same example.
More articles in "Integration Guides"
