

Next.js Static Site Sample
Note: Contentstack no longer supports Starters. We recommend using Kickstarts which are pre-built, minimal code templates designed to help you quickly integrate your project with Contentstack.
Static Site Generation (SSG) generates website pages at build time. The content on web pages generated using SSG can be accessed quickly. Next.js is a framework that attempts to statically generate any pages that it can by detecting how an app is fetching its data.
Incremental Static Regeneration (ISR) allows developers and content editors to use static-generation on a per-page basis instead of rebuilding the entire website. Using ISR, Next.js allows you to create and update static pages after you have built a website. ISR can help you generate product pages faster or with a higher cache hit rate.
This guide will help you create a starter website built on top of Next.js SSG with minimal steps. It uses Contentstack’s Node.js SDK to store and deliver the website content from Contentstack. You can also learn how to set up ISR for a Contentstack-powered site.
Screenshots
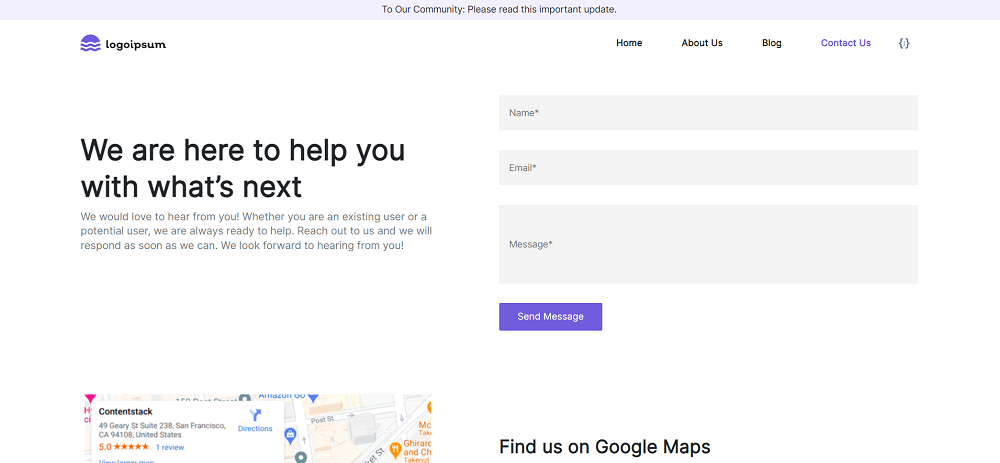
eNote: Learn how to build a starter website using Next.js framework for React applications with Server Side Rendering (SSR).
Let’s look at the steps to create this starter website using Next.js and Contentstack.
Note: This starter app uses Live Preview version 2.0.
Prerequisites
- Contentstack account
- Node.js version 20 or later
- Contentstack CLI: npm install -g @contentstack/cli
- Enable Live Preview for your organization
- Management token with read permission
Note: For this tutorial, we have assumed that you are familiar with Contentstack and Next.js. If not, please refer to the Contentstack docs and Next.js docs for more details.
Supported Features
- Launch Hosting: Seamlessly deploy your website using our Launch hosting platform. Refer to the Launch documentation to learn more about hosting on Launch.
- Live Preview: Utilize Contentstack's Live Preview feature to see real-time updates of your content changes reflected on your site before publishing.
- Branches: Leverage the Branches feature to manage different versions of your content within Contentstack, allowing for organized development and deployment.
- Workflows: Implement structured content approval processes within Contentstack using the Workflows feature to streamline the content creation and publishing for your site.
Set Up Your App
Here is an overview of the steps involved in creating our Next.js app:
- Set the Region
- Log in to your Account
- Import Content
- Create Delivery Token
- Build and Configure the Website
- Deploy the Website
Set the Region
To use the North America, Europe, Azure North America, Azure Europe, Google North America, or Google Europe endpoint, run the following command in your terminal (command prompt):
csdx config:set:region <<region>>Note:- For North American users, set the region as NA.
- For European users, set the region as EU.
- For Azure North American users, set the region as AZURE-NA.
- For Azure European users, set the region as AZURE-EU.
- For Google North America users, set the region as GCP-NA.
- For Google Europe users, set the region as GCP-EU.
Log in to your Account
To import content to your stack, first, you’ll need to log in to your Contentstack account via CLI by running the following command in your terminal:
csdx auth:loginThis command will ask you to provide your Contentstack’s account credentials (email and password).
Import Content
The seed command lets you import content to your stack in a few steps. To do so, run the following command in your terminal:
csdx cm:stacks:seed --repo "contentstack/stack-starter-app"This command prompts the following options:
- Organization name: You will get a list of organizations to which you have access. Select the one from the list where your source stack is located or where you want to create a new stack.
Note: Choose an organization where you are an owner or admin.
- Stack preference: Next, you will get an option to create a new stack or use an existing stack.
- If you select New, you must enter the stack name, and the stack creation process will start.
- If you select Existing, you will get a list of stacks to which you have access in the organization. Choose the destination stack where you want to import the content. If the existing stack has some content, it will ask for a confirmation to continue with the same stack.
Additional Resource: Refer to the Stack Roles documentation to learn more about permissions.
Tip: To avoid the chances of any error, we recommend that you select the option of creating a new destination stack. If you import content to an existing stack, ensure that the stack is empty.
Finally, you will get the content imported to your stack.
- Organization name: You will get a list of organizations to which you have access. Select the one from the list where your source stack is located or where you want to create a new stack.
Create Delivery Token
A delivery token lets you fetch published content of an environment.
You can create a delivery token for the “development” environment for running the website on localhost. Later, while deploying your site, you can create tokens for other environments.
Build and Configure the Website
Fire up your terminal, navigate to your project folder, and run the following command to create a configuration file named .env.local.
cp .env.local.example .env.localNote: If you are a Windows user, replace cp with copy in the command given above.
The .env.local file contains all the necessary config parameters. Open it in any code editor or IDE of your choice, provide your stack credentials as shown below, and save the file.
CONTENTSTACK_API_KEY = <api_key_of_your_stack>
CONTENTSTACK_DELIVERY_TOKEN = <delivery_token_of_the_environment>
CONTENTSTACK_ENVIRONMENT = <environment_name>

# By default branch=main, if a branch is not provided
# CONTENTSTACK_BRANCH = <your_branch_name>

# By default region=us, if a region is not provided
# CONTENTSTACK_REGION = <your_region_name>
Mandatory configuration parameters to enable Live Preview
Note: The below code is for North America region users only. Refer the configuration code for Europe region, Azure North America region, Azure Europe region, Google North America, and Google Europe region on the regions configuration page.
CONTENTSTACK_PREVIEW_TOKEN = <preview_token_linked_with_delivery_token> CONTENTSTACK_PREVIEW_HOST = rest-preview.contentstack.com CONTENTSTACK_APP_HOST = app.contentstack.com CONTENTSTACK_API_HOST = api.contentstack.io CONTENTSTACK_LIVE_PREVIEW = true #By default the live preview feature is enabled for this project. To disable it, set "CONTENTSTACK_LIVE_PREVIEW= false". CONTENTSTACK_LIVE_EDIT_TAGS = false #By default live editing tags are disabled for this project. To enable it, set “CONTENTSTACK_LIVE_EDIT_TAGS= true”.Note: Make sure your management token has READ permission only.
Additional Resource: Go to our Live Preview documentation to learn more about the Live Preview feature in Contentstack.
Run the following commands in your terminal:
npm install
npm run dev
That’s it!
You can now view the website at http://localhost:3000. And you also have the stack that has all the content and resources for the website. Try experimenting by creating new entries and publishing on the “development” environment. You should be able to see the changes on the website at the localhost.
Note: If you face any issues while installing the starter app, refer to the Customizing Babel Config document for more information.
Set up SSG On-demand ISR (Optional)
For Static Site Generation, the build is generated for a particular active route at predefined intervals.
Alternatively, for on-demand Incremental Static Regeneration, the build is generated based on the conditions provided in webhook events for the specific page URLs.Here are the steps to follow to set up on-demand ISR.
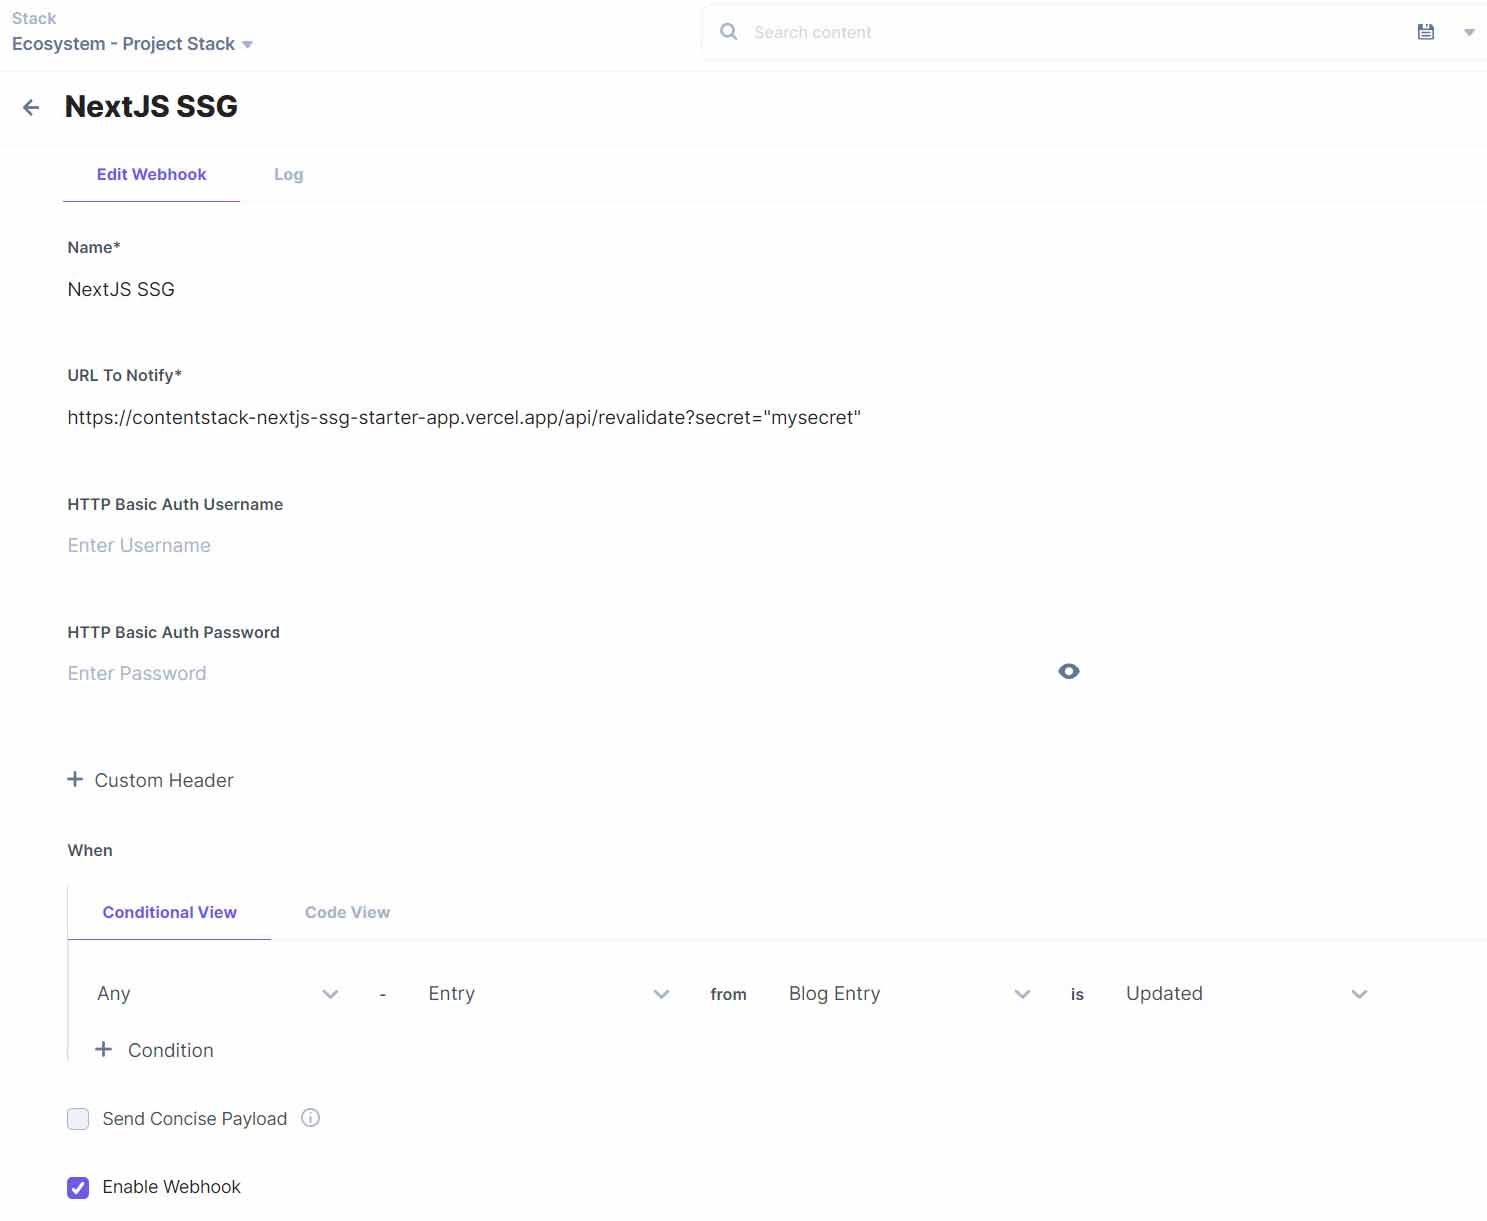
Configure Webhook in Contentstack
- Select Webhook from the "Settings" icon on the left navigation panel and click on + New Webhook.
- Provide a suitable name for your Webhook and enter the page URL appended with /api/revalidate?secret=”<some secret value>”.
- Select the required conditions needed to trigger the page on demand and then Save the webhook.
Set configuration files for On-demand ISR
- Add the following configuration parameter to .env.local :
CONTENTSTACK_SECRET_TOKEN = <your_secret_value> //any value of your choiceNote: The secret value entered in this section must be the same as the secret value entered in the website URL in Webhook.
- When switching to On-demand ISR, it is required to remove the parameter revalidate=1000 from all the .tsx pages under the pages folder.
Set up Live Preview (Optional)
Note: In order to use Live Preview, your plan must include this feature. Check our pricing page for more details.
The next step is to set up and enable live preview for your website. Follow the steps below to set up live preview feature for your website:
- Navigate to the Live Preview section in your stack's “Settings”.
- Select the Enable Live Preview checkbox.
- Now, select a Default Preview Environment for previewing the live content of your website. Finally, Save your settings.
This completes your live preview set up. Now, you can deploy the website using Vercel.
Deploy the Website
The easiest and quickest way to deploy a Next.js starter website to production is by using Contentstack Launch, Contentstack’s web hosting platform. For more details, refer to the Contentstack Launch documentation.
Alternatively, you can use Vercel to host your website. To do so, you need a Vercel account before deploying.Note: When deploying the starter website to Vercel, enable or disable the Live Preview environment variable as needed.
