

Getting Started with Contentstack Personalize with A/B Testing: An End-to-End Guide
Contentstack Personalize is an optimization engine that uses real-time user data to dynamically adapt content. This allows you to create highly targeted experiences for specific audiences, improving engagement and conversion.
This step-by-step guide will help you get started quickly with Contentstack Personalize by performingAutomate Your Winning Strategy the following sequence of tasks:
- Create a Personalize Project and Connect it to an Existing Stack
- Set up SDK
- Create an A/B Test Experience in Personalize
- Create an Event
- Triggering Events and Collecting Metrics
- Create Entry Variants in CMS
- Activate the A/B Test Experience
- View Experience Analytics
- Automate Your Winning Strategy
Prerequisites
Before starting, ensure you have:
- A Contentstack account
- Access to the Contentstack Organization/Stack as the Owner/Admin that has Personalize enabled
- Next.js website (version 14 and above) with App Router
- Website content sourced from a Stack and deployed on your preferred hosting platform
- A basic understanding of A/B testing and Contentstack’s UI
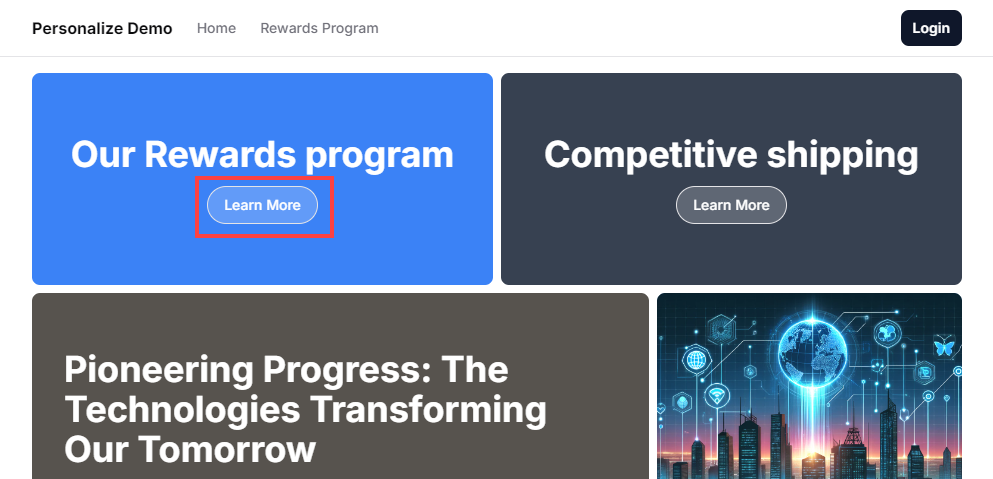
For this guide, we will be creating an A/B test to test a different headline on your website, and convert a visitor every time they click on the CTA (Call to Action). Let’s dive in and create a Personalize project.
Create a Personalize Project and Connect it to an Existing Stack
To create a new Personalize project, log in to your Contentstack account and perform the following steps:
- In the top navigation bar, click the App Switcher icon and then click Personalize.
- You will be redirected to the Personalize Projects landing page. Click the + New Personalize Project button.
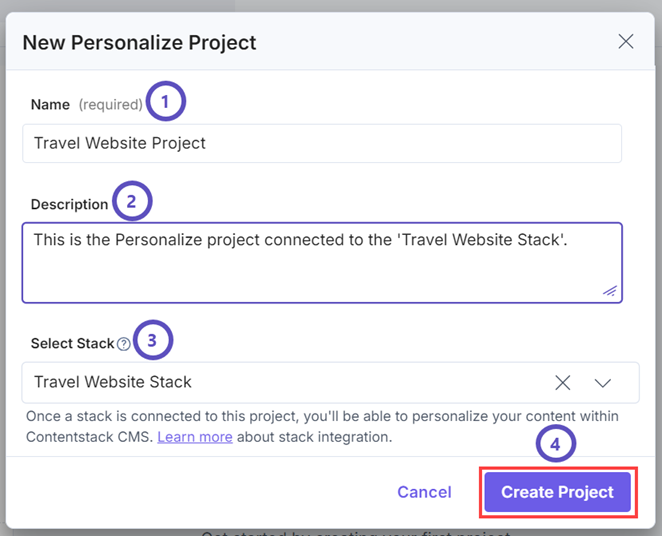
- In the New Personalize Project modal,
- Enter a Name and optional Description for the project.
- Select an existing stack from the drop-down list to connect it to your Personalize project.
- Click the Create Project button.
This creates your new Personalize project and it will now appear on the Personalize Projects landing page.
Additional Resource: For detailed information, please refer to the Create a Project documentation.
Set up SDK
You must set up the Personalize Edge SDK for your Next.js website, hosted on Vercel. To do this, refer to this guide and then continue the further steps in Personalize. After setting up the SDK for your Next.js website, continue the steps further from this guide.
Additional Resource: For setting up the Personalize Edge SDK for your Next.js website with Personalize, hosted on Launch, refer to this guide.
Create an A/B Test Experience in Personalize
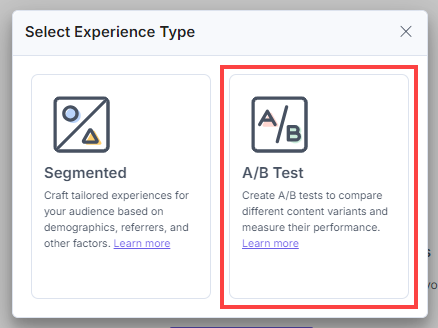
An Experience is a configuration within a personalization platform for managing and executing tests and campaigns. You can choose between Segmented or A/B Test experiences. An A/B test experience is a randomized experiment that lets you present two or more content variants of a web page or an app and display them to different sets of users at the same time to verify the effectiveness of these variants.
For this guide, we will create an A/B Test experience with the following details:
- A/B Test experience name: Headline Test
- Variants:
- Control: This is a variant that represents the existing headline - traffic - 50%
- Bold headline: The new variant with a different headline - traffic - 50%
- Metrics:
- Primary metric: Click on “Learn More“
To create a new A/B Test experience in the new project, perform the following steps:
- Click the newly created project to navigate to it.
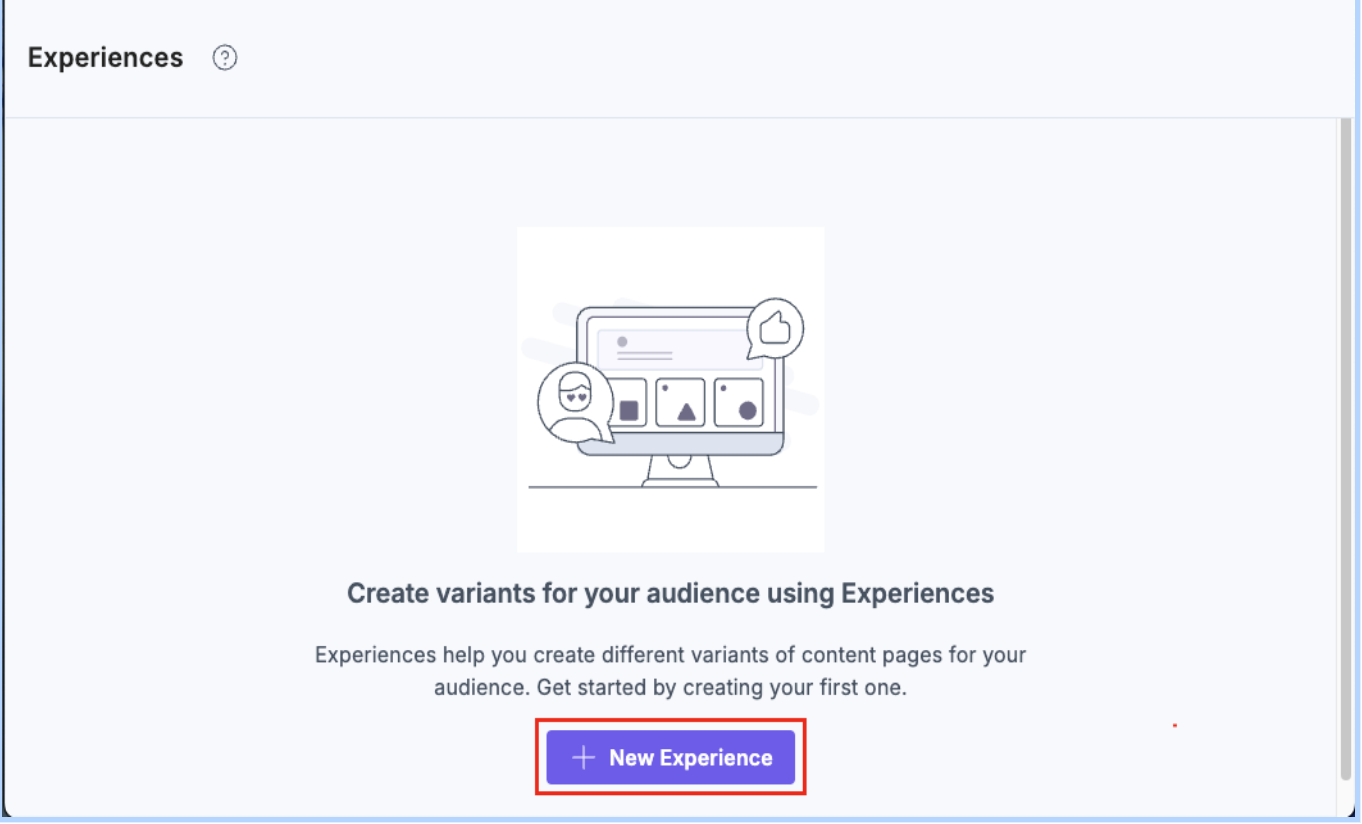
- By default, you will be navigated to the Experience landing page. Click the + New Experience button.
- In the Select Experience Type modal, click A/B Test as the experience type.
- Provide a Name and an optional Description for your experience, and click Save General Details.
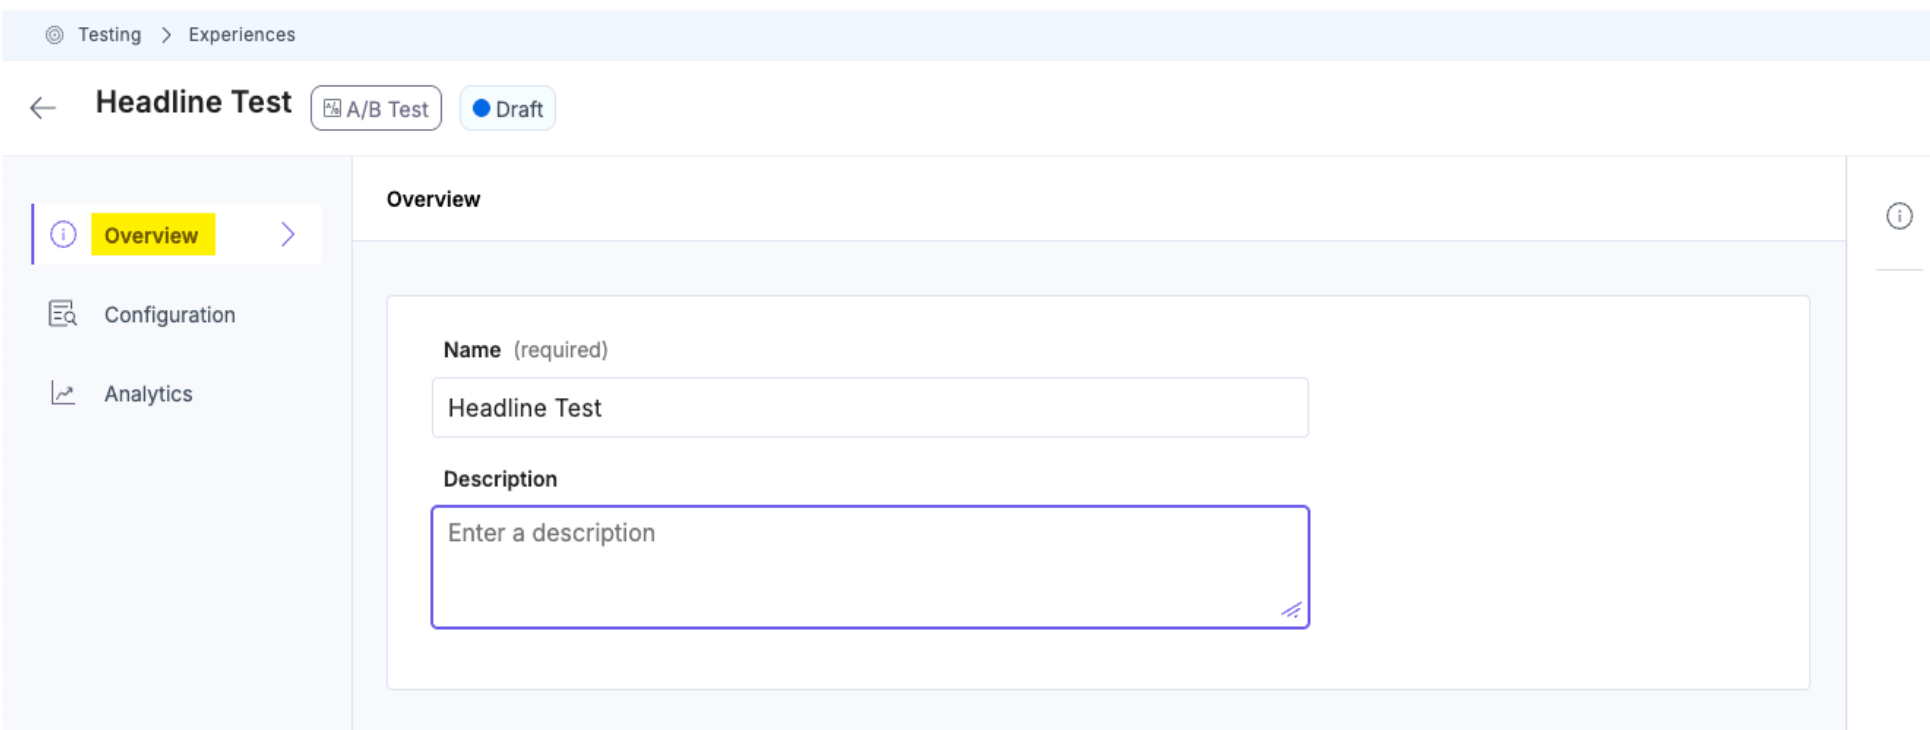
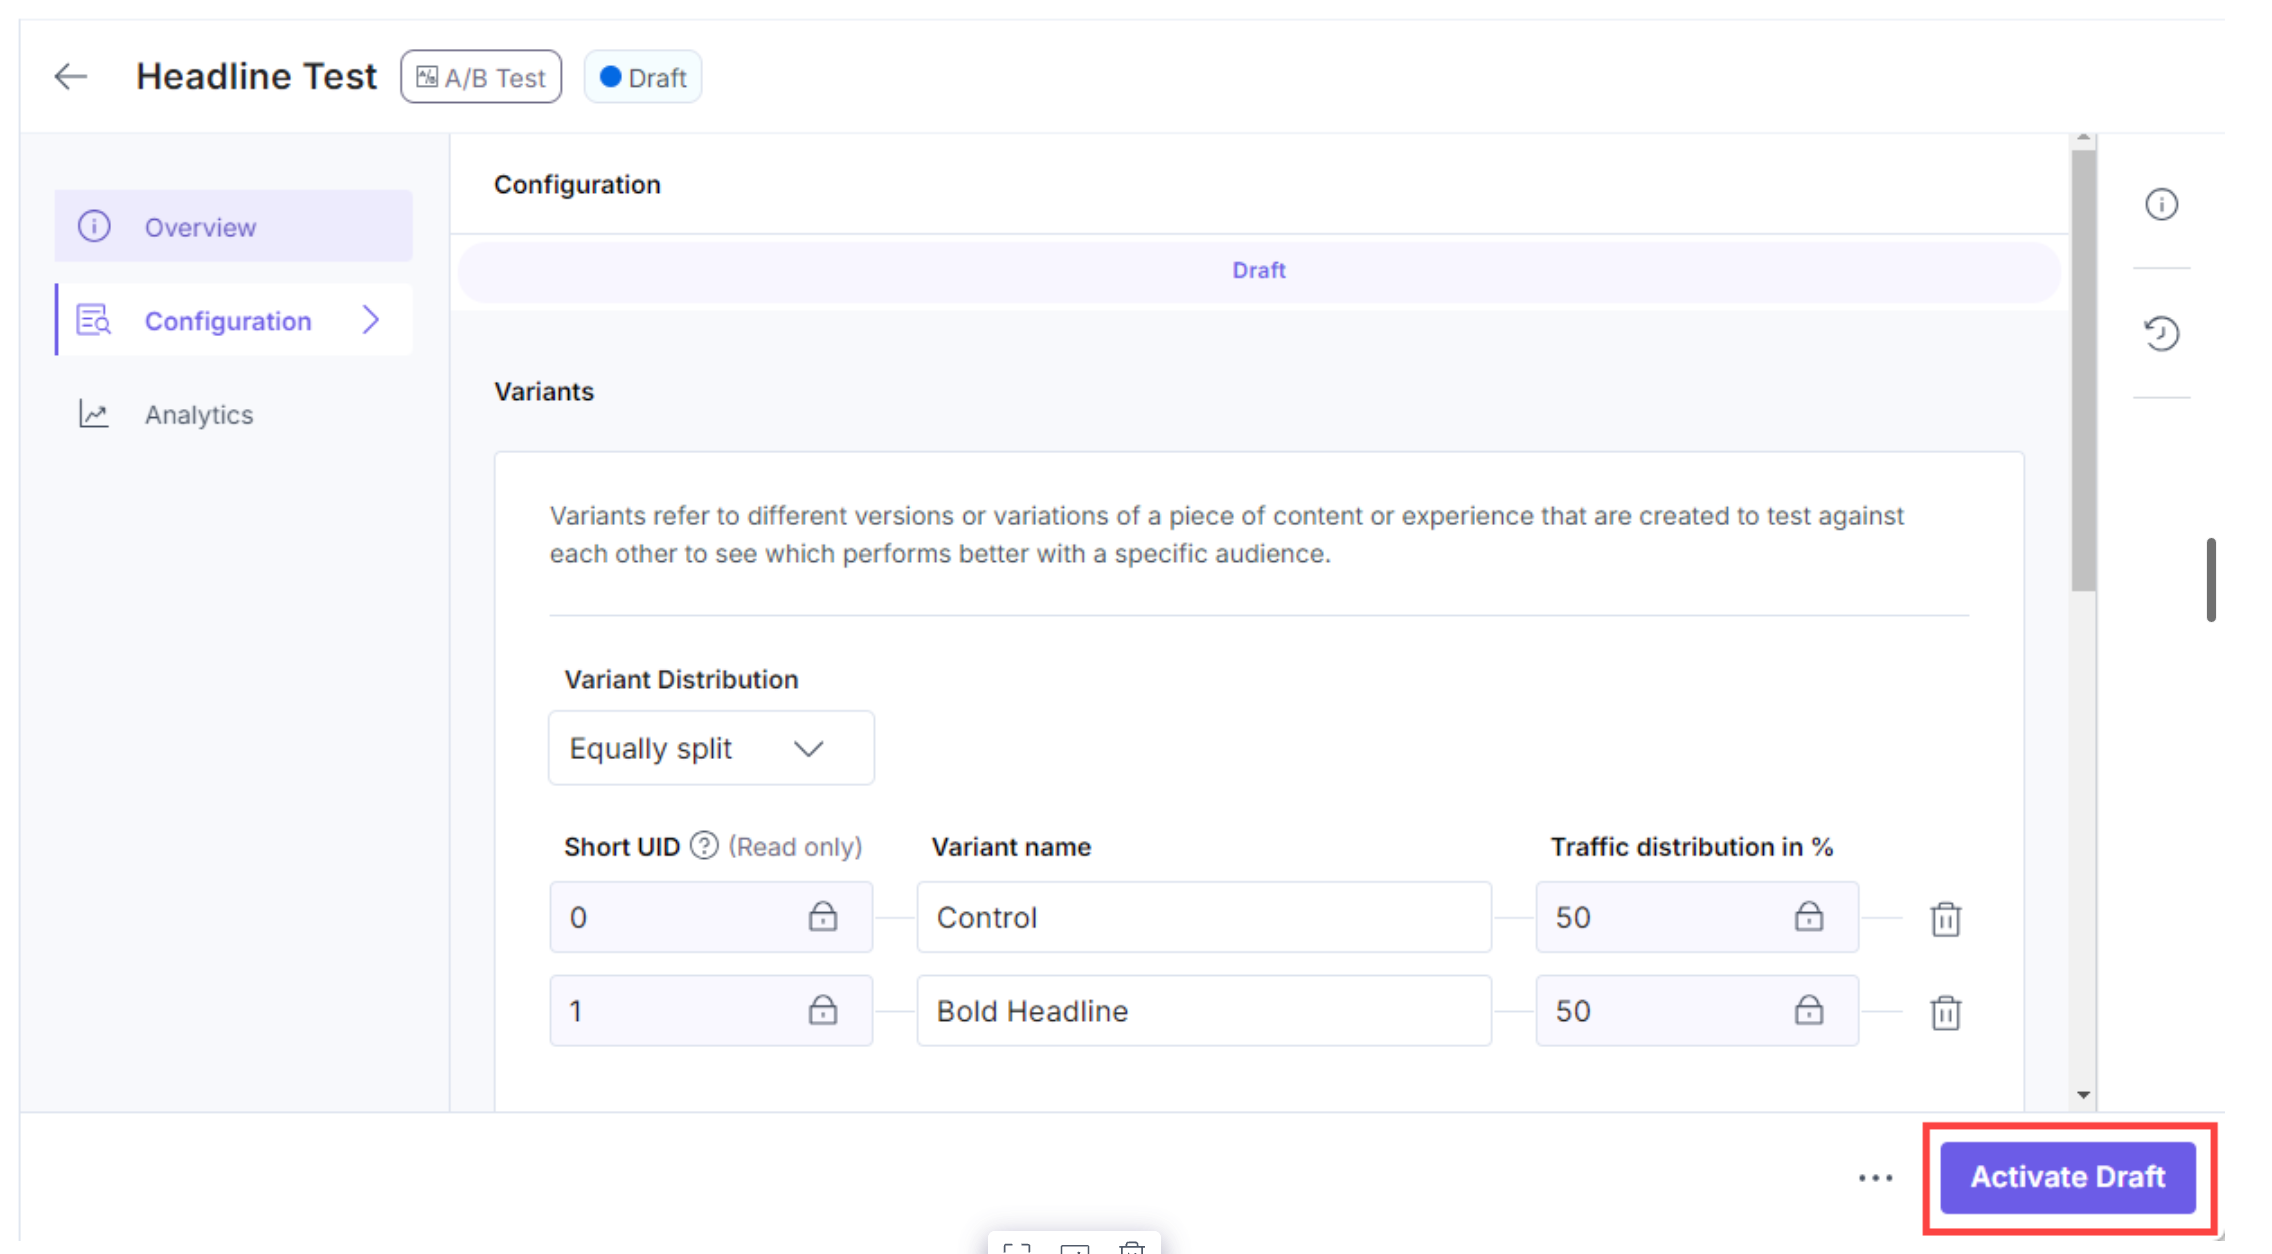
- Click the Configuration tab to set up your A/B test variants as follows:
- In the Variant Distribution drop-down, select Equally split.
- Click the + Add Variant button twice to create two variants.
- Enter Control and Bold headline in the Variant name fields.
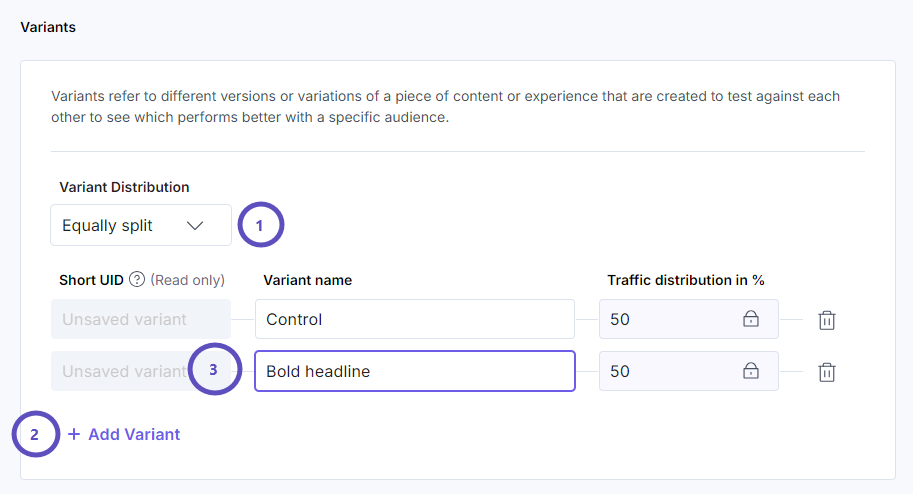
- Click the Save Draft button to save the A/B Test experience.
You’ve now created an A/B test experience that you can use to test different content variants.
Additional Resource: For detailed information, please refer to the Create an A/B Test Experience documentation.
Enable Live Preview and Visual Builder
To fully support personalized content creation and validation with Contentstack Personalize, enable both Live Preview and Visual Builder on your stack. These tools provide editors with real-time visibility and intuitive controls for managing variant-based experiences directly in the CMS interface.
Note: Live Preview lets you preview personalized experiences in real time. Visual Builder allows editors to create and manage variants visually, and preview multiple variants simultaneously based on different audience selections, without requiring developer involvement.
Create an Event
Events in Contentstack Personalize, are essential for measuring the success of your A/B tests. By tracking specific user actions (metrics) as events, such as clicks, form submissions, or video plays, you can accurately determine which variant in your experience performs better.
For this guide, we are creating a Click event to track conversions for our A/B test on the ‘Learn More’.
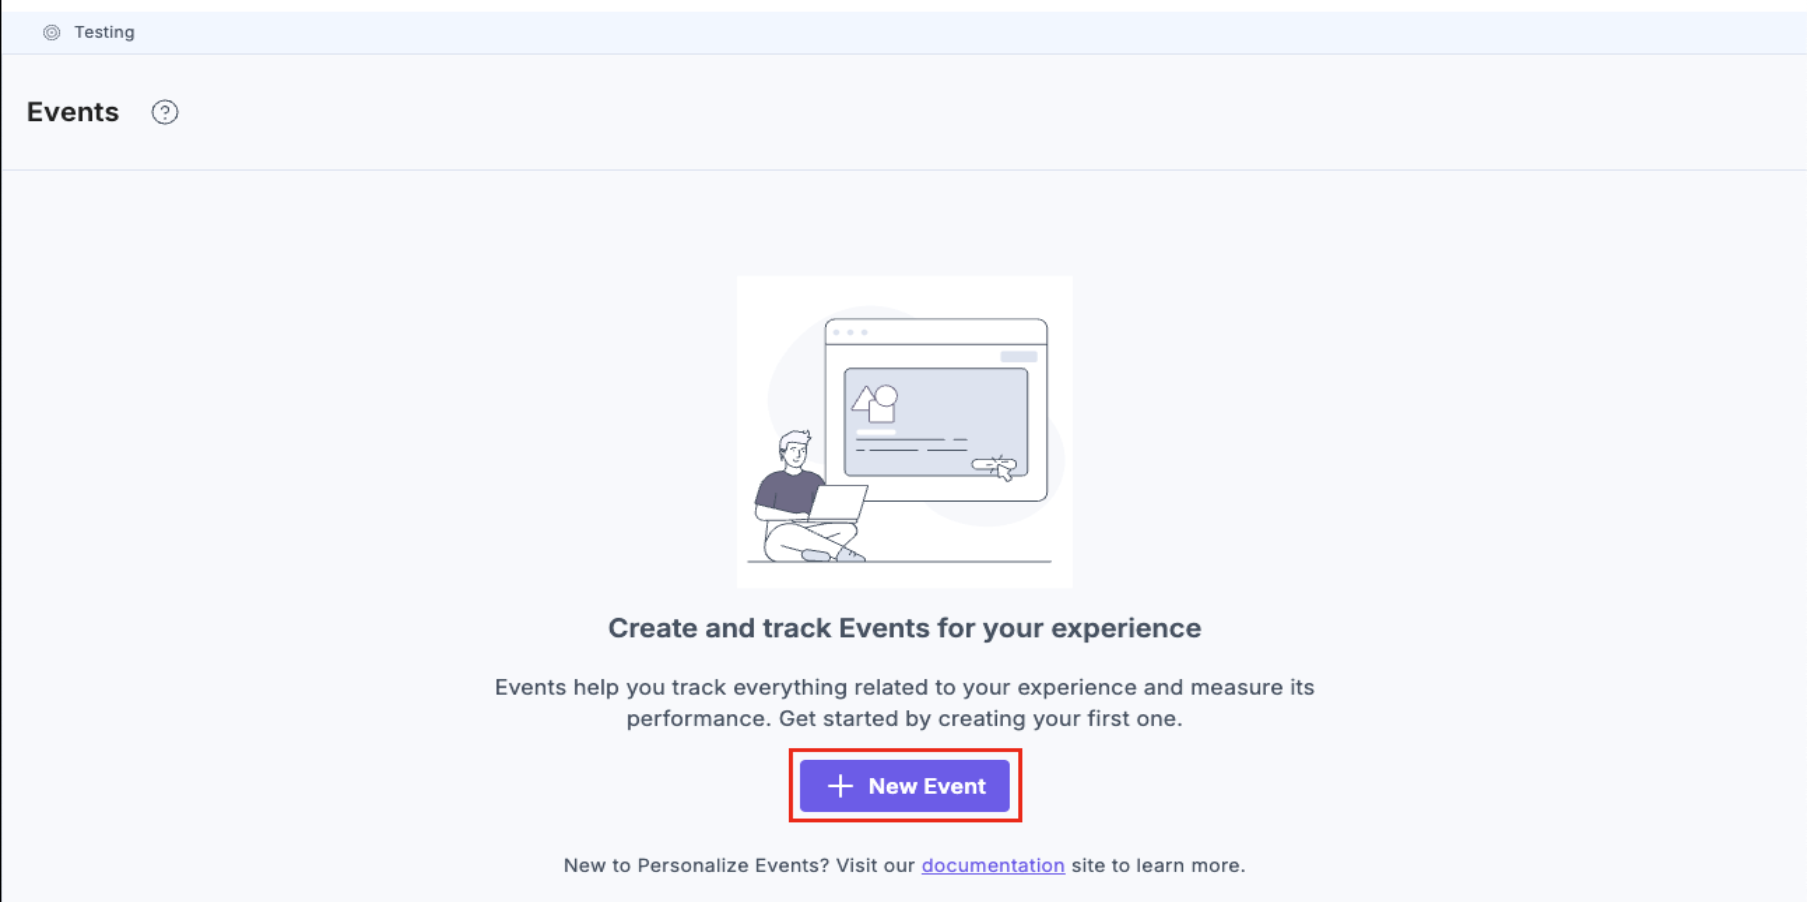
To create an event, perform the following steps:
- Click the Events tab in the top navigation panel. From the Events page, click the + New Event button.
- In the New Event modal, provide a suitable Key and an optional Description.
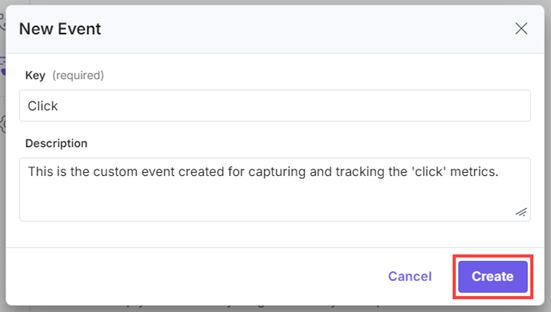
Note: You can create custom events to track conversions for common scenarios such as click, add_to_cart, checkout and many more.
- Once you have done that, click the Create button.
This creates a new event in your Personalize project. You can now add the event to an A/B Test experience as a Metric to evaluate the variant performance for conversions.
Triggering Events and Collecting Metrics
Impressions are a way to count how many times users see specific content on your website. This helps you understand if the personalized content is actually being seen by users.
A conversion is an event that signifies a positive user action, such as clicking on a CTA, adding a product to the cart, making a purchase, or scrolling to the end of a page. For this guide, we measure which headline is more effective and leads to more clicks on the learn more button.
To add the created event to an A/B Test experience, perform the following steps:
- Click the Experiences tab in the top navigation panel.
- On the Experiences page, click the previously created A/B Test experience to open it or click the corresponding vertical ellipses under the Actions section, select Edit.
- Click the Configuration tab.
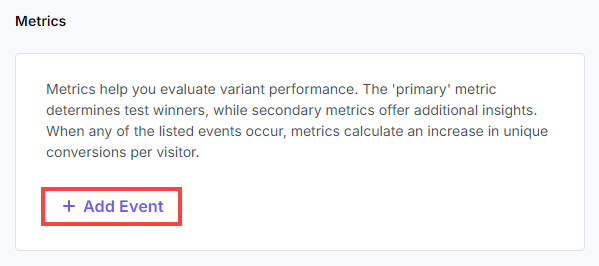
- Scroll to the Metrics section and then click + Add Event.
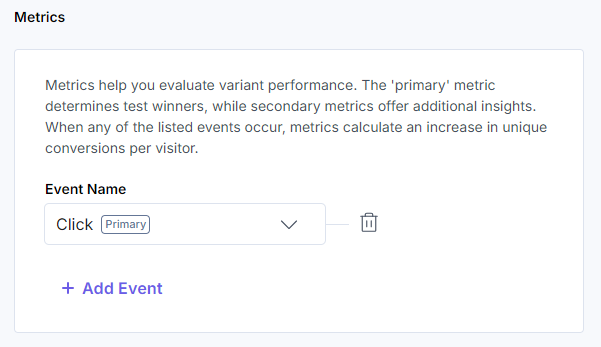
- Select the preferred event from the drop-down list.
Note: Use the Personalize Edge SDK to trigger the impressions and events for your experiences using the triggerImpression and triggerEvent methods.
- Once you have done that, click the Save button.
This adds the new event as a reference in your A/B Test experience. Now let’s create Entry Variants for your A/B Test experience.
Create Entry Variants in CMS
Contentstack’s Entry Variants feature lets you create and manage variations of your content seamlessly, catering to diverse audiences, languages, and marketing experiments.
Link Content Types to Variant Groups in CMS
The Variants page in Contentstack allows you to view and manage all variant groups and entry variants, sourced from the Personalize feature. Follow the steps below to access and manage variants within Contentstack.
- Navigate to the stack that we synced with our personalized project in earlier steps.
- In the top navigation panel, click the Settings icon (or press S) and select Variants.
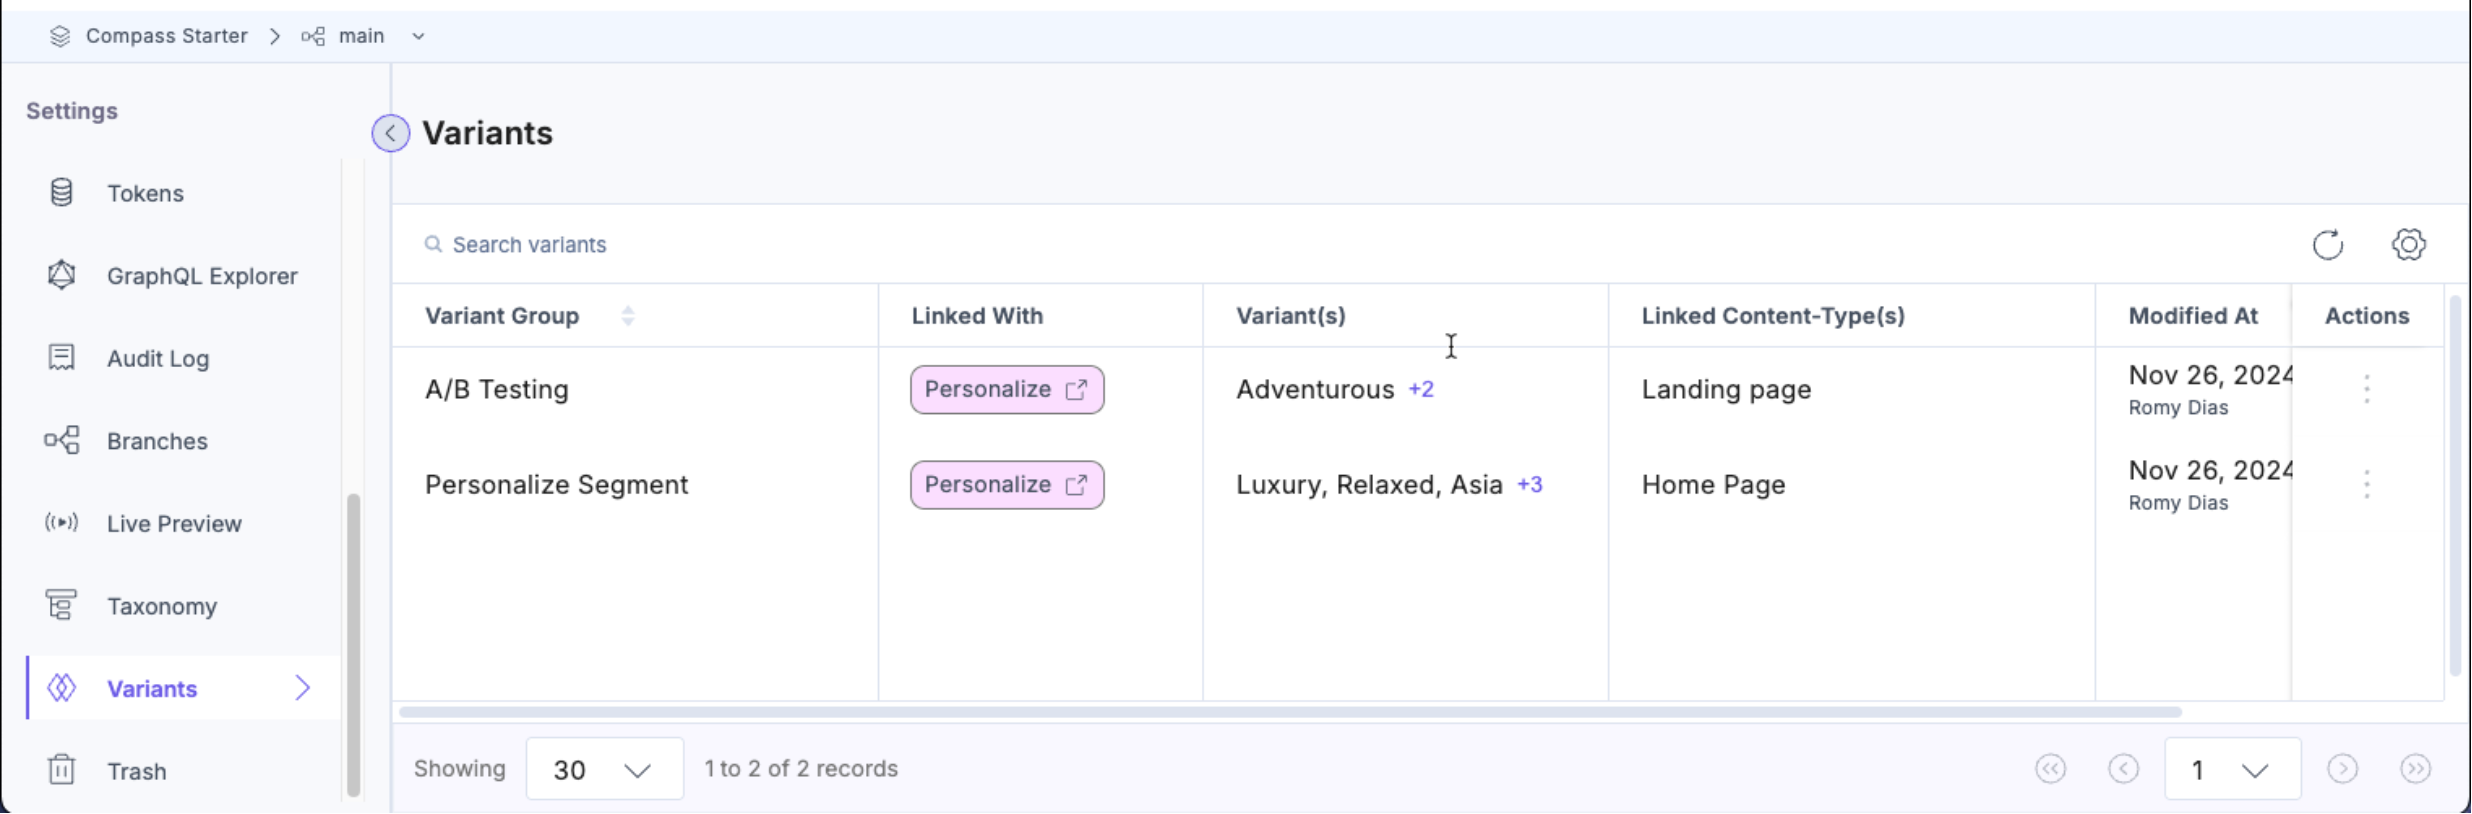
- You will see a list of all Variant Groups imported from Personalize. Below is an overview of the key details on this page:
- Variant Group: Displays the name of the variant group.
- Linked With: Indicates the connection status of the variant group with Personalize.
- Variant(s): Shows the total number of variants available within the group.
- Linked Content-Type(s): Lists the total number of content types linked with the variant group.
- Modified At: The date and time along with the user name who modified the variant group.
- When you click a specific Variant Group, you will be redirected to the Variant Group Details page. On this page, you can view the following details:
- Variant Group Name: The name of the group.
- Description: A brief description of the variant group.
- Variants: A list of all the variants under this group.
Note: You cannot edit the above fields on the Variant Group Details page since this information comes from Personalize.
- In the Link Content Types section, select one or more content types you want to link with this variant group.
- Click Apply to link the selected content types to the variant group.
- Finally, click Save to confirm your changes.
Once you've linked a variant group to a content type, a dropdown will appear in the Entry Editor page. This allows you to create an entry variant based on the linked variant group.
Create Entry Variants for the Experiences
Entry Variants allow you to deliver customized content to different user groups, making it easier to target specific audience segments. Follow these steps to create an entry variant.
- Navigate to the stack where you want to create entry variants.
- Click the Entries icon in the top navigation panel.
Note: Link variant groups to the relevant content type(s) before creating entry variants. Each experience in your Personalize project appears as a Variant Group in the stack. For linking details, refer to the Manage Variant Groups and Entry Variants document.
- In the top navigation panel, click the Entries icon and select Base Entries.
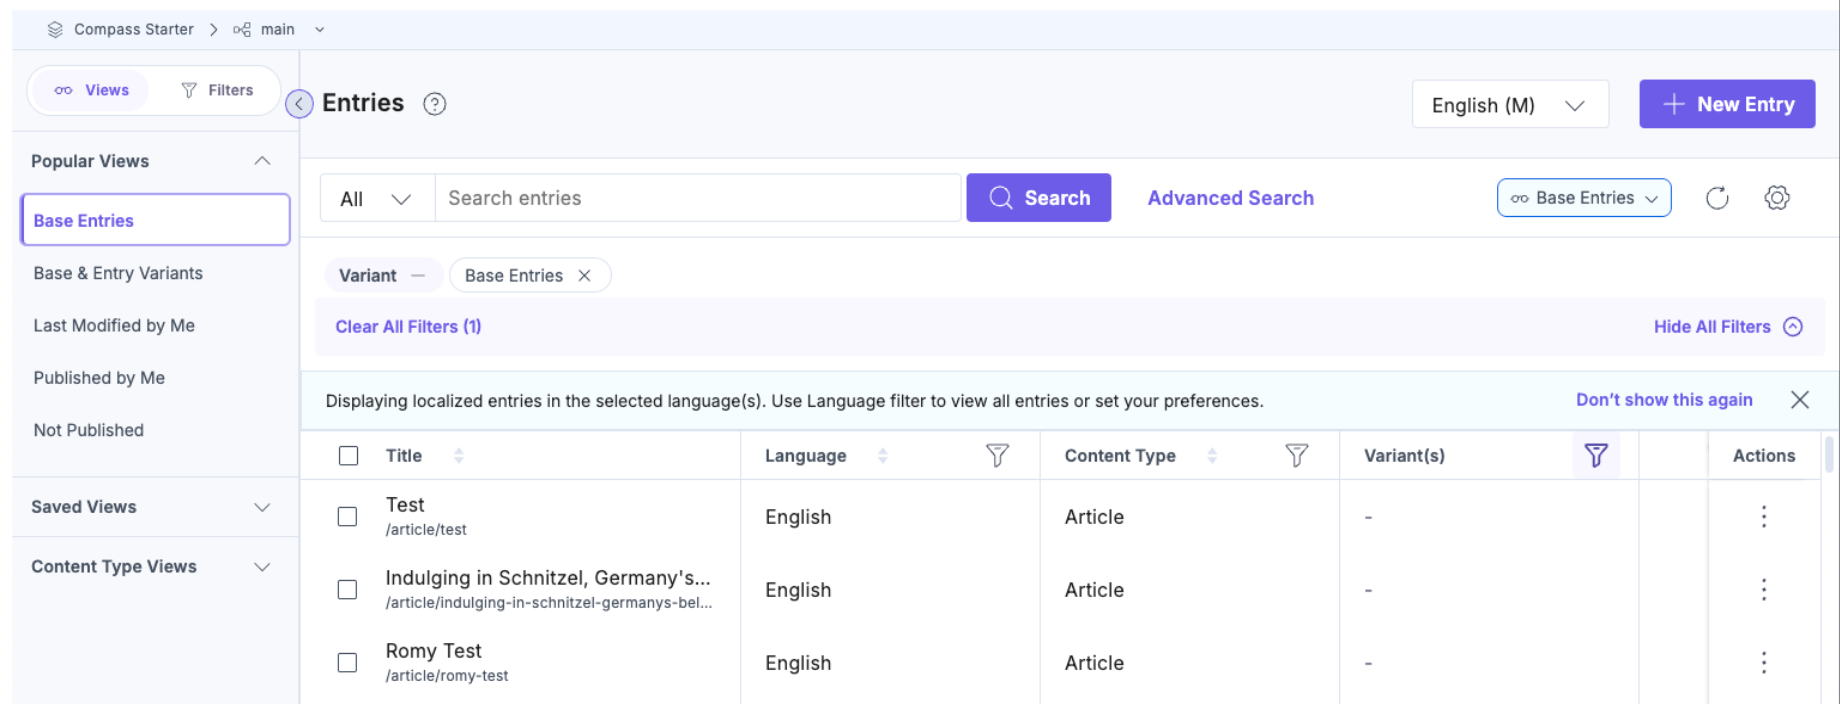
- Select the desired variant from the available variant groups to create your entry variant.
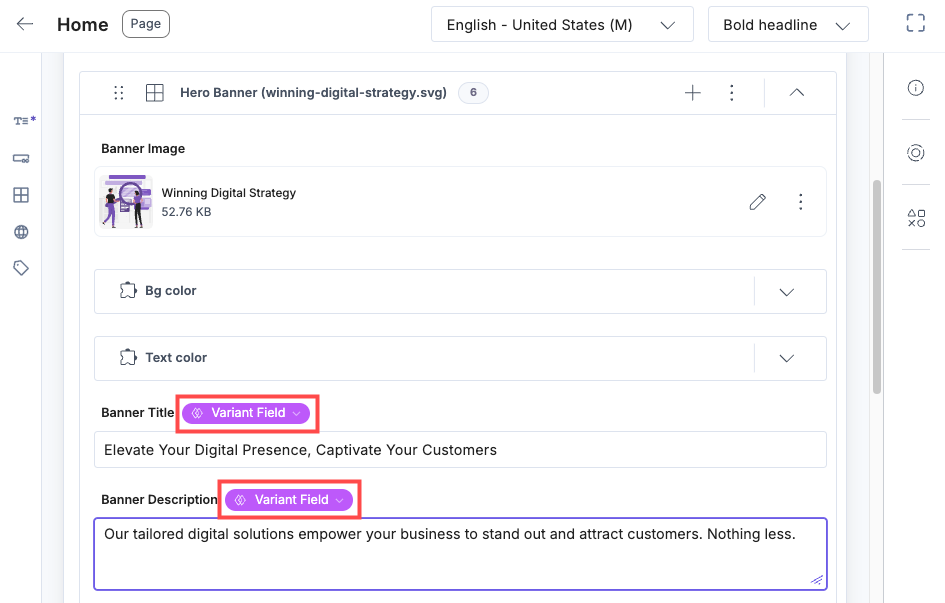
- The entry editor will display content from the base entry by default. Enter or edit content in the fields as per the selected variant. This content will be tailored specifically for the configured audiences.
- As soon as you enter or update content for a field, you will see a Variant Field tag.
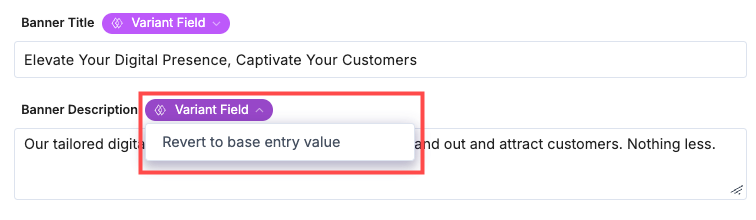
- You can click the Variant Field dropdown and select Revert to base entry value if you want to revert to the base entry content for a specific field.
- Once satisfied with the content, click Save to save the entry variant.
Note: Once saved, the entry variants become independent of the base entry. For more details, refer to the manage versions of entry variants document.
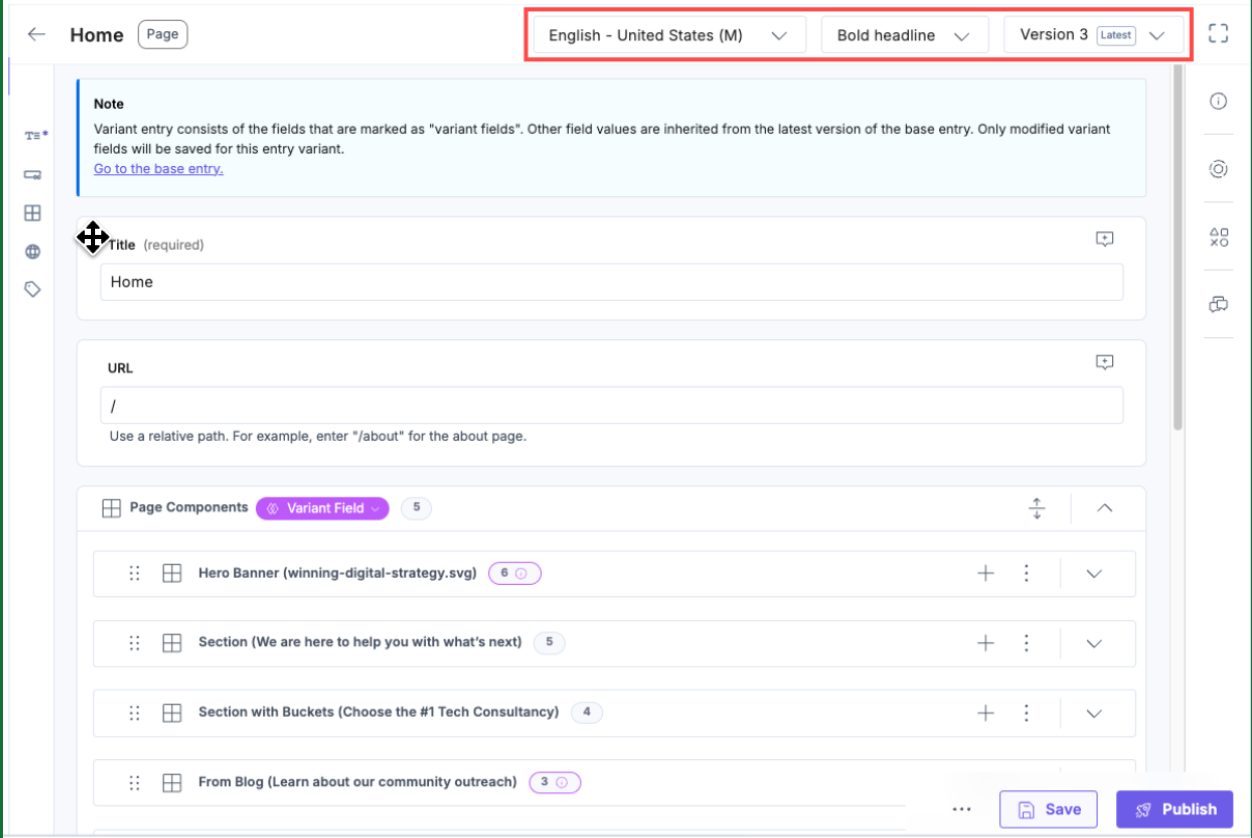
You can manage and switch between different variants within the entry editor by selecting the relevant variant from the dropdown menu.
Publish an Entry Variant
- Navigate to the desired stack, click the Entries icon, and select Base & Entry Variants.
- Select an existing entry variant, indicated by the variants icon on the entries list page.
- Click the Publish button within the entry editor.
- In the Publish Entry Variant modal that appears, under Select Environment(s) and Select Language(s), select the environment(s) and the locale(s) to which you want to publish the entry.
- Under Publish, you have two sub-options – Now (to publish immediately) and Later (to publish at a later date/time that you provide).
When you select “Later”, a group of options appear asking you to select the Date and Time of publishing, and the Time-Zone.
- Confirm your settings by clicking the Send button.
- If you have nested references within your entry variant, the Publish Reference(s) modal showing all the nested references for the entry will open up.
- Click Send With References to send the entry along with all its nested references for publishing.
Note: If no previous or current version of the base entry is published in the selected environment(s) and language(s), the base entry will be published by default. Learn more about how publishing works with Entry Variants.
Alternatively, when publishing the base entry, you can Select Variant(s) from the dropdown in the Publish Entry modal. Choose from the available entry variants to publish them alongside the base entry.
Activate the A/B Test Experience
After creating the Entry Variants for your A/B Test experience, we can activate the experience in Personalize to run the testing of the different headlines of your website.
- In the top navigation panel, click the Personalize icon.
- You will be redirected to the Personalize Projects landing page. Click the project we created in step 1.
- On the Experiences page, click the corresponding vertical ellipses under Actions, click Edit for the previously created A/B Test experience to activate it on your website.
- Click the Configuration tab and then click the Activate Draft button.
- In the Activate Draft modal, click Activate.
This activates your A/B Test experience created with the variants in Personalize with the Entry Variants in CMS. Once the experience is activated, the variants are displayed on your website to your visitors and Personalize automatically records the analytics for the impressions and conversions in real-time.
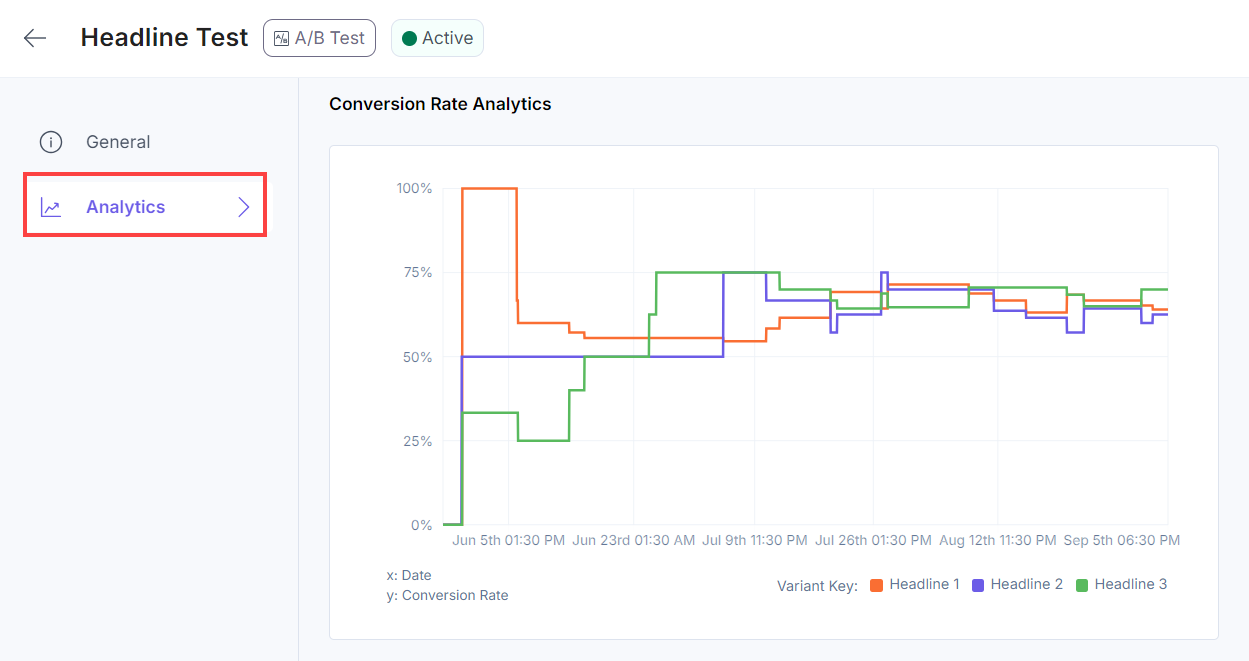
View Experience Analytics
Once you activate the A/B Test, Personalize will start calculating the insights once a certain number of impressions and conversions come up within the Analytics tab.
Impressions occur when a user views a specific Variant within an Experience, effectively gaining an impression of the personalized content. Each impression is associated with the Experience, its Variant, and the active user.
A conversion is an event that signifies a positive user action, such as a click on the button (Learn More) that we defined earlier in the guide. They are used in A/B Test experiences to evaluate the effectiveness of a variant, and a higher number of conversions can indicate a winning variant. To learn more about how we determine the winning variant in A/B test, please refer to the Experience Analytics documentation.
Once you learn which variant is winning, you can tweak the traffic distribution to send more traffic to the winning variant.
You have successfully set up a Contentstack Personalize project, connected it to an existing stack, configured the SDK, and created an A/B test experience with events and entry variants. You are now ready to start personalizing your content and analyzing the performance of your experiences.
This guide provides a complete overview to get you started with Personalize. For more advanced usage and customization, refer to the Personalize documentation.
Automate Your Winning Strategy
Once your A/B test has sufficient data to declare a winner, the final step is cleanup. Rather than manually updating your CMS entries and deleting variant data, install the Clearwinner app from the Contentstack Marketplace. This tool provides an automated alternative to manual merging, allowing you to promote winning content to your live site with a single click.
For more information, refer to the Clearwinner App Installation Guide.
More articles in "Personalize Overview"
