

Create an Entry
In Contentstack, creating an entry is the first step in adding content to your website or app. An entry represents a unit of content, such as a blog post, webpage, or product description, and is created within a content type. Entries adhere to the predefined structure of their content type, ensuring consistency across your content.
Note: Entries are branch-specific. For instance, an entry created in the "Development" branch can only be accessed within that branch. Refer to our Branch-specific Modules document for more information.
To create an entry, log in to your Contentstack account, and perform the following steps:
- Go to your stack and click “Entries” or use the shortcut key “E” (for both Windows and Mac users).
Note: To create an entry, you need to have a predefined content type that defines the structure of your content. For detailed information on creating content types, refer to our Create a Content Type documentation language. By default, the language is set to the master language of your stack.
Select the content type for the entry.
- Fill in the fields as defined by the content type, such as "Title," "Cover Image," or "Body Content".
- [Optional] You can add tags to an entry. This helps you filter or search your entries quickly.
- Save the entry for later editing or proceed to publish it.
Note: If Drafts and Auto Save is enabled for your stack, clicking New Entry immediately creates a draft entry. You can begin editing the entry without manually saving it, as Contentstack automatically saves draft changes while you work in the entry editor. The entry remains in the Draft state until it is saved for the first time.
- To create entry variants for delivering personalized content to specific user groups, refer to our Create an Entry Variant document.
- Use the Additional Metadata for Entries feature to attach metadata without incrementing the entry version.
Tip: To speed up content creation, you can also copy an existing entry instead of creating one from scratch. When you copy an entry, Contentstack automatically updates the title and any unique fields by adding a timestamp to avoid conflicts.
Browser Tab Title for Entries
When you open an entry, the browser tab dynamically displays the entry title. This makes it easier to identify and switch between multiple open entries.
- If the entry has a title, the tab displays the entry title.
- If the entry has no title, the tab displays Untitled Entry.
- If the entry cannot be found, the tab displays Entry Not Found.
The tab title updates automatically whenever the entry title changes.
Entry Outline
The Entry Outline in Contentstack’s entry editor page enables efficient navigation and management of your entry content, allowing you to access fields and components without manual scrolling.
The Entry Outline shows the fields in your entry editor page that are part of your content type, such as “Title”, “URL”, “Cover Image”, “Summary”, and so on. Clicking on any field in the Outline takes you directly to the actual field, which is especially helpful for large or complex content types.
Key Features
Here are some key features of Entry Outline:
- Easy Field Navigation: Click any field name in the Outline panel to jump directly to the specific field.
- Collapsible Groups: Grouped fields (e.g., modular blocks) are collapsible, keeping the interface clean and manageable.
- Search Fields: The search bar at the top lets you quickly find specific fields by typing their names.
- Pin/Unpin Outline: Pin the Outline to keep it fixed or unpin it to gain more workspace, adapting to your preference.
Note: The Entry Outline always displays all fields exactly as they appear in the content type schema, even if some fields are shown as tabs in the entry editor. This ensures a complete view of the content structure for easier navigation.
Tabs Layout in the Entry Editor
When your content type includes fields with the Show as Tab option enabled, the entry editor displays those fields as separate tabs. Each tab represents a Group, Modular Block, or Global Field configured to appear independently.
This layout improves usability for complex content types with many fields, allowing editors to focus on specific sections (e.g., SEO fields or metadata) without needing to scroll through every section of the entry.
- Default Tab: Contains all ungrouped fields that aren’t marked as tabs.
- Custom Tabs: Display content from fields marked with Show as Tab in the schema.
- Navigation: You can switch between tabs freely; all entry features (comments, publishing, outline navigation, etc.) continue to work as expected.
- Order: Tabs appear in the same order as their corresponding fields in the content type schema.
- Scrolling Tabs: If you have multiple tabs, use the arrows on the tab bar to scroll through them.
Example: If your content type includes a Global field named SEO and a Modular Block named Media Gallery, enabling Show as Tab for both displays them as two separate tabs in the entry editor.
Additional Resource: Learn more about how tabs work in the entry editor in Working with Entry Tabs.
Work with Entry Editor Full-width View
Contentstack's entry editor full-width view offers an expanded, clutter-free workspace ideal for managing nested references and complex content structures. Users can optimize their workflow by pinning the Entry Outline, opening the right information panel, or both, to adjust the layout as needed.
Add Content for Multiple Content Type Reference
If you have added a Reference field that refers to multiple content types, you will be able to add multiple entries as references in a single field. When entering data for a multiple Reference field, you will see the option, Choose existing entry and Create New Entry.
Note: If an existing entry’s Reference field is upgraded, you must save the entry again to activate the changes. Once saved, you can begin adding entries of multiple content types.
Choose existing entry
This option opens the Select Entries modal, where you can perform the following steps:
- Use the Content Type dropdown to select a content type.
- Select the desired entries. You can switch between content types to select entries from other content types.
- Click Show selected entries at the top-right of the modal to view the chosen entries.
- Finally, click Add Selected Entries to include all selected references in the field.
- A maximum of 100 entries can be added to a Multiple Reference field.
- The maximum reference depth is 1 level for fields referencing multiple content types.
Create new entry
This option allows you to create and add new reference entries on the go. This option is useful when you need to add a new entry to use as a reference.
- Click Create new entry in the reference Field.
Warning: If Drafts and Auto Save is disabled, ensure the parent entry is saved before navigating away from the editor to avoid losing unsaved changes.
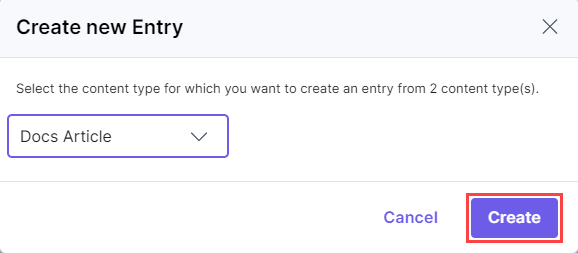
- In the modal, select the content type from the dropdown for the new entry and click Create.
- Enter the details for the new entry and click Save. This will:
- Create a new entry for the referred content type.
- Automatically add it under the Reference field.
Once the new entries are added:
- Use the Edit icon beside a referenced entry to make changes to it.
- Use the Remove icon to delete an entry from the reference list.
Tip: Each field in a content type supports specific data types. For details about field types and their supported data, refer to our Fields documentation.
Preview and Manage Entry Changes
Contentstack provides multiple features designed to simplify entry editing and ensure efficient content management. These tools include:
- Live Preview: View content changes in real-time without saving or publishing.
- Visual Builder: An interface for creating and editing page layouts. It enables real-time adjustments directly on the page without any developer intervention.
- Timeline: Visualize and manage the publishing history and future updates. Preview scheduled updates and track publishing history.
API Reference
To create entries via API, refer to the Create an entry API Request.
Tutorial Video
More articles in "Create and Manage Content"
