

Set Up Live Preview with REST for SSR
Note: This guide focuses on setting up Live Preview using REST APIs. If you are using GraphQL, refer to our Set-up Live Preview with GraphQL for SSR document.
Server-side rendering (SSR) means your website’s pages are generated on the server before they reach a visitor’s browser. Instead of building the page in the browser, the server sends fully prepared HTML to display. This guide explains how to configure Live Preview for SSR websites using REST APIs.
Prerequisites
- Contentstack account
- Access to stack settings
- Preview token
- Website that uses Contentstack Delivery SDKs
- IFrame-compatible website to avoid CORS errors
Follow these steps to configure Live Preview with REST for your SSR website:
Set up the Website
To enable Live Preview on your website, begin by setting up the essential.
Generate a Preview Token
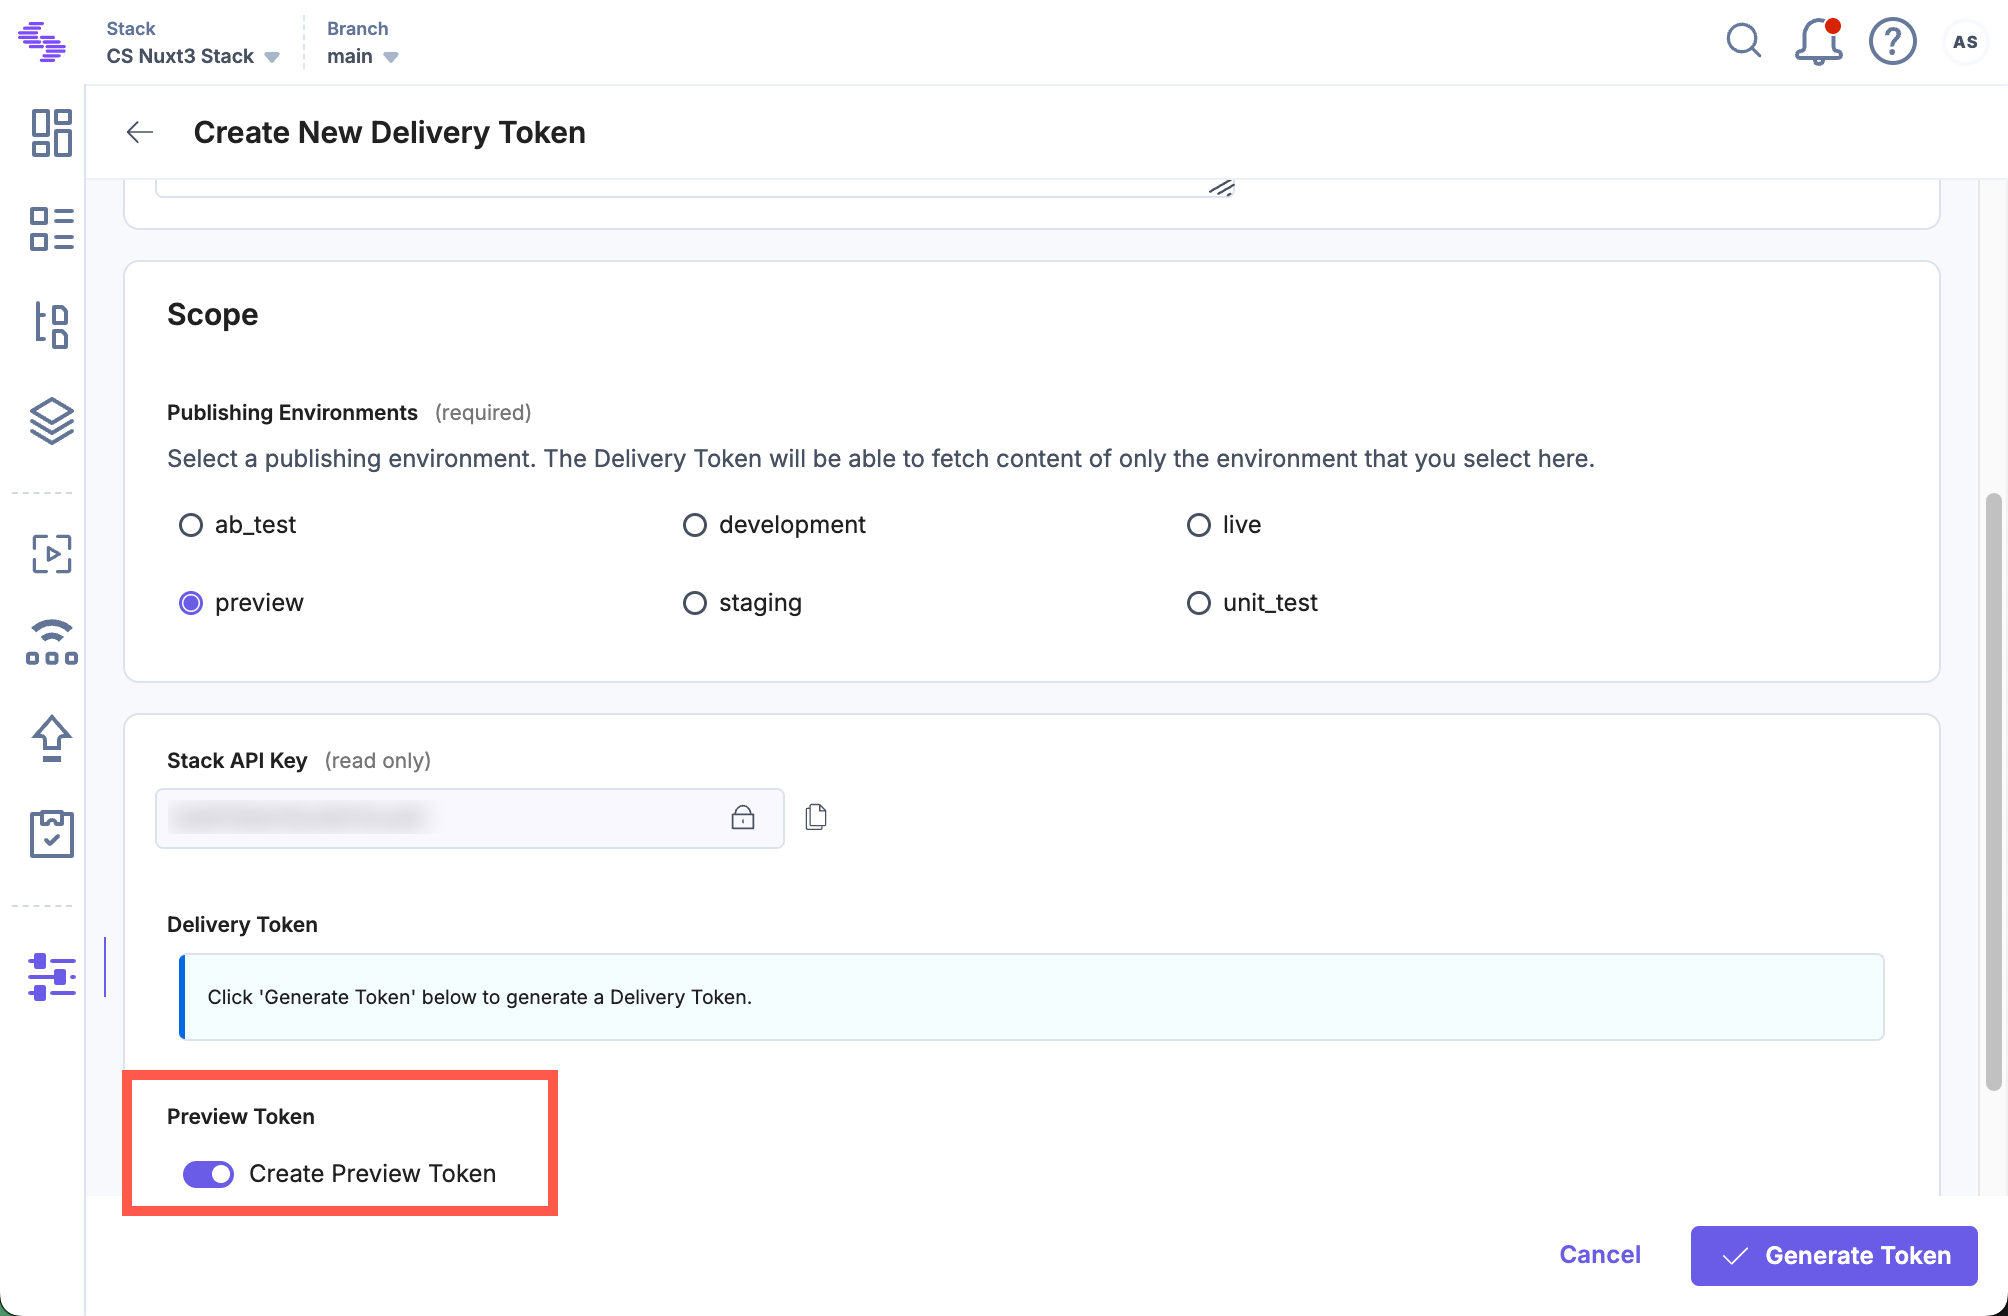
Create a preview token by navigating to Settings > Tokens > Delivery Tokens (press “alt + O” for Windows or “option key + O” for Mac).
Note: It is recommended to use a preview token for Live Preview instead of a previously utilized, read-only management token.
Each preview token is associated with a delivery token and shares access to the specific environment. If a delivery token doesn't exist, create one and enable the Create Preview Token toggle. For an existing delivery token, use the + Create Preview Token option and copy the generated token.
Update Contentstack's Delivery SDK:
Add the Live Preview configuration inside the Contentstack.Stack() method when configuring Contentstack’s Delivery SDK. For example, here’s a sample configuration using the JavaScript Delivery SDK:
import Contentstack from 'contentstack' const Stack = Contentstack.Stack({ ... // update your configs here live_preview: { preview_token: preview_token, enable: true, host: 'rest-preview.contentstack.com' //recommended }, ... })Note: For the North America endpoint, set the host parameter to rest-preview.contentstack.com. If your website is hosted on a different data center, use one of the following values:- AWS EU: eu-rest-preview.contentstack.com
- Azure NA: azure-na-rest-preview.contentstack.com
- Azure EU: azure-eu-rest-preview.contentstack.com
- GCP NA: gcp-na-rest-preview.contentstack.com
- GCP EU: gcp-eu-rest-preview.contentstack.com
Migrate to New Preview Service (recommended)
Upgrade the Contentstack SDK to its latest version to use the new preview service. In your Contentstack.Stack() initialization, replace the management_token parameter with the preview_token, as shown below:
Contentstack.Stack({
...,
live_preview: {
enable: true,
host: "rest-preview.contentstack.com",
preview_token: "csxxxxxxxxxxxx"
}
})
Additional Resource: For detailed information, refer to the Migrate to Preview Service documentation.
Warning: Updating to the latest SDK version won’t affect your current configuration. However, you may experience limited performance improvements in Live Preview for referenced entries and certain operations unless you update both the host and token as shown above.
Install and Initialize the Live Preview Utils SDK:
Use the Live Preview Utils SDK to listen for content updates and fetch real-time preview data on the client side.
Install the SDK using one of the following methods:
- Via npm:
Install the Live Preview Utils SDK package via npm by running the following command:
npm install @contentstack/live-preview-utils
Initialize the SDK using the init() method to set up event listeners for content updates:
import ContentstackLivePreview from "@contentstack/live-preview-utils"; ContentstackLivePreview.init({ enable: true, ssr: true, stackSdk: Stack, // Recommended: Enables Edit Tags editButton: { enable: true }, stackDetails: { apiKey: "your api key", environment: "your environment value", branch: "your branch", }, clientUrlParams: { protocol: "https", host: "app.contentstack.com", // Use region-specific host if applicable port: 443, }, });Note: To avoid configuration reset errors due to rerendering, place the initialization code in a separate JavaScript file.
- Via script:
Add the following script tag to your HTML file to load the Live Preview Utils SDK:
<script type='module'>
import ContentstackLivePreview from "https://esm.sh/@contentstack/live-preview-utils@3.0.1";
ContentstackLivePreview.init({
  enable: true,
  ssr: true,
  stackSdk: Stack, // Stack instance from delivery sdk,

  // Recommended: Enables Edit Tags
  editButton: { enable: true },
  stackDetails: {
    apiKey: "your api key",
    environment: "your environment value",
    branch: "your branch",
  },
  clientUrlParams: {
    protocol: "https",
    host: "app.contentstack.com", // Use region-specific host if applicable
    port: 443,
  },
});
    </script>
- Via npm:
Utilize the Live Preview Hash
When the Live Preview panel is open in SSR (server-side rendering) mode, Contentstack automatically adds a hash as a query parameter in the URL. This hash helps the system identify that the request is coming from Live Preview and ensures the correct version of the content is displayed. To make Live Preview work properly, you need to pass this hash to the Contentstack Delivery SDK while fetching data.
Here’s a simple example:
const initializeContentstackDeliverySDK = () => {
	return Contentstack.Stack({
		api_key: 'api_key',
      ...other config
	});
}

app.get('/', async (request, response) => {
    // This implementation may vary across frameworks, but the Live Preview hash will always be available in the query string during preview mode.


	const Stack = initializeContentstackDeliverySDK();
     Stack.livePreviewQuery(req.query);


	// Fetch data using the same Stack client from above.
	const entryData = await getCMSData(Stack, { url: "/" });
...
});
Note: Depending on the framework you are using (Express, Next.js, etc.), how you extract query parameters may vary. But the Live Preview hash will always be available in the query string when preview mode is active.
In server environments like Node.js, it’s important to create a new instance of the Delivery SDK for each request, especially when Live Preview is enabled. Here’s why:
- The Delivery SDK adjusts some internal settings (like API endpoints) when Live Preview is active.
- If you reuse the same SDK instance across multiple requests, these internal changes might accidentally affect other users who are not using Live Preview.
- This could lead to showing the wrong preview data to the wrong user — for example, one editor might see another editor’s changes.
To avoid such problems, always create a fresh SDK instance for every request. This keeps each request completely separate and ensures a smooth, accurate Live Preview experience for all users.
Host the Website
To host a website, you can simply use launch or any other website hosting service.
Update Stack Settings
To set up Live Preview for the entries of your stack, perform the following steps:
- Navigate to Settings and select Environments.
- Set the base URLs for different locales, and click Update.

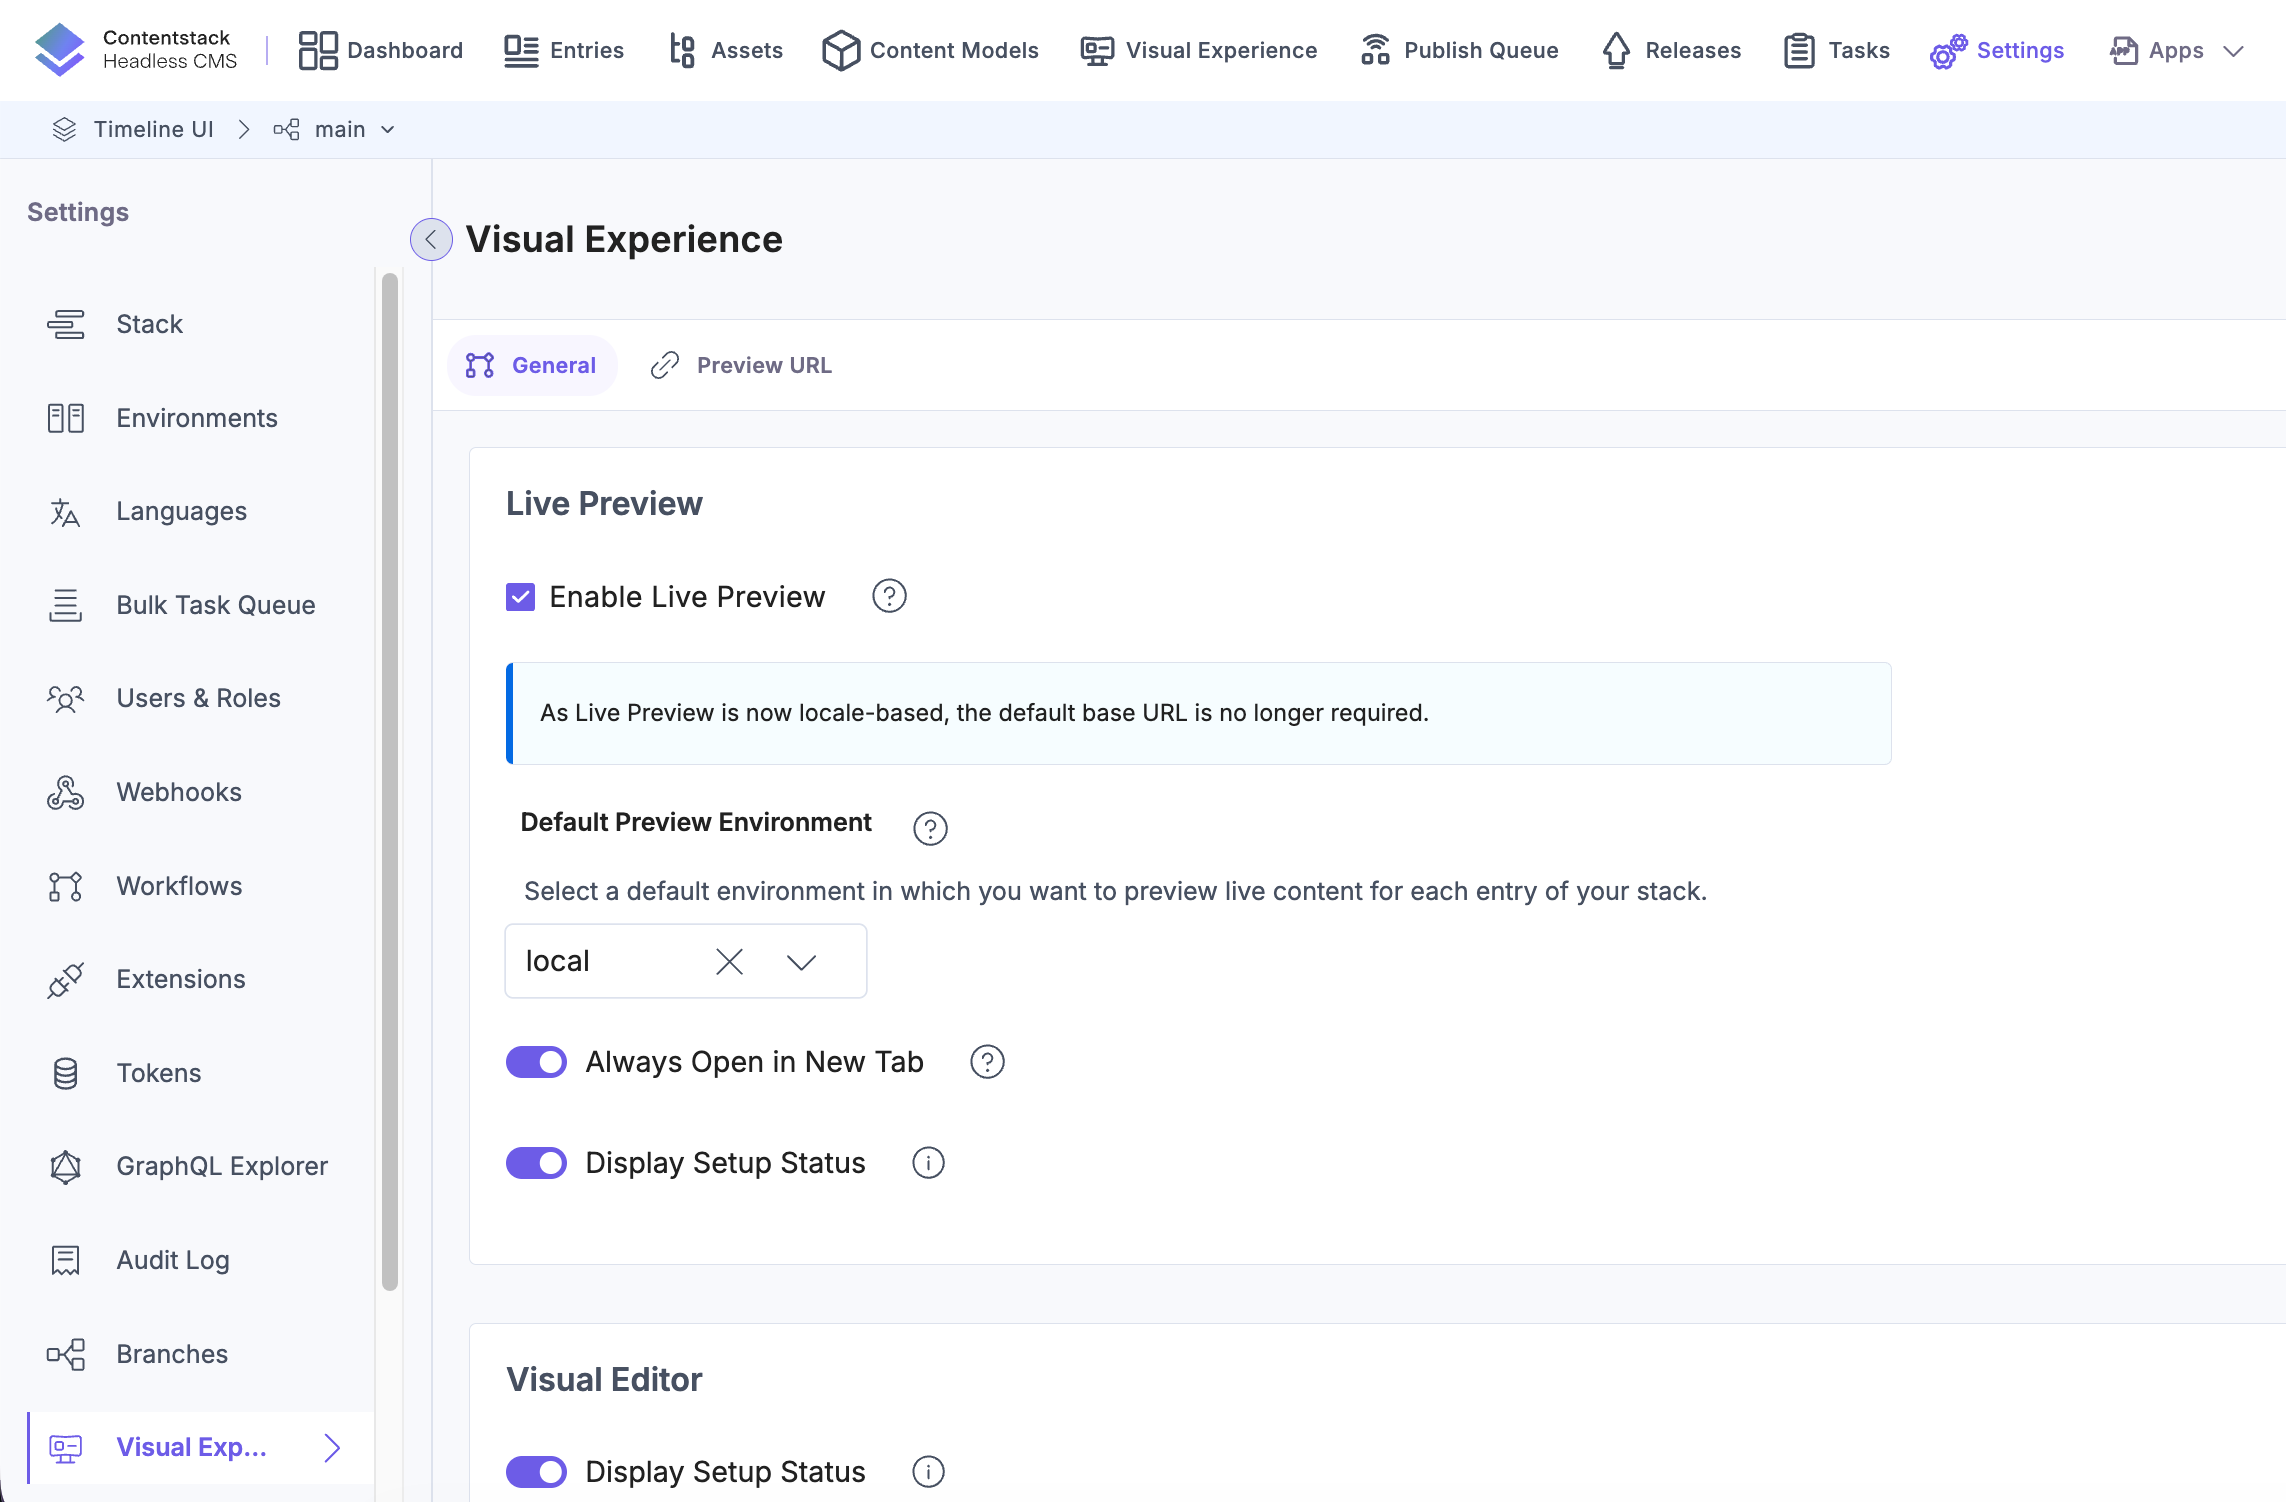
- Select Visual Experience from the stack settings.
- In the General tab, select the Enable Live Preview checkbox.
- Set the Default Preview Environment and click Save to save the settings.
Tip: You can also update the preview URL and environment from the preview settings available on the entry page.
- Enable the Display Setup Status toggle to display the configuration status.
You can now see the Live Preview icon within all the entries of your stack and the feature previews data from the hosted website.
You can now see the Live Preview icon within all the entries of your stack and the feature previews data from the hosted website.
Live Edit Tags for Entries (recommended)
Live Edit tags allow editors to directly jump from the Live Preview pane to the corresponding content fields in the entry editor. Clicking the Edit button next to a content block automatically opens the relevant field. If the field refers to another entry, you’ll be redirected to that entry’s editor page.
Additional Resource: For detailed information on how to set up Live Edit tags, refer to our documentation on Set Up Live Edit Tags for Entries with REST.
More articles in "Set up with REST"
