

Get Started with Automations
This guide will walk you through the essentials of getting started with automations. Whether you are looking to integrate multiple tools, automate routine operations, or design custom workflows, Automate offers a user-friendly, visual interface to help you achieve these goals without requiring programming expertise.
With built-in security and seamless integration capabilities, Automate empowers both technical and non-technical team members to build workflows that meet evolving business needs.
Let’s dive in and start automating!
Prerequisites:
- Contentstack account
- Admin/Owner access for the Contentstack stack
The basic steps of the workflow can be broadly classified into the following:
Let’s look at the steps in detail.
Create Project
To get started with automations, you need to create a project. Projects help you keep everything related to your automations, agents, executions, and audit log set up under one location in an organized manner.
To create a project, perform the steps given below:
- Log in to your Contentstack account.
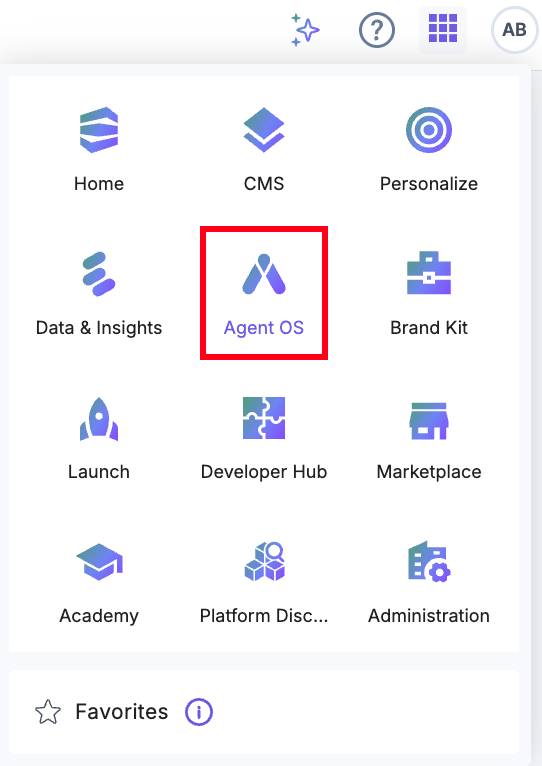
- After logging in, click the App Switcher icon, then select Agent OS from the list.
- Click + New Project.
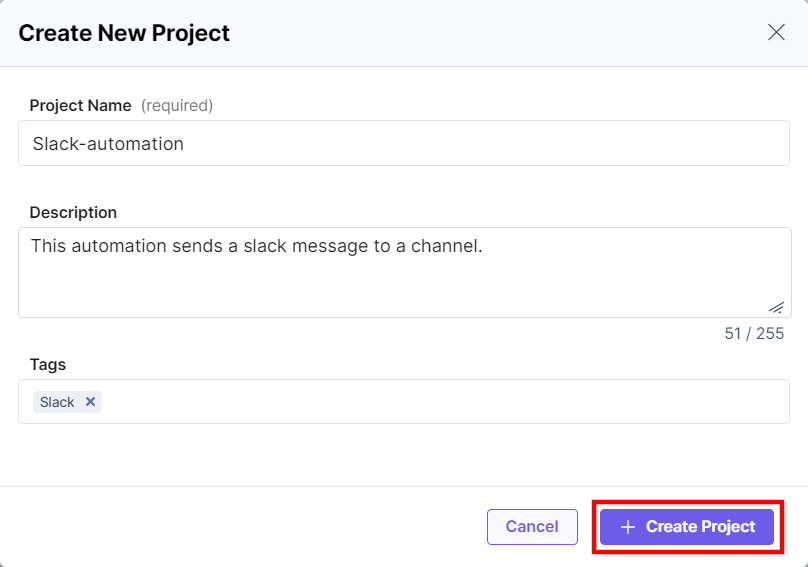
- In the Create New Project modal, enter the Project Name (for example, Slack-automation), an optional Description, and click Create. You can also add Tags for your project as shown below.
The above steps open the Agent OS Dashboard page.
Create an Automation
Automation is the process of creating a workflow that sets up a connection between two or more web apps or services, including Contentstack.
Automations help you set up specific steps that will perform based on the specified conditions. Once you define these steps, Contentstack Automations will automate the executions of the steps.
First, perform the following steps to create an Automation:
- In the top navigation panel, click Automations.
- On the Automations listing page, click + New Automation. From the dropdown, select Create New.
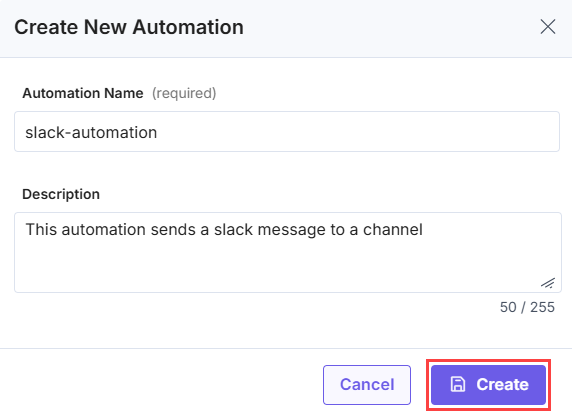
- In the Create Automation modal, provide an Automation Name and an optional Description. Click Create.
- After entering the basic details of the automation in the above step, the next set of actions can be broadly classified into the following two main steps:
Note: You can now throttle the execution for your automations to avoid rate limit. For more information, refer to the Throttle Execution document.
Let’s look at the above steps in the next section.
Configure Trigger
Triggers are conditions or invocation points that fire off an Automation when an event occurs in Contentstack or an external app or service. They help automate a business workflow to accomplish required tasks.
Note: You can click the Add any additional context or notes relevant to this section text to add additional details about the trigger step.
Configuring a trigger can be broken into the following steps:
- Click Configure Trigger from the left navigation panel.
- Choose Connector: Here, you can select Contentstack or an available third-party app or service which will serve as the trigger connector. For example, click HTTP.
Note: For more details on the “HTTP” Connector and other available connectors, refer to Automate Connectors.
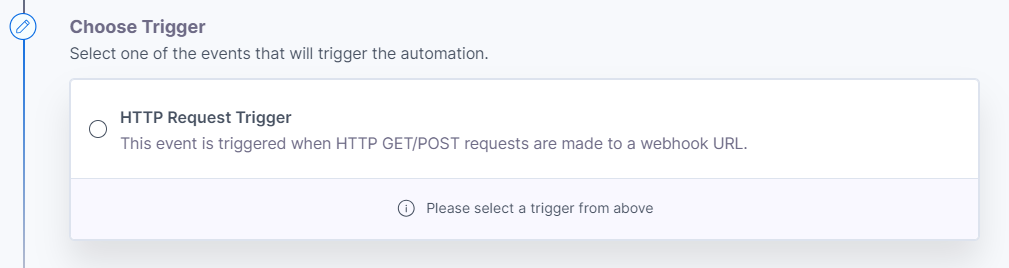
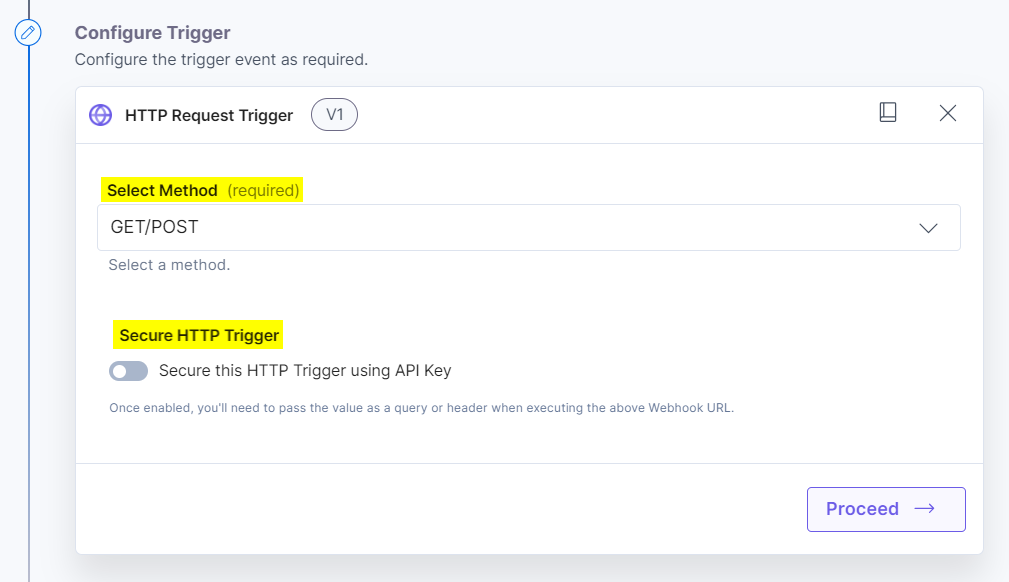
- Choose Trigger: Select the Trigger or the webhook event listed under the selected connector. In our case, you will select the HTTP Request Trigger. This trigger will be activated whenever you make an HTTP GET/POST request to a specific webhook URL.
- Configure Trigger: Here, you need to provide additional details with respect to the trigger you selected in the above step. This section will differ for each trigger. For our example, click the displayed Method, i.e., GET/POST. You can also enable the Secure HTTP Trigger using the toggle to add security to the HTTP trigger and click Proceed.
Note: For more information, refer to the HTTP Trigger documentation.
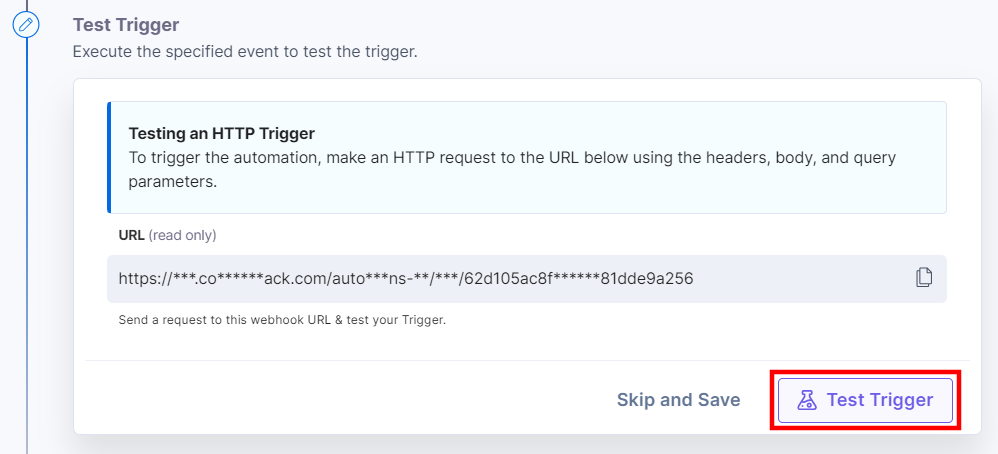
You will find the applicable Input methods and an Input URL in the Test Trigger section.
Note: You will see a similar URL, even If you update the configuration before testing the trigger.
- Test Trigger: The final step is to test the trigger you created. The Input URL you find here will be the webhook URL that you can use to see the automation working. Click Test Trigger.
You should be able to see the output as follow:
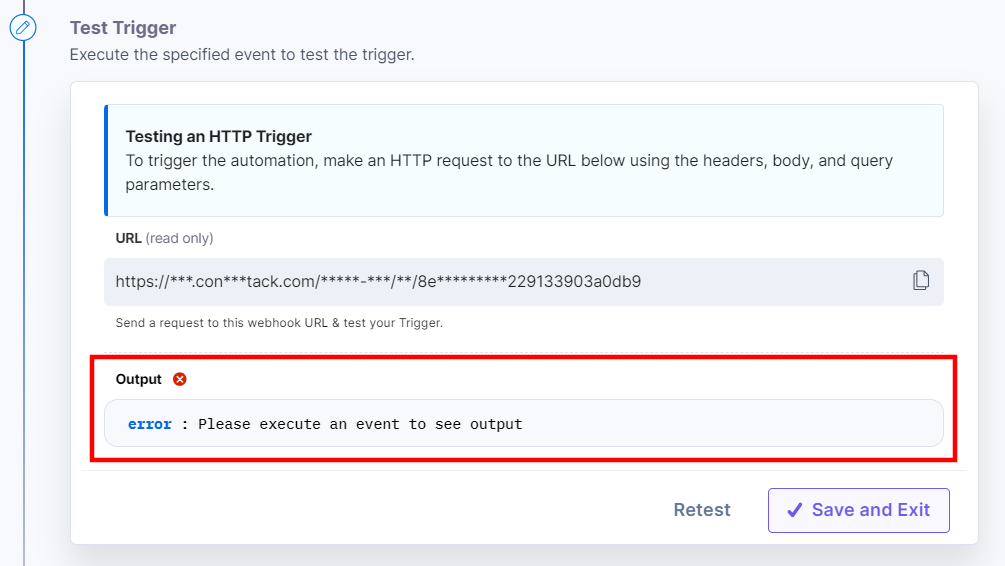
Note: The output doesn’t appear because we haven’t tested the Trigger URL yet.
Next, to try if the trigger is working real-time, perform the following steps:
- Copy the Input URL that you see above and paste it on a new browser tab.
- Pass a query parameter to the Input URL, for example, https://trigger_input_URL?name="john" and hit enter. You should see an output similar to the following:
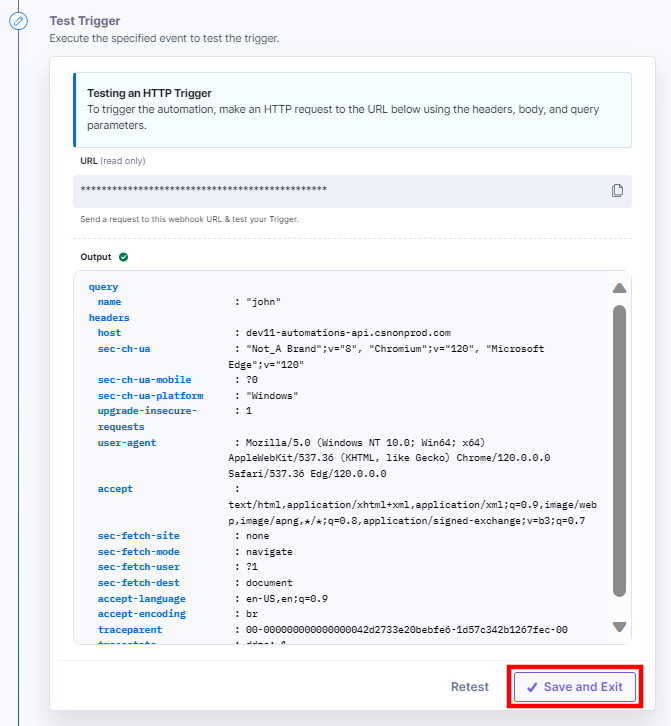
{"result":"The automation is currently being tested or not activated","rule_id":"1111ababa11111","trigger_id":"1111ab1c1ab11111ca11b111111ca1bc"} - Return to your Test Trigger setup page and click Restest. In the output, you will see your query parameter as follows:
query:
name:"john"Here’s what you see
-
The Apply Trigger Conditions section lets you filter the data displayed in the output. For example, if you want your trigger to proceed further with the configured actions, under the condition that the name parameter (the one you passed in the above step) is “scott” in the output result, click + Add Trigger Condition and pass the following filter condition:
query.name | Matches (Text) | scott - Lastly, you can either pass a new query parameter and Retest the trigger or hit Save and Exit (see screenshot in step 3).
-
This completes your step of configuring your HTTP trigger.
-
Note: You will find more details on how to rename a trigger and delete a trigger in the "Working with Automate" section.
Configure Action Step
Action is the event that happens as a result of a triggered event.
To understand the concept of Actions, let’s consider the above example where you set an HTTP Request trigger that is activated when a user fires a GET/POST request. And, you can set up an action that will notify a particular Slack channel when such an event occurs.
After configuring the Trigger, click Configure Action Step and perform the following steps to set up the corresponding action:
Note: You can click the Add any additional context or notes relevant to this section text to add any additional details about the action step.
- Click Configure Action Step from the left navigation panel.
- Click Action Step to configure third-party services.
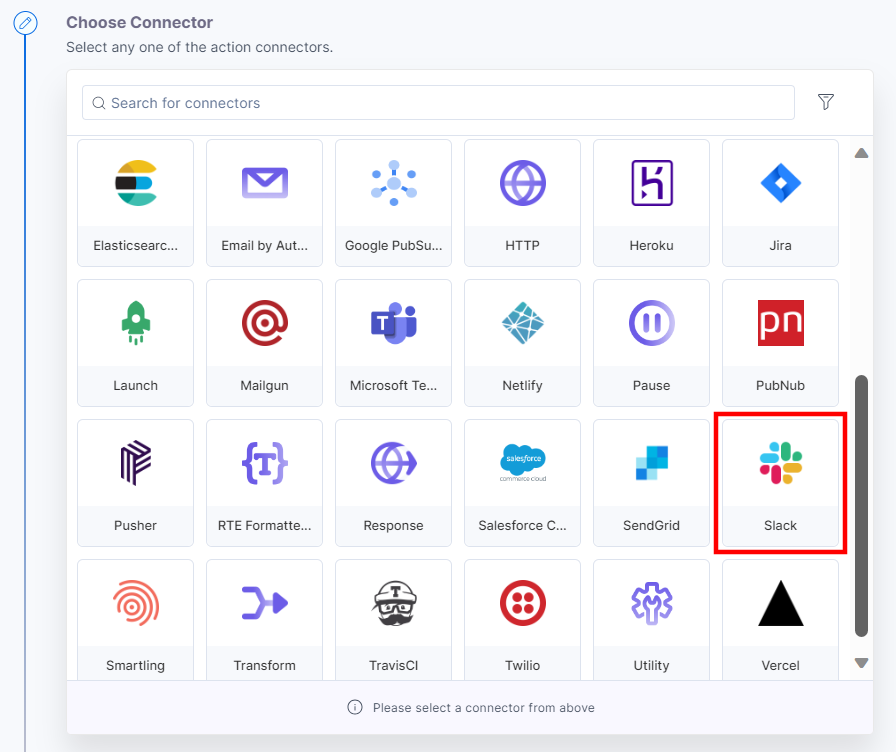
- Choose Connector: Click the connector (Contentstack or a third-party app or service) where you want your workflow to perform the next set of actions. In our case, click Slack.
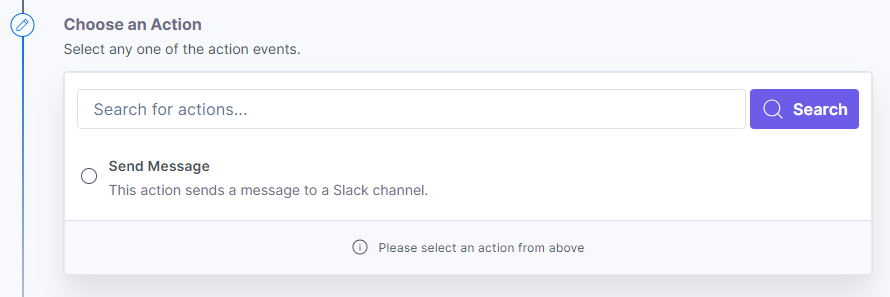
- Choose an Action: Select the action listed under the selected connector, Slack. In our case, select Send Message that will send a message to a specific Slack channel that you choose.
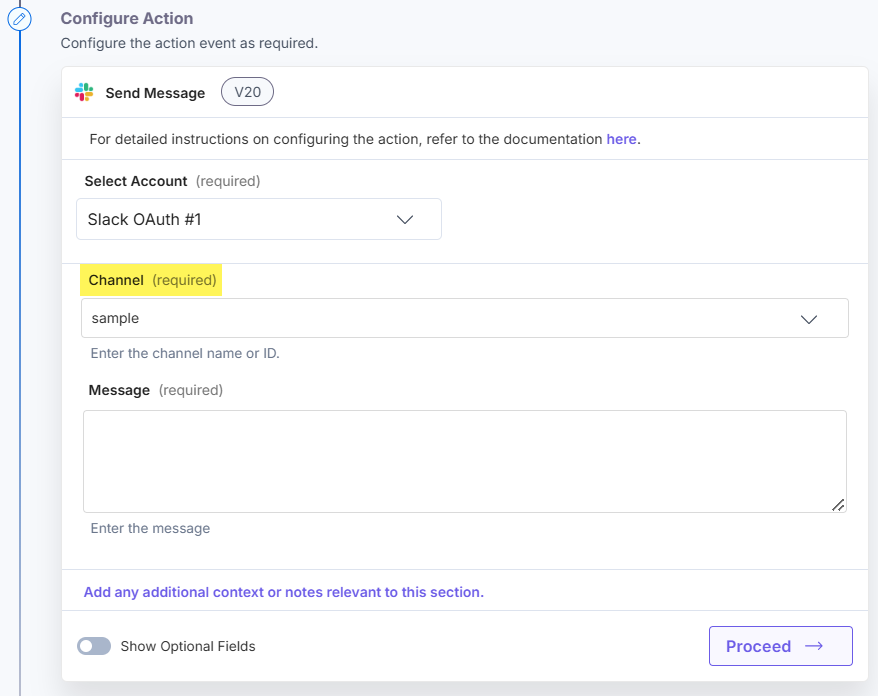
- Configure Action: Here, you need to provide additional details for the action you selected in the above step. This section will differ for each action. For our example, we will add the Slack account.
- Click + Add New Account (add Slack account).
- You will see a list of permissions that you can choose to Authorize.
Additional Resource: Refer to the Slack connector documentation to know more about the permissions.
- Next, you will see a window open with access requests from the app. Click Allow to proceed further.

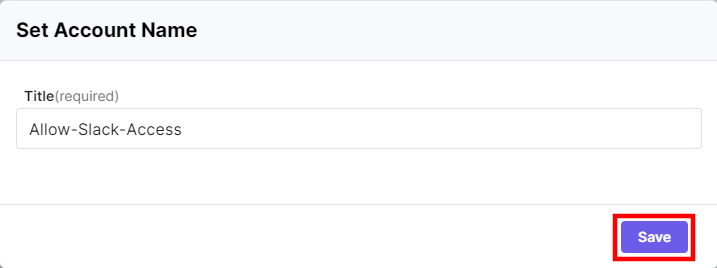
- Enter a Title for this account, say “Allow-Slack-access” and click Save.
- Next, click the Channel textbox. It displays a Lookup list containing all the channels in your Slack account. Click Load More until you locate your channel.
For our example, select the sample channel, and its name is displayed in the entry box.
- Click the Message textbox. You will see all the values related to the “1.HTTP Request trigger” you set up earlier. Click a parameter, say query.name, that you want to send as a message to the selected Slack channel.
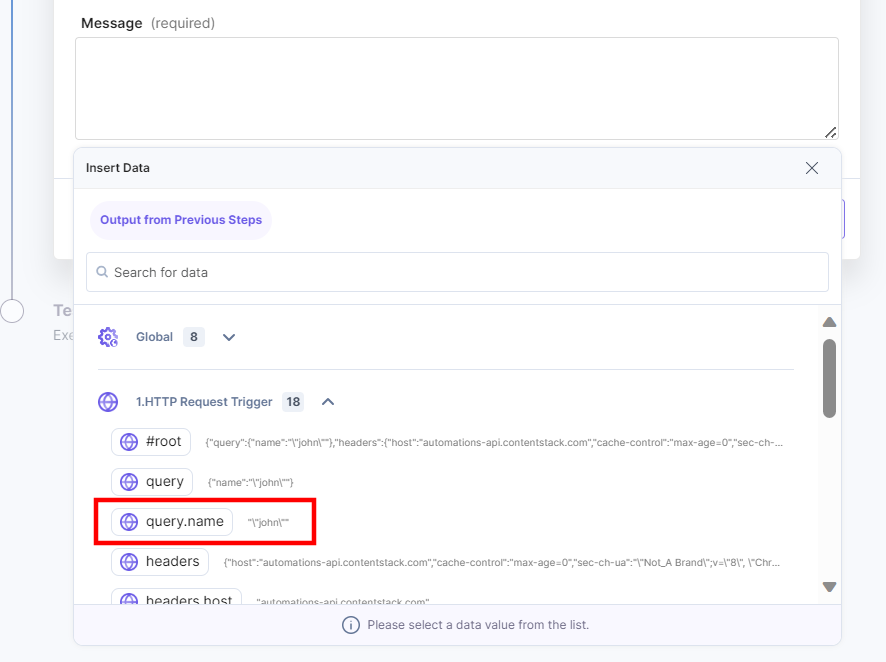
For example, if you want to send the name param, select query.name and type ahead a message if needed, say “1.query.name has sent a GET/POST request”.
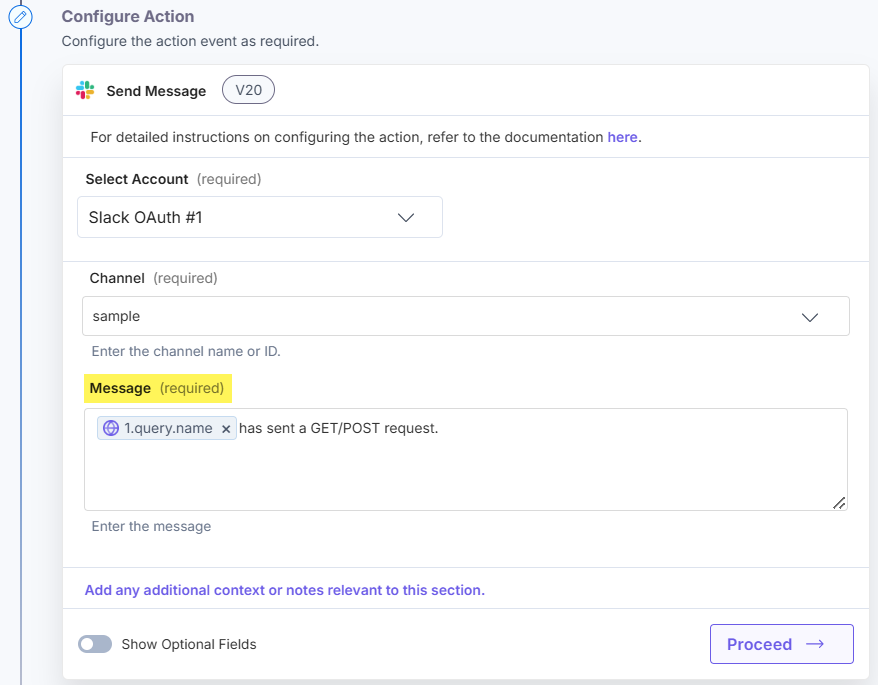
- Once done, click Proceed.
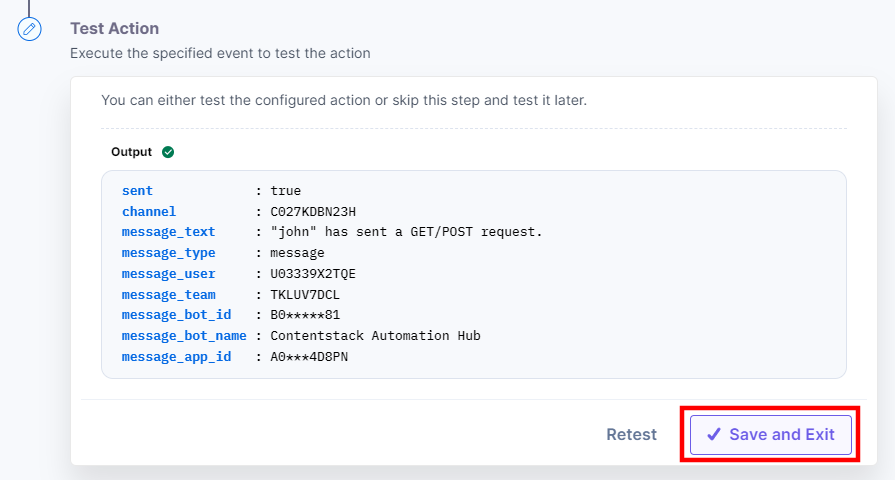
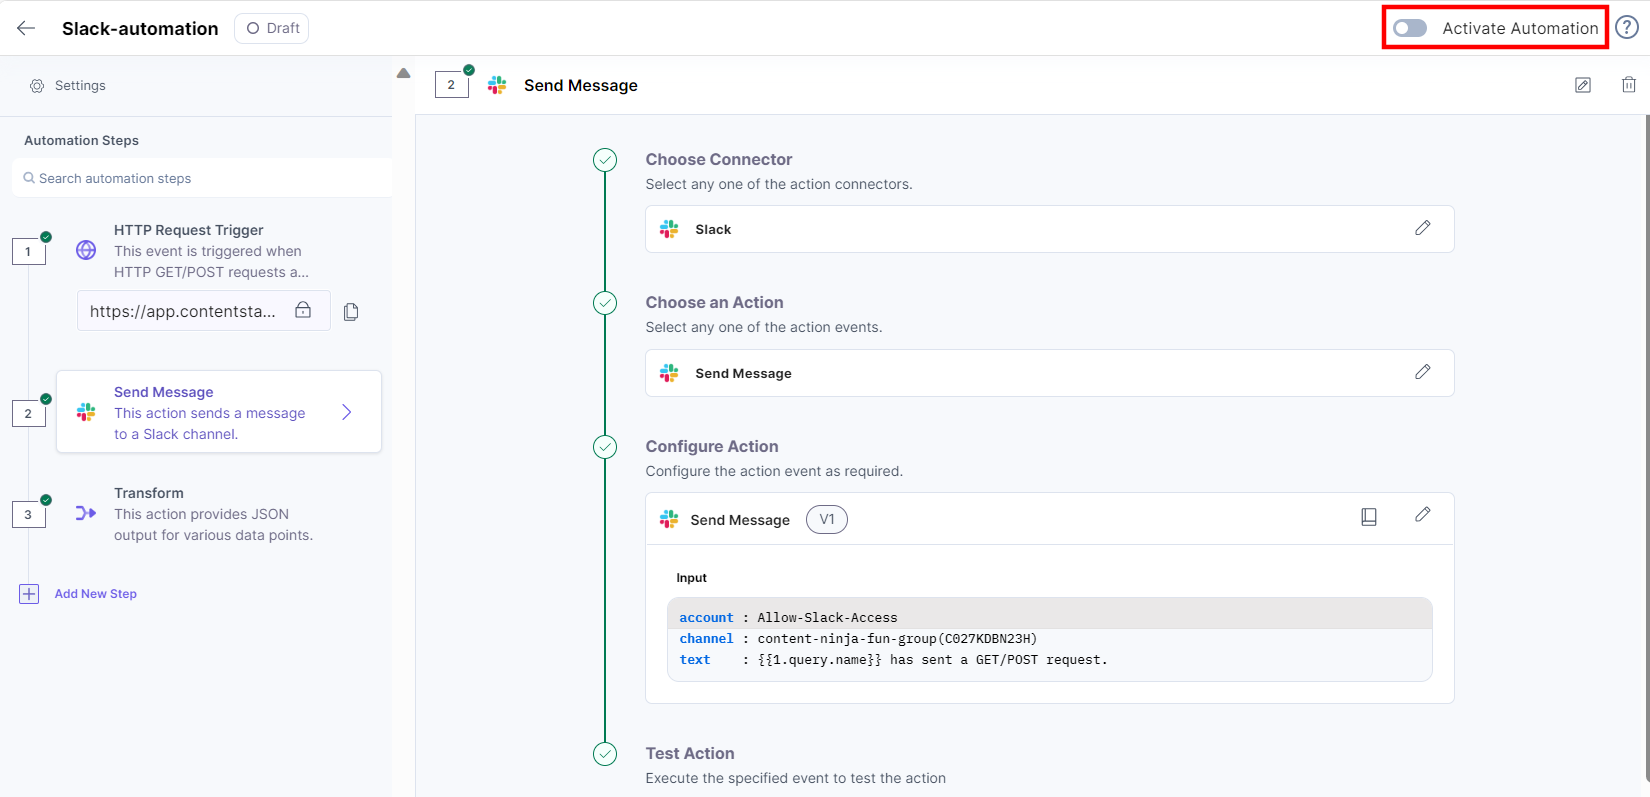
- Test Action: Finally, you can test the configuration you have set up by clicking on the Test Action button.
The output shows the message that will be sent on the linked Slack channel.
 Check your Slack channel. You will see the message delivered to the Slack channel as below:
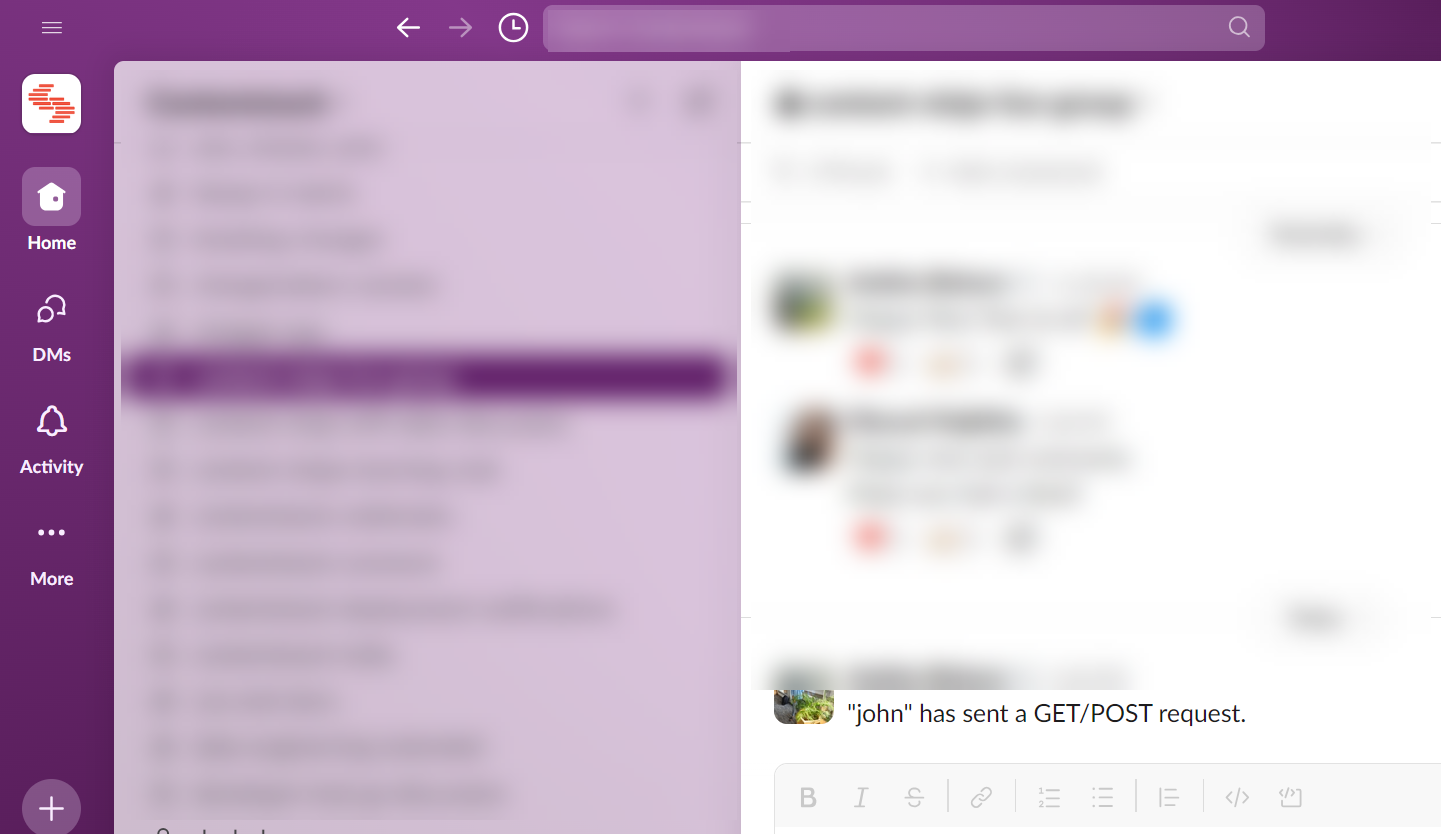
Once it works as expected, click Save and Exit.
The action is now tested. If you hover over the number (2), the message “Tested” will be displayed.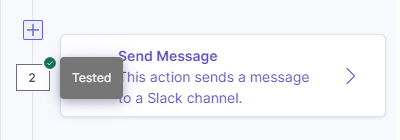
-
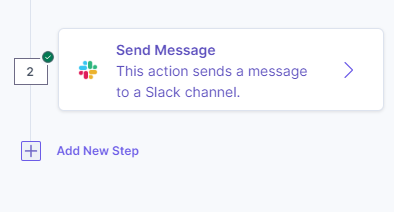
You can add multiple actions in an automation if needed. To do so, click the + Add New Step icon below the added action.
Then, perform all the steps similar to steps that were covered in the Step 2.2 - Configure Action section.
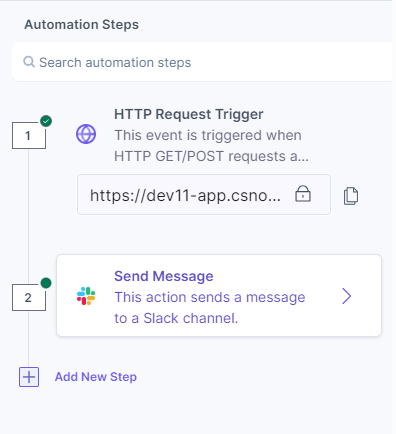
Once done, on the left panel of the page, you will see the Automation Steps summarizing the trigger and actions used in the automation.
Note: You will find more details on how to edit automation details, how to delete an automation, and other actions in the Additional functions on Triggers and Actions section.
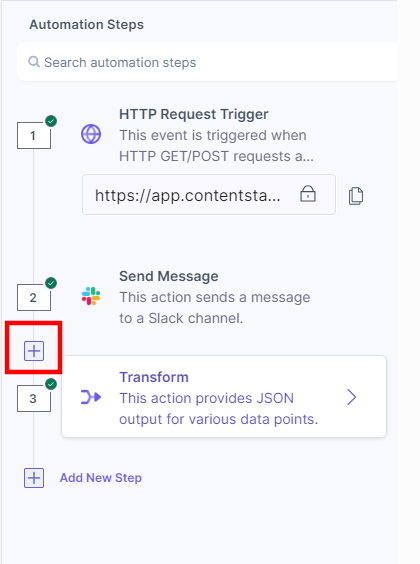
You can add a new step in between the configured automation steps. Suppose, you want a add a new action step in between two configured actions, then hover over the line between the two steps and click the + sign as shown below:
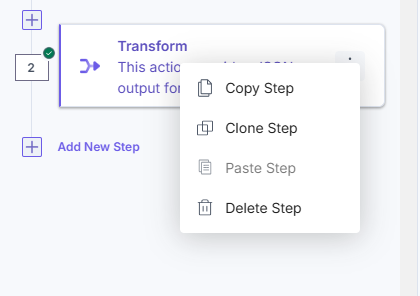
You can perform the following actions in configured steps:
- Copy Step: Copy and paste the step anywhere in the automation.
- Clone Step: Duplicate and add the step immediately below the existing step.
- Delete Step: Remove the existing step.
- Paste Step: After copying, use the Paste icon to insert it after a preferred step.
Additionally, you can also use Control + C and Control + V to copy and paste the step.
Note: If your automation has an unconfigured step, you can override it and configure a new one.
Test Automation
Now that you have tested and verified that the automation is working as expected, test out its working in the respective connector you have added as trigger or action.
If you see the changes you incorporated in the above processes are working fine. You are ready to activate the automation for use. If not, revisit all the above steps.
Activate Automation
Once your automation is ready for use, you need to activate it to use it in your projects.
To do this, click the toggle button at the top-left corner:
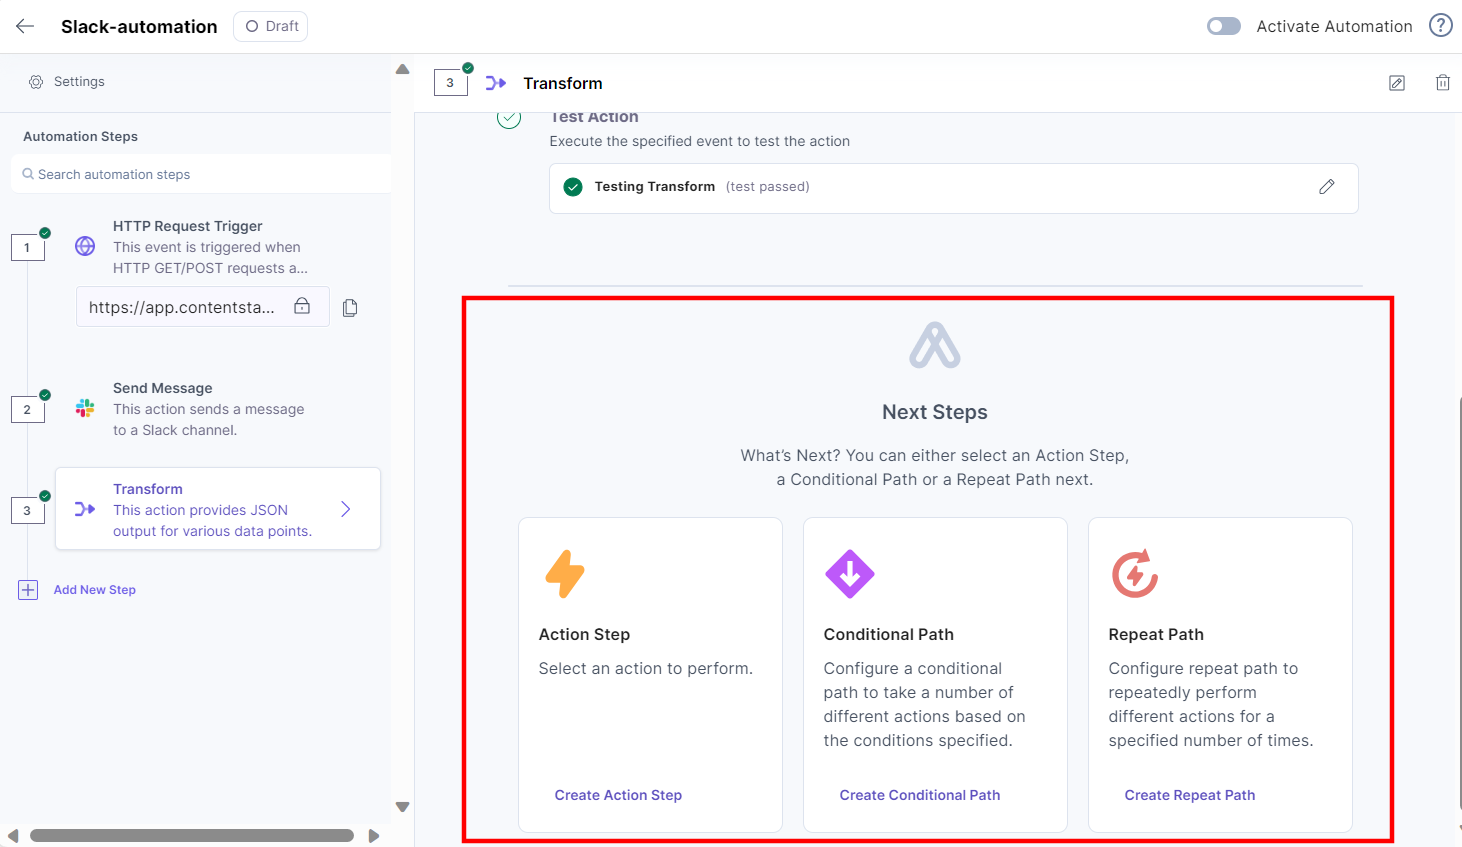
You can also configure another Action Step, Repeat Path or a Conditional Path quickly and easily. The quick select screen appears after each trigger and action step.
Note: You cannot view the quick select screen if you configure the Response action connector.
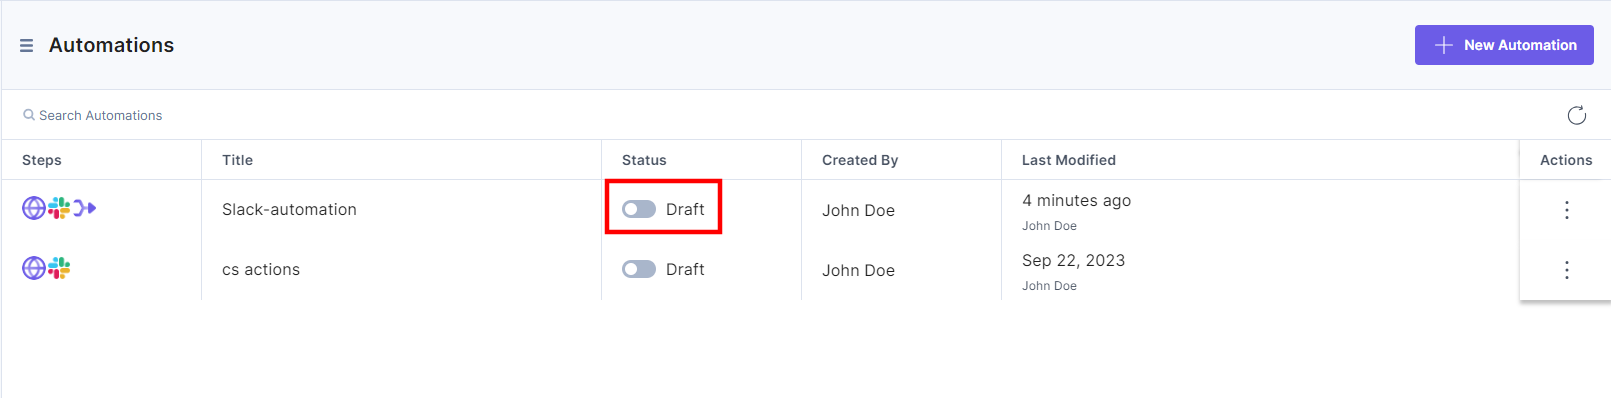
You can also activate an automation on the Automations homepage as follows:
Notes:
- Usage Throttling: For large-scale automations, use the throttling feature to prevent rate limits and avoid system overloads.
Additional Resources and Warnings:
- Documentation for Connectors: Refer to Contentstack’s documentation on available connectors (e.g., HTTP Trigger, Slack) for in-depth details on setup and customization.
- Rate Limits and API Quotas: Be aware of rate limits, especially when using third-party APIs or high-volume automations. Monitor usage to avoid interruptions.
- Security Warnings: Always configure secure triggers (e.g., Secure HTTP Trigger) when handling sensitive data or user-specific workflows.
More articles in "Quickstart"
