

Set up SSO with Microsoft Entra ID Native App
Warning: This set up guide is deprecated. Please visit our documentation on Set up SSO with Microsoft Azure AD.
This step-by-step guide explains how to set up Single Sign-On in Contentstack with Microsoft Entra ID as your SAML 2.0 Identity Provider (IdP). You create an SSO name and Assertion Consumer Service (ACS) URL in Contentstack, configure the Contentstack app in Microsoft Entra ID, exchange the IdP details, add users and application roles, map those roles to Contentstack, and then test and enable SSO.
Prerequisites
- Contentstack account
- Organization Owner role
- Microsoft Entra ID administrator access with an active Microsoft Entra ID subscription
What You Will Learn
How to create an SSO name and ACS URL in Contentstack.
How to configure the Contentstack app in Microsoft Entra ID as a SAML 2.0 IdP.
How to add application roles and assign them to users for IdP role mapping.
How to test and enable SSO for your organization.
Steps to set up SSO with Microsoft Entra ID
The integration with Microsoft Entra ID Native App can be done in the following easy steps:
- Create SSO Name and ACS URL in Contentstack
- Configure Contentstack App in Microsoft Entra ID
- Configure Microsoft Entra ID details in Contentstack
- Add Users to Your Microsoft Entra ID Application
- Add Users Roles in Your Application
- Assign Roles to Application Users for IdP Role Mapping
- Create Role Mappings in Contentstack
- Test and Enable SSO
Let us see each of the processes in detail.
Create SSO Name and ACS URL in Contentstack
Note: Only the Organization Owner will be able to perform the steps discussed below.
Start by creating an SSO Name and generate the ACS URL in Contentstack
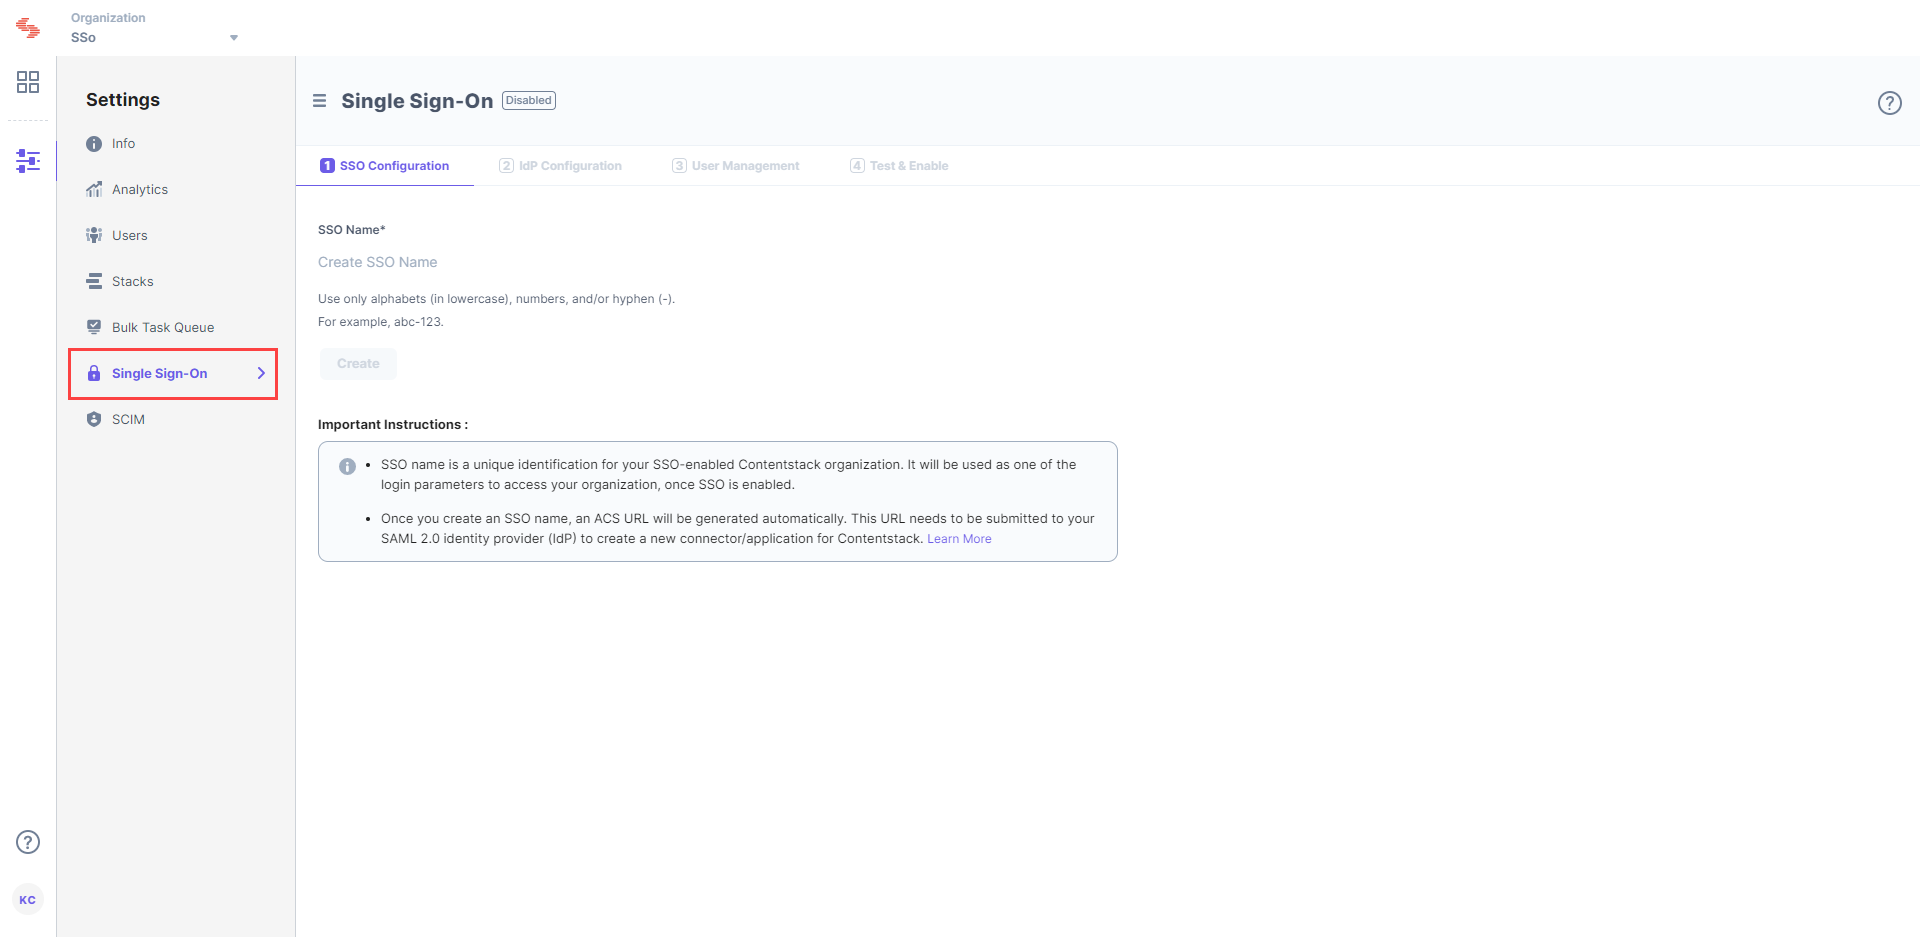
- Log in to your Contentstack account, go to the Organization Settings page, and click the Single Sign-On tab.
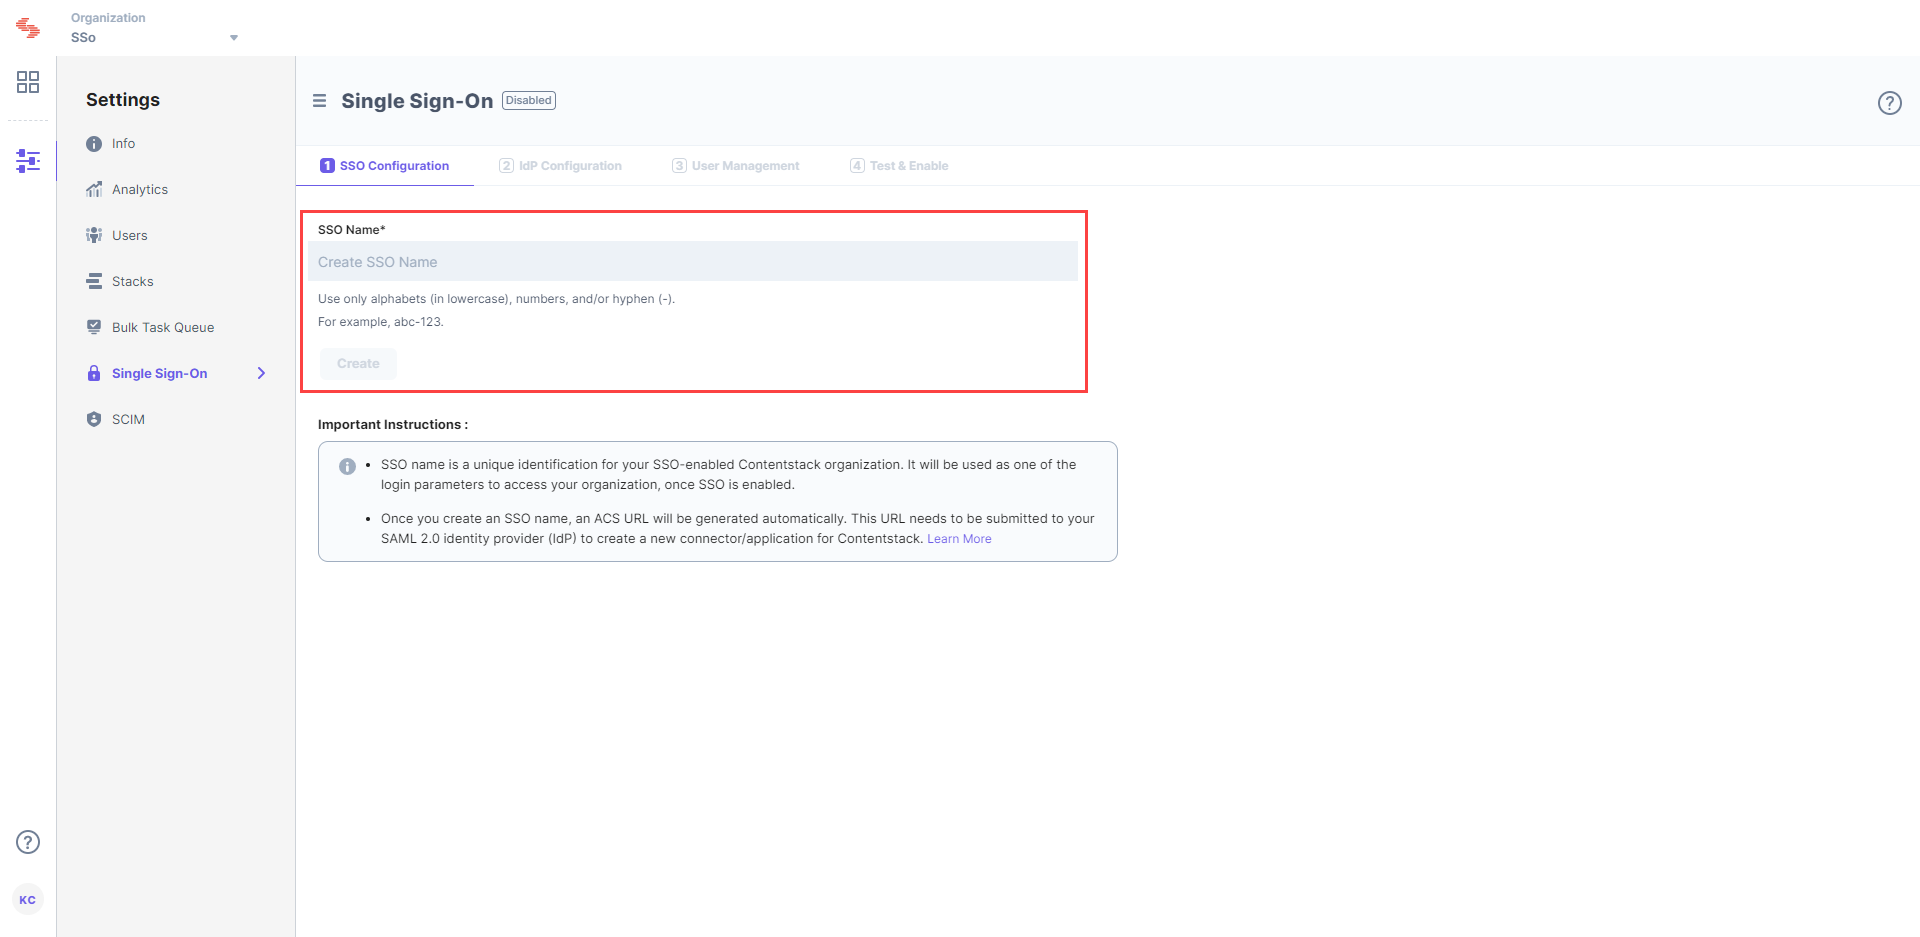
- Enter an SSO Name of your choice, and click Create. This name will be used as one of the login credentials by the organization users while signing in.
Note: The SSO Name can contain only alphabets (in lowercase), numbers (0-9), and/or hyphens (-).
- When you click Create, this will generate the Assertion Consumer Service (ACS) URL and other details such as Entity ID, SAML Version, Attributes, and NameID Format.
These details will be used in the upcoming Step 2 for configuring the Contentstack app in Microsoft Entra ID.
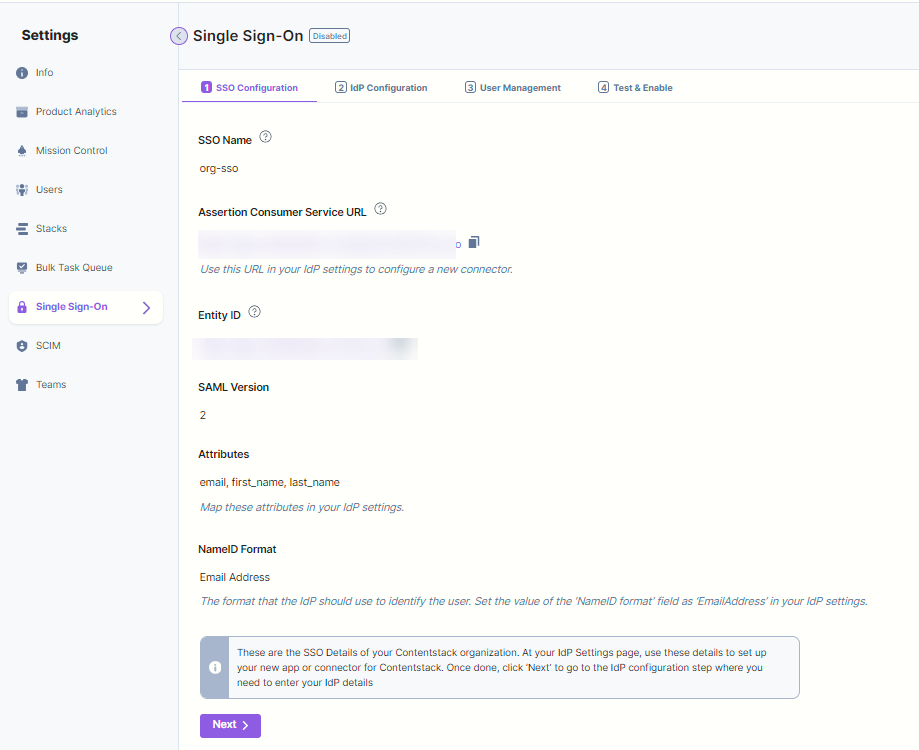
Keep this window open, as you may need these details for setting up the Contentstack app in Entra ID.
- Log in to your Contentstack account, go to the Organization Settings page, and click the Single Sign-On tab.
Configure Contentstack App in Microsoft Entra ID
Note: You need to be a Microsoft Entra ID administrator to complete the steps below.
To configure the integration of Contentstack into Microsoft Entra ID, you need to add the Contentstack app in the Microsoft Entra ID portal.
- Go to the Microsoft Azure portal, and click Microsoft Entra ID.
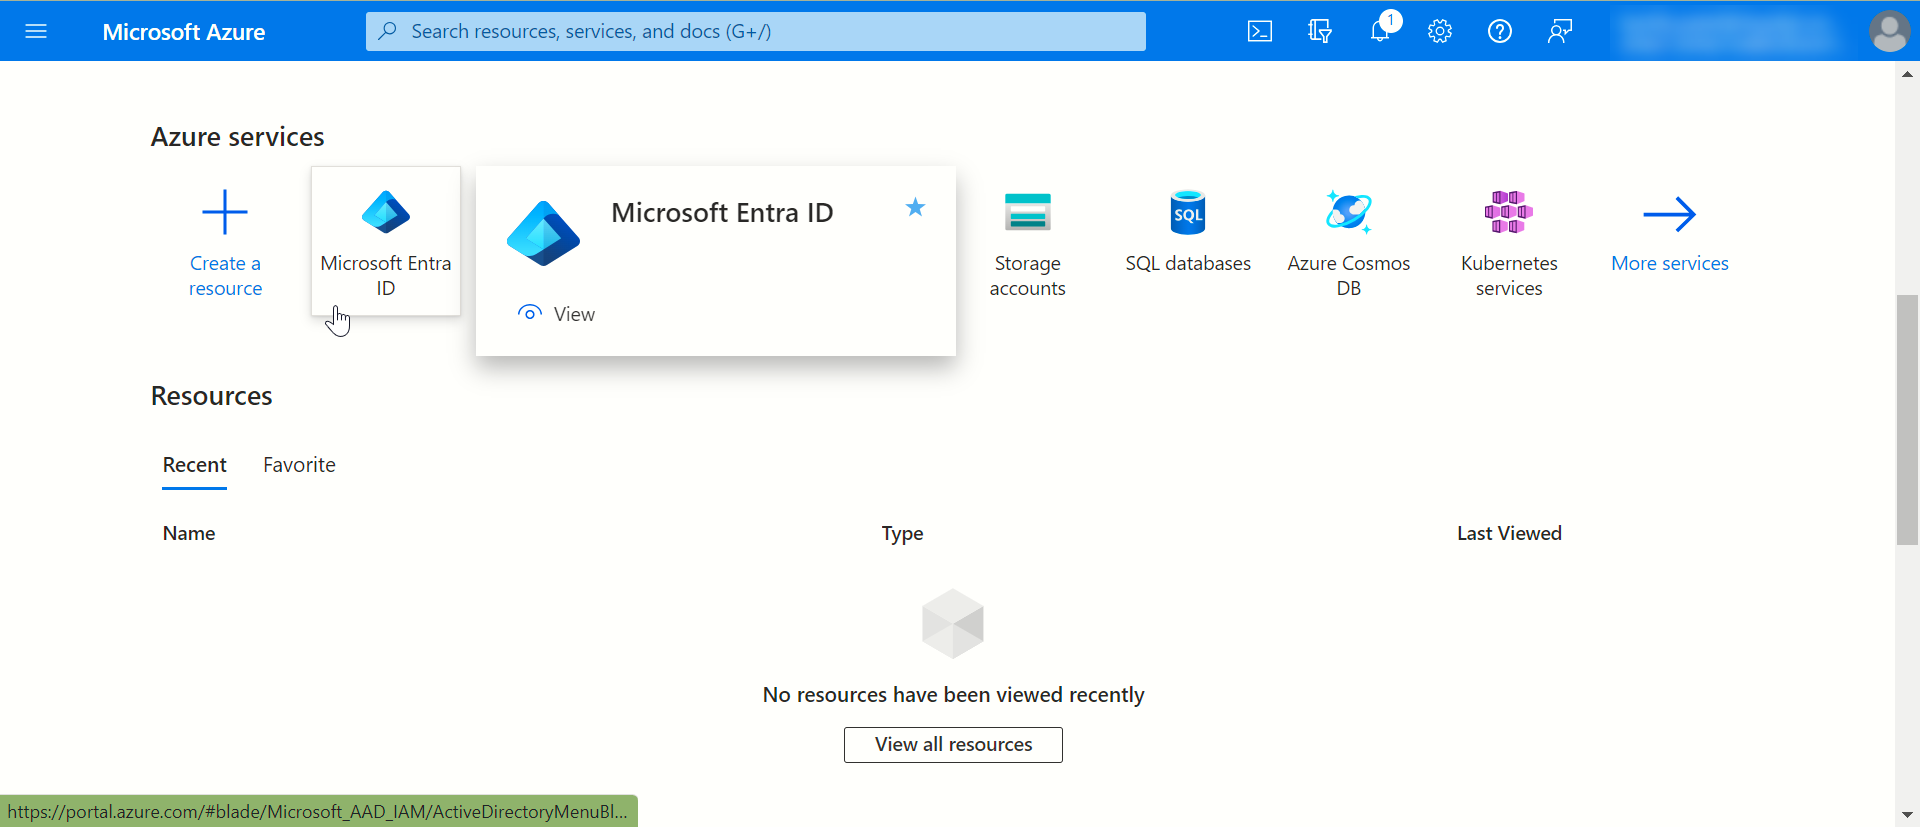
Note: Please make sure you have an active subscription of Microsoft Entra ID before we proceed to the next step.
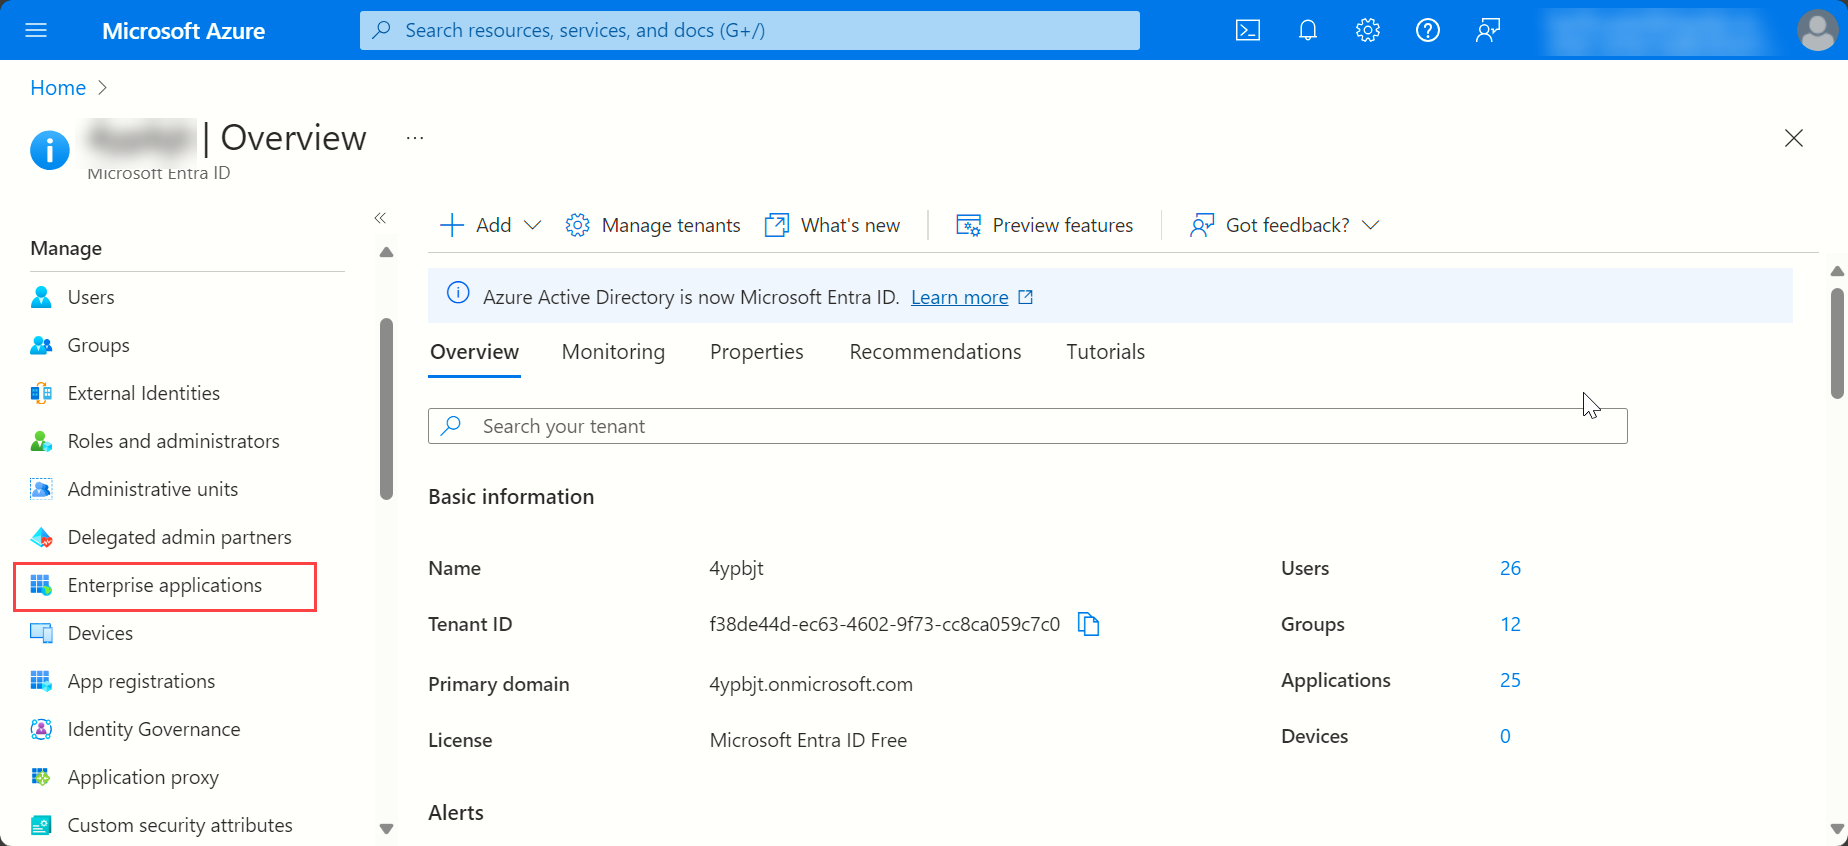
- Click Enterprise applications from the left panel.
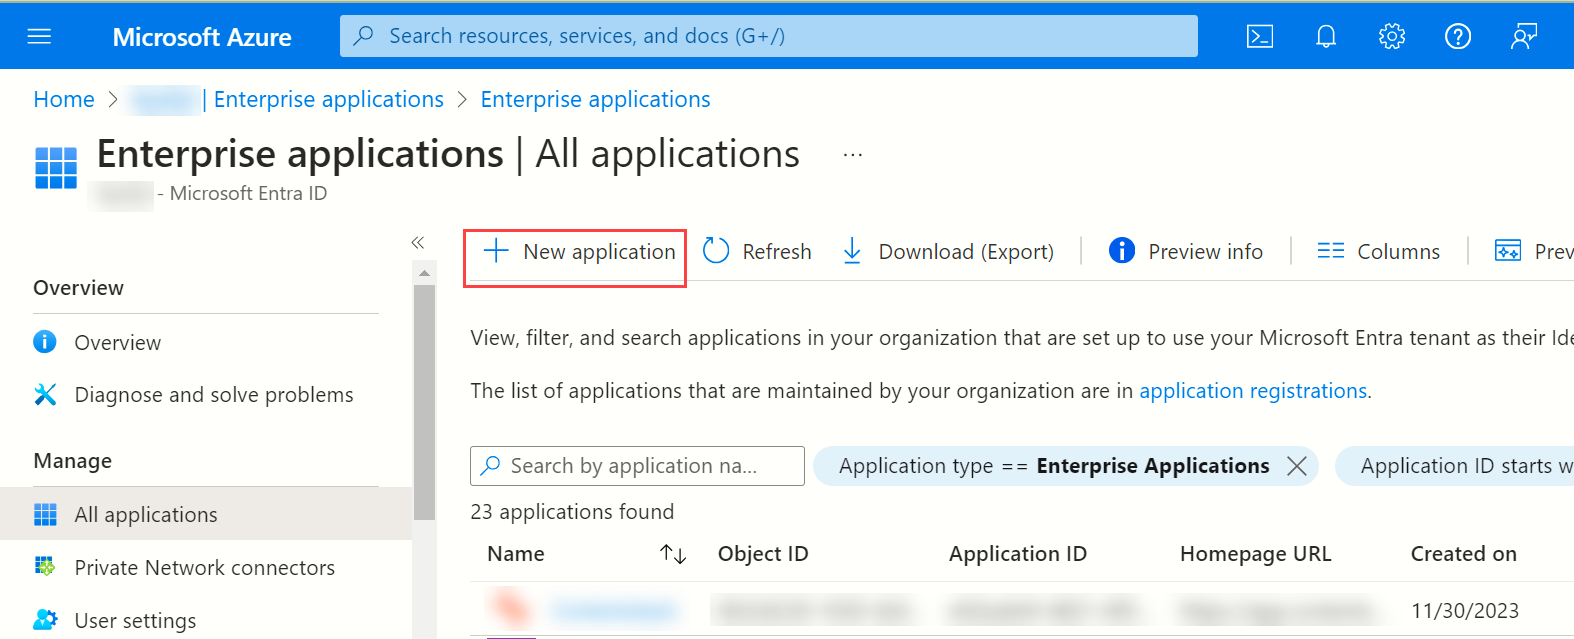
- Click + New application from the top to create a new application.
- Go to the search box and search for the Contentstack application, and then click the Contentstack app icon that appears.
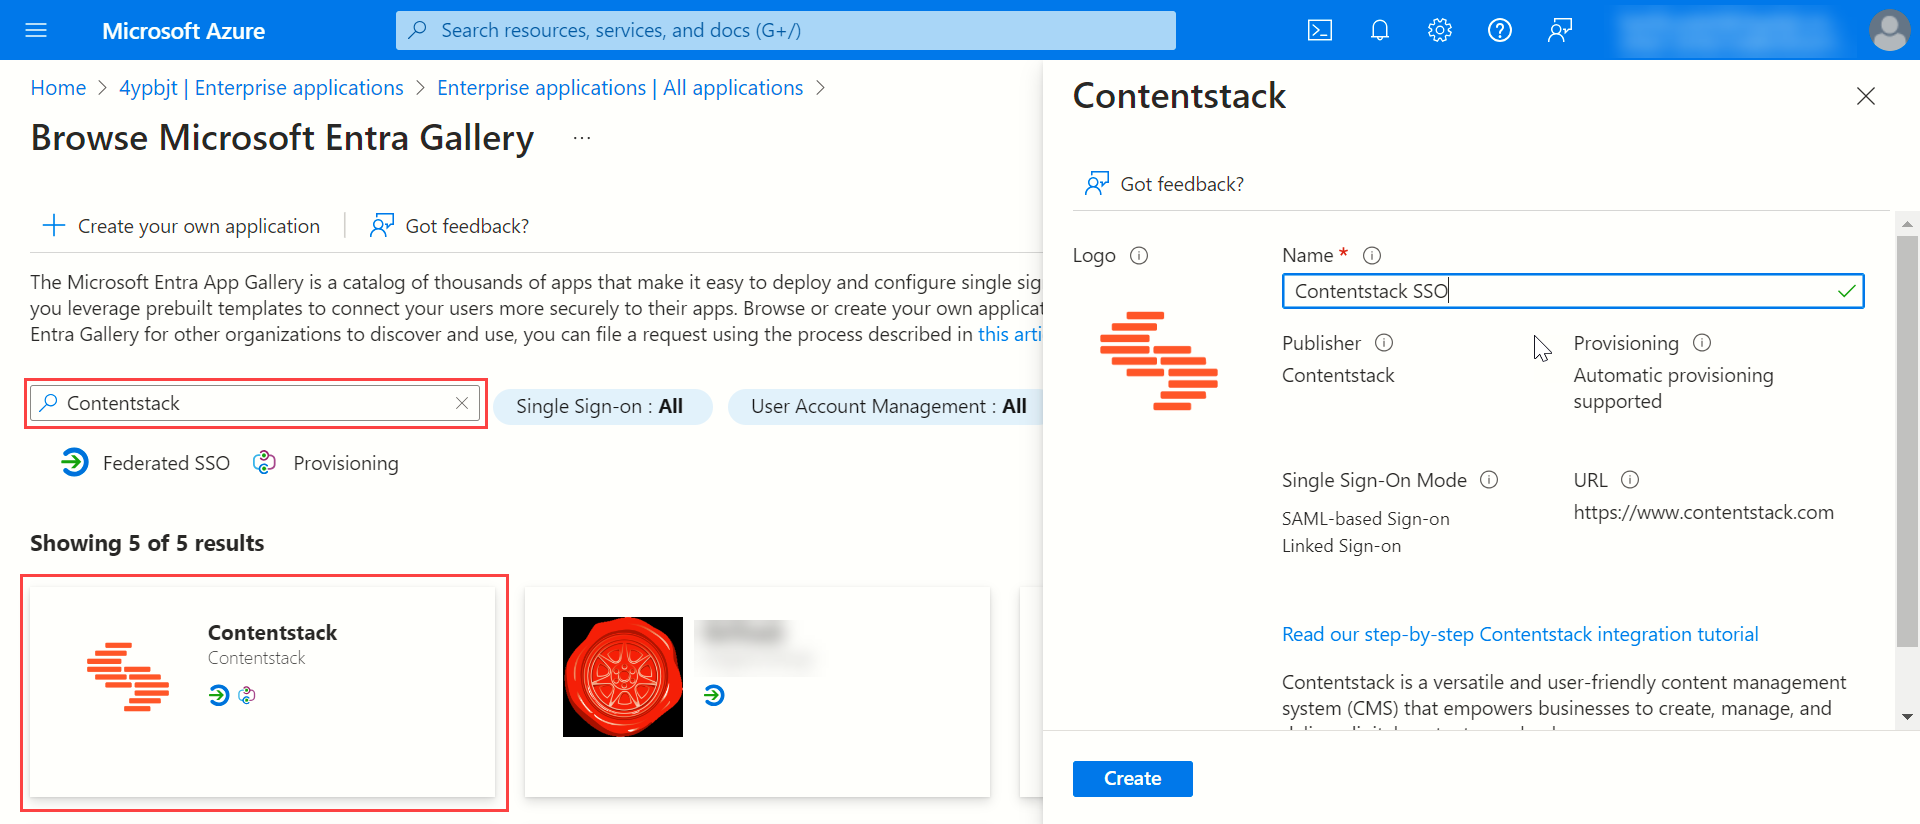
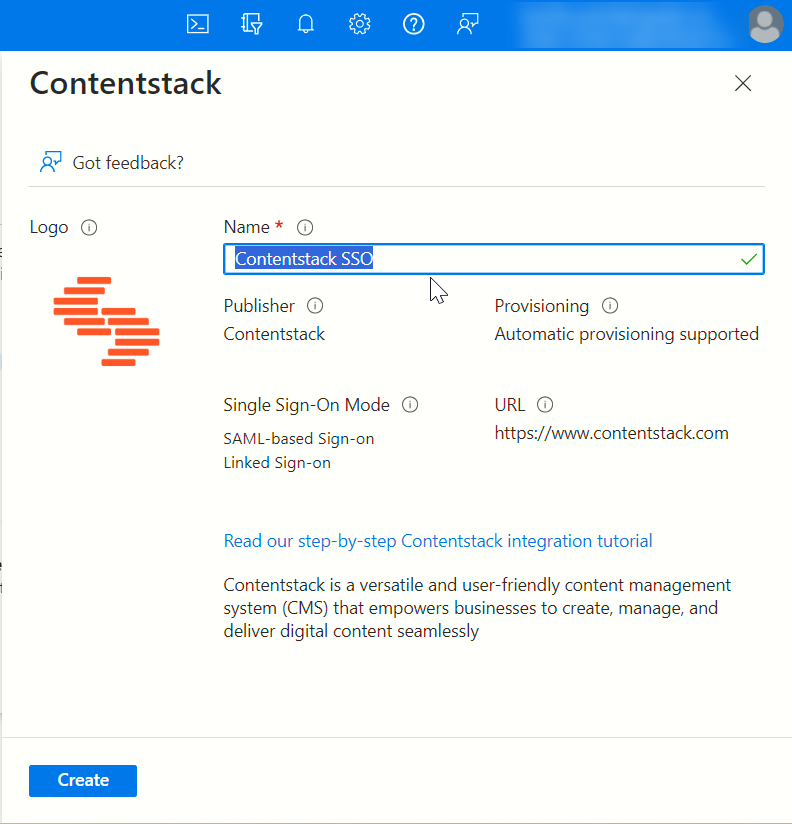
- You may provide a name to your application, for example, “Contentstack SSO” and click Create.
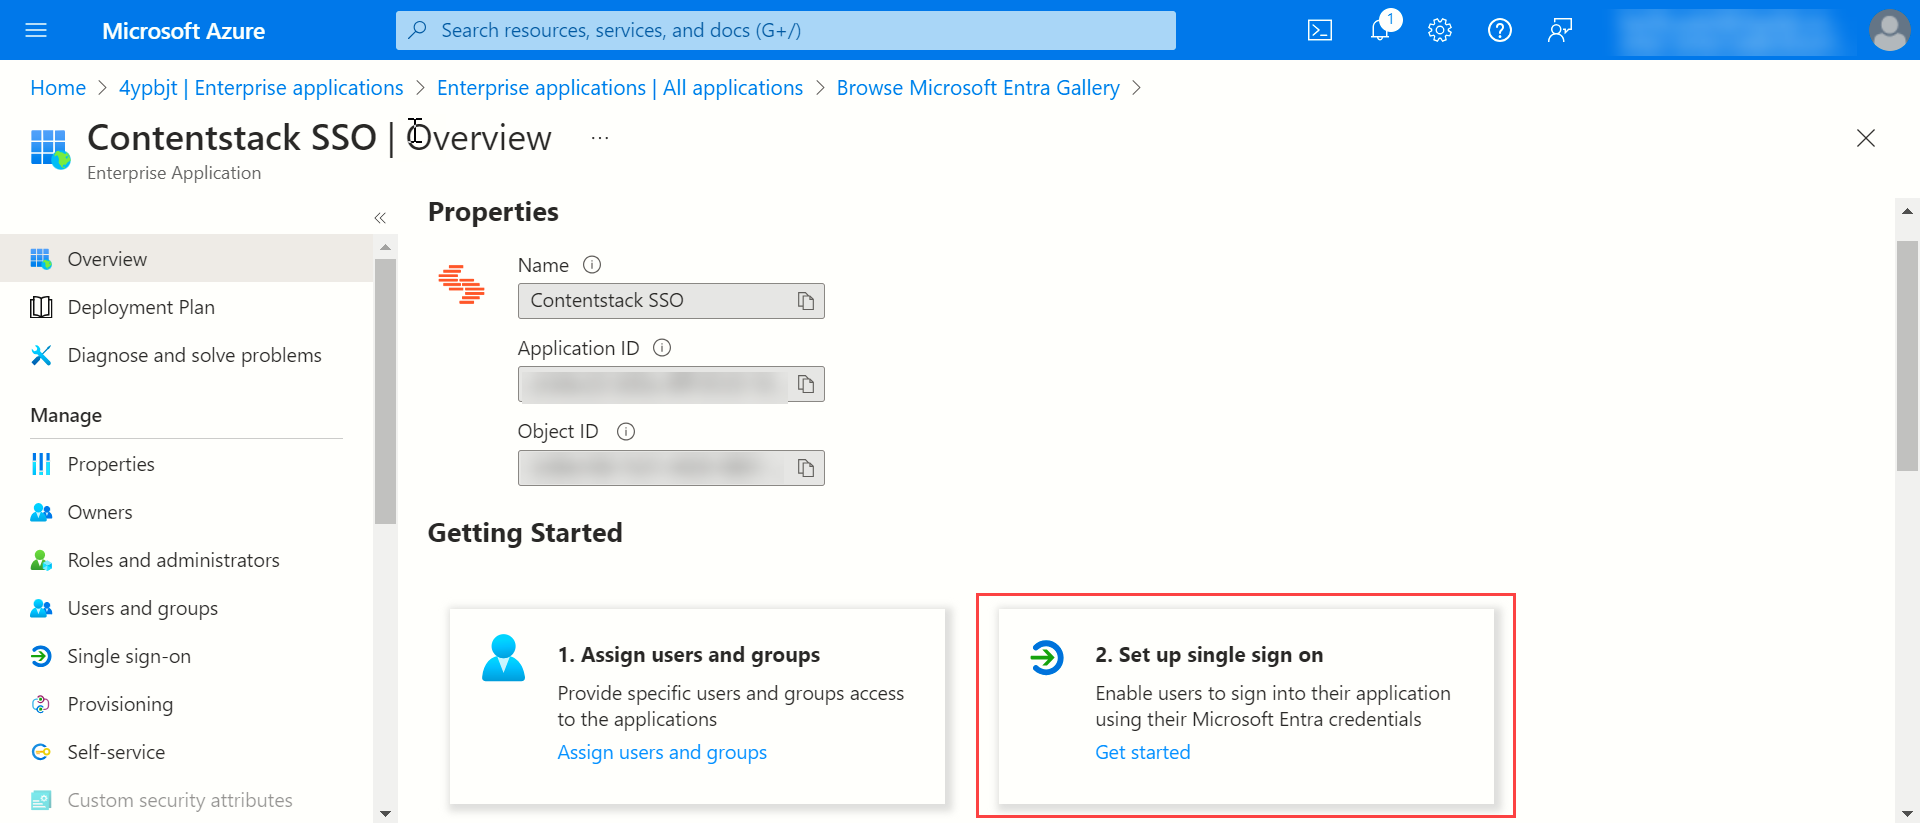
- This will lead you to the Overview page where you will see the overview details of your application. Under the Getting Started section, click the 2. Set up single sign on card.
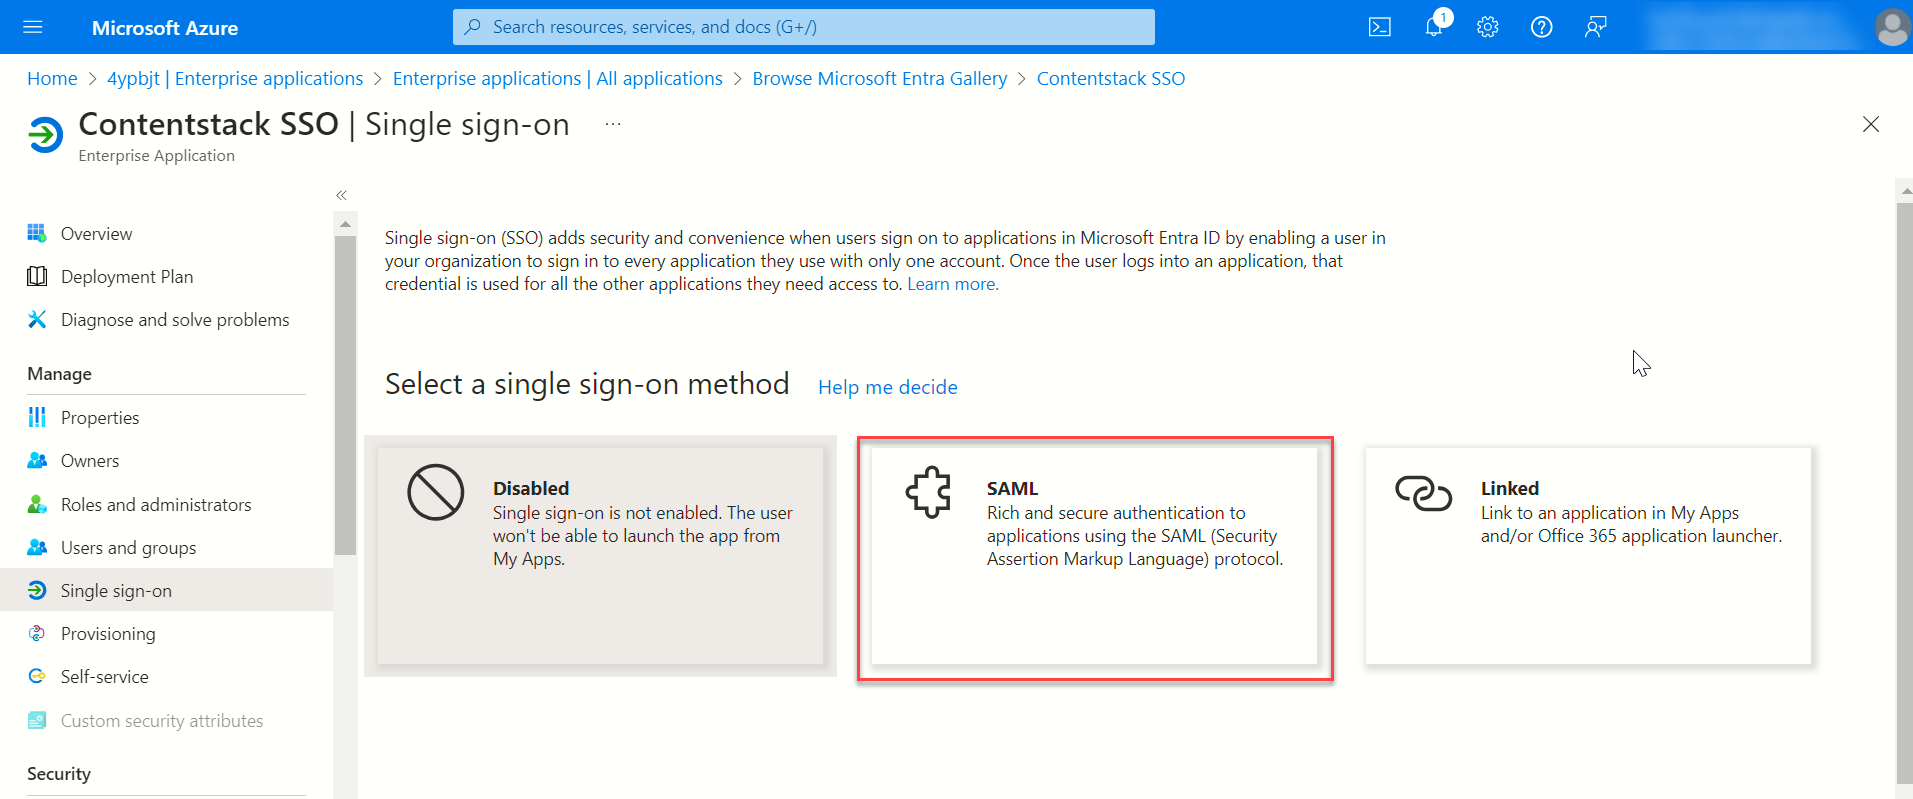
- On the Single sign-on page, under Select a single sign-on method, select the SAML mode to enable single sign-on.
- You will be led to the Set up Single Sign-On with SAML page where you can perform further steps after creating your app.
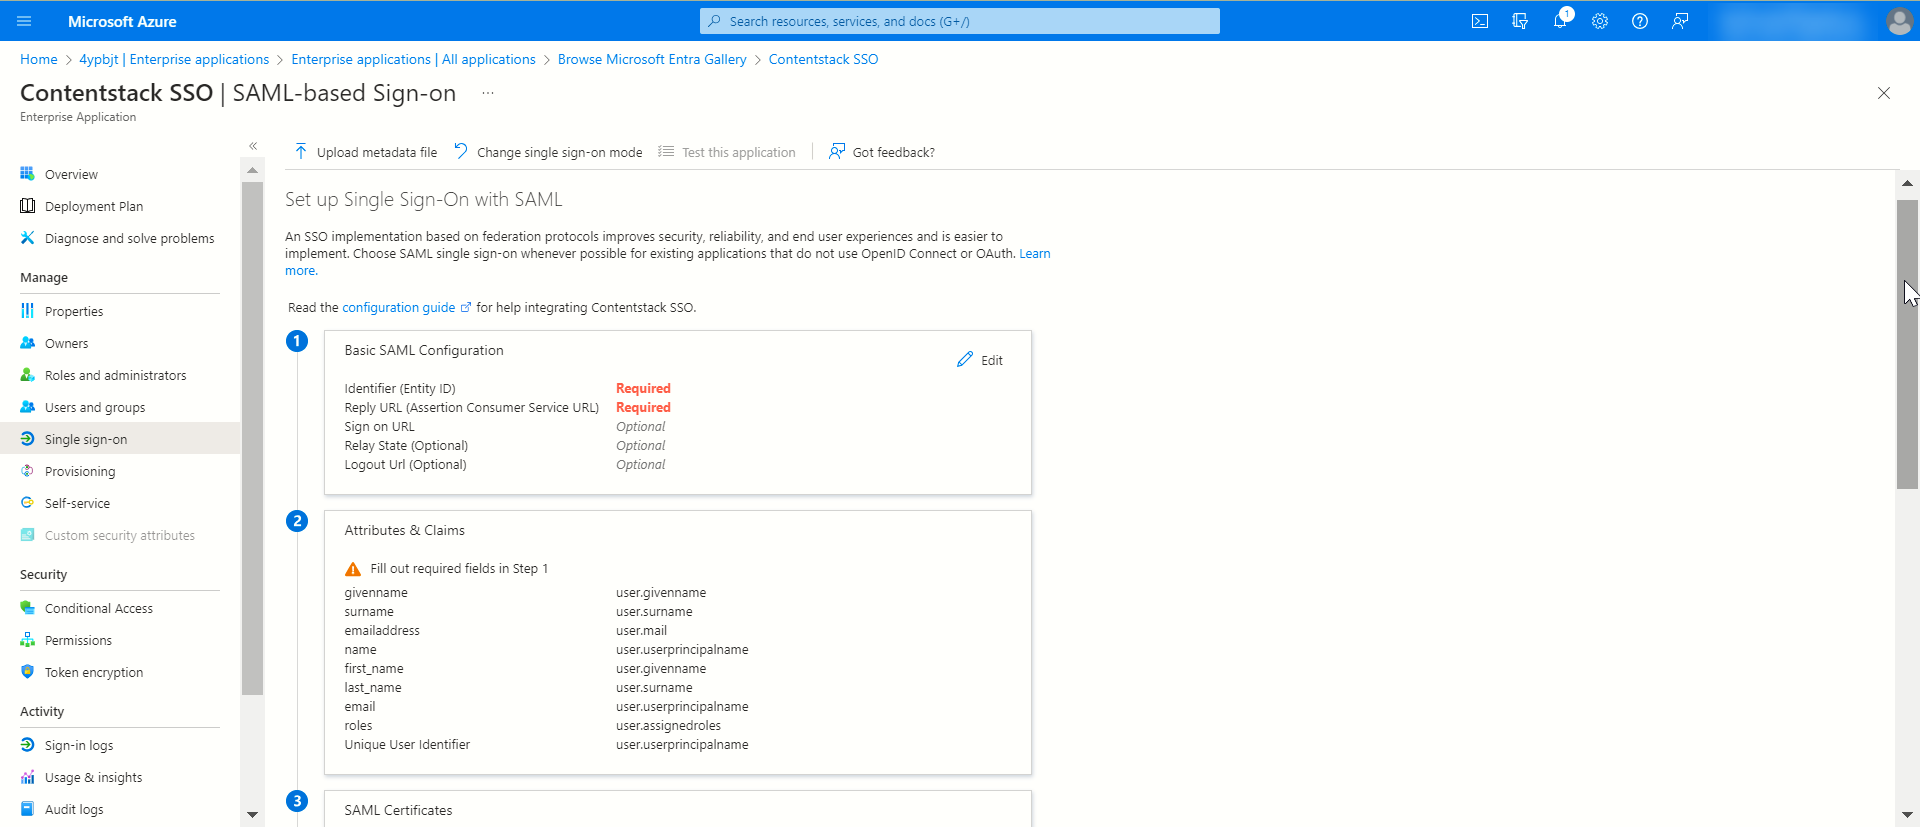
- Click the “Edit” (pencil) icon beside the Basic SAML Configuration section, and add the following details:
- Identifier (Entity ID): Enter the “Entity ID” of Contentstack, i.e., https://app.contentstack.com.
- Reply URL (Assertion Consumer Service URL): Enter the ACS URL that we generated in Step 1.c.
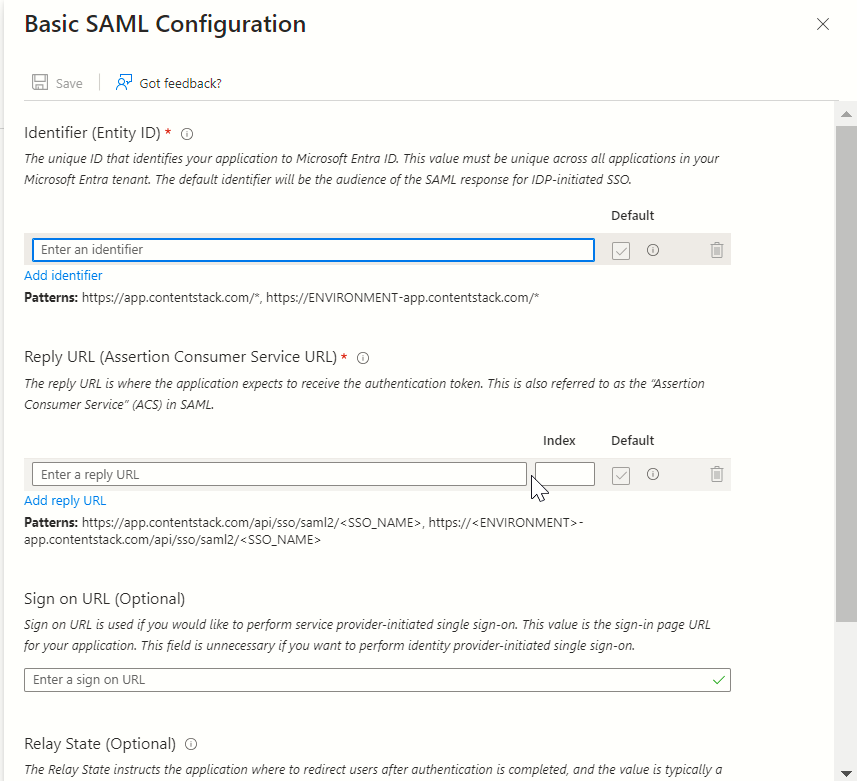
- Click Save.
Now in the Attributes & Claims section, you can view default or pre-set claims and their corresponding values.
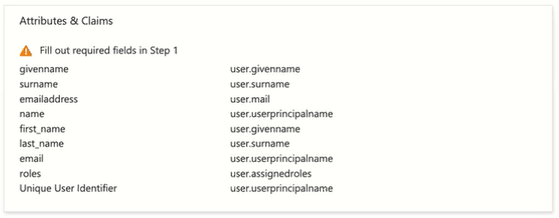
Amongst the listed attributes above, the attributes email, first_name, last_name, and roles are mandatory, while all other attributes are optional.
Name Value first_name user.givenname last_name user.surname email user.userprincipalname roles user.assignedroles Note: If you want to enable Role Mapping in Contentstack, then it is highly important to add the already set roles attributes as we need these for IdP Role Mapping, which we will cover in the next set of steps.
- In the SAML Certificates section, click the Download link beside Certificate (Base64). This will download and save the Base64 version of the certificate for your Contentstack app.
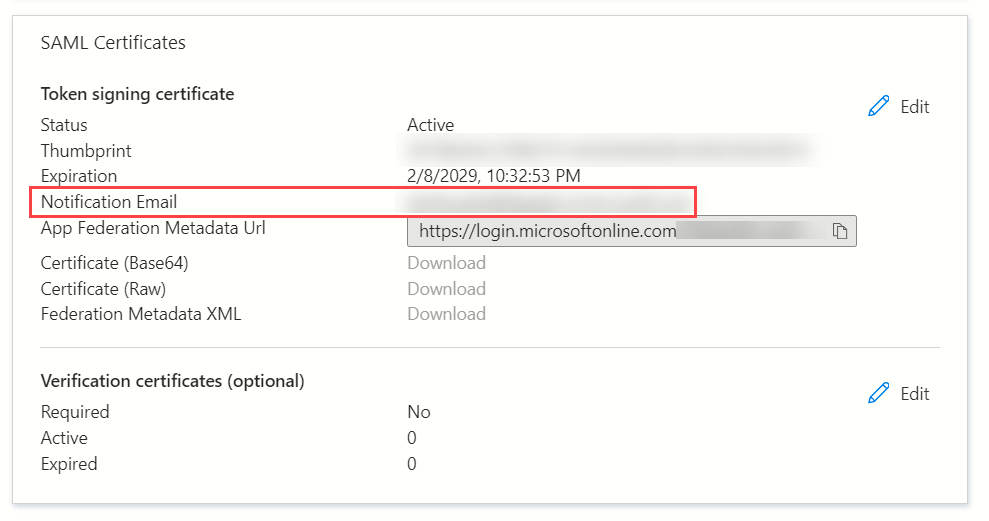
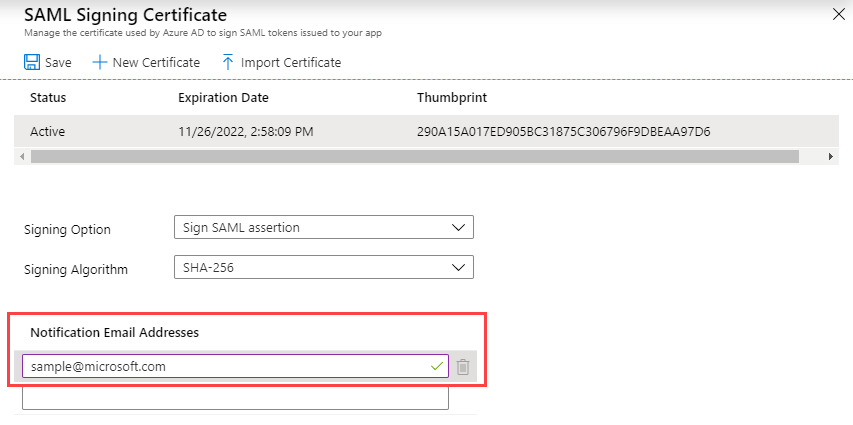
- If needed, edit the Notification Email Addresses section, change the notification email, and click Save.
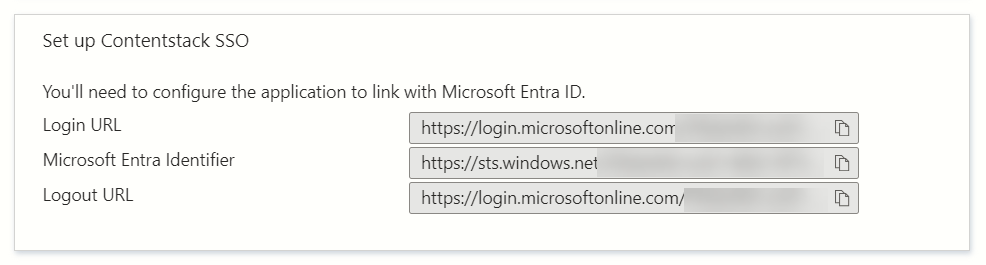
- Under the Set up <app_name> section, you will find important data, such as Login URL, Entra ID Identifier, and Logout URL of your Microsoft Entra ID app. This data is required when configuring the Microsoft Entra ID details in Contentstack.
- Go to the Microsoft Azure portal, and click Microsoft Entra ID.
Configure Microsoft Entra ID details in Contentstack
- From the previous section, copy the URL provided in the Login URL section of your Contentstack application in Microsoft Entra ID and paste it into the Single Sign-On URL field in Contentstack’s 2 IdP configuration section.
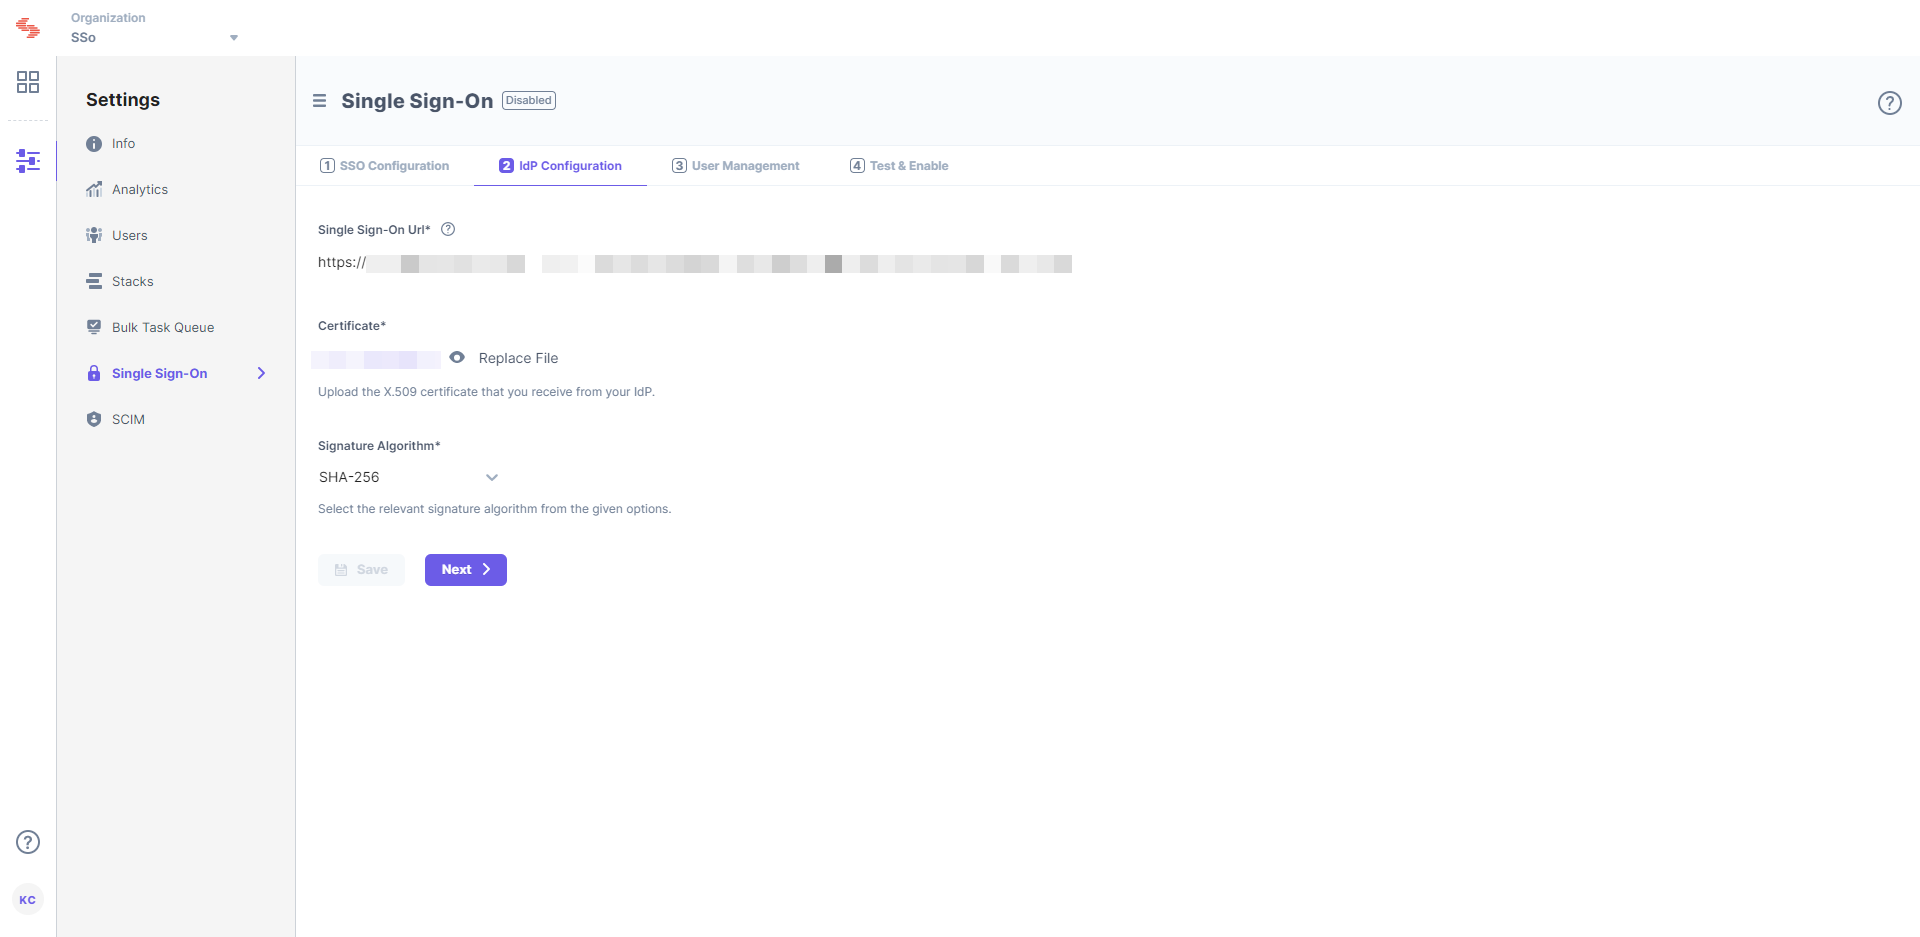
- Upload the X.509 certificate that you downloaded from Microsoft Entra ID in Step 2.i. into the Certificate field in Contentstack SSO Settings.
Next, you need to define roles in Microsoft Entra ID that would be used to create role mapping in Contentstack.
- From the previous section, copy the URL provided in the Login URL section of your Contentstack application in Microsoft Entra ID and paste it into the Single Sign-On URL field in Contentstack’s 2 IdP configuration section.
Add Users to Your Microsoft Entra ID Application
After setting the necessary configurations in Contentstack, you need to add users to your newly added application.
To do so, you need to perform the following steps:
- Navigate to Microsoft Azure Portal > Entra ID application, select Enterprise Applications, select All applications, then select your application.
- Under the Getting Started section, click the 1. Assign users and groups tab.
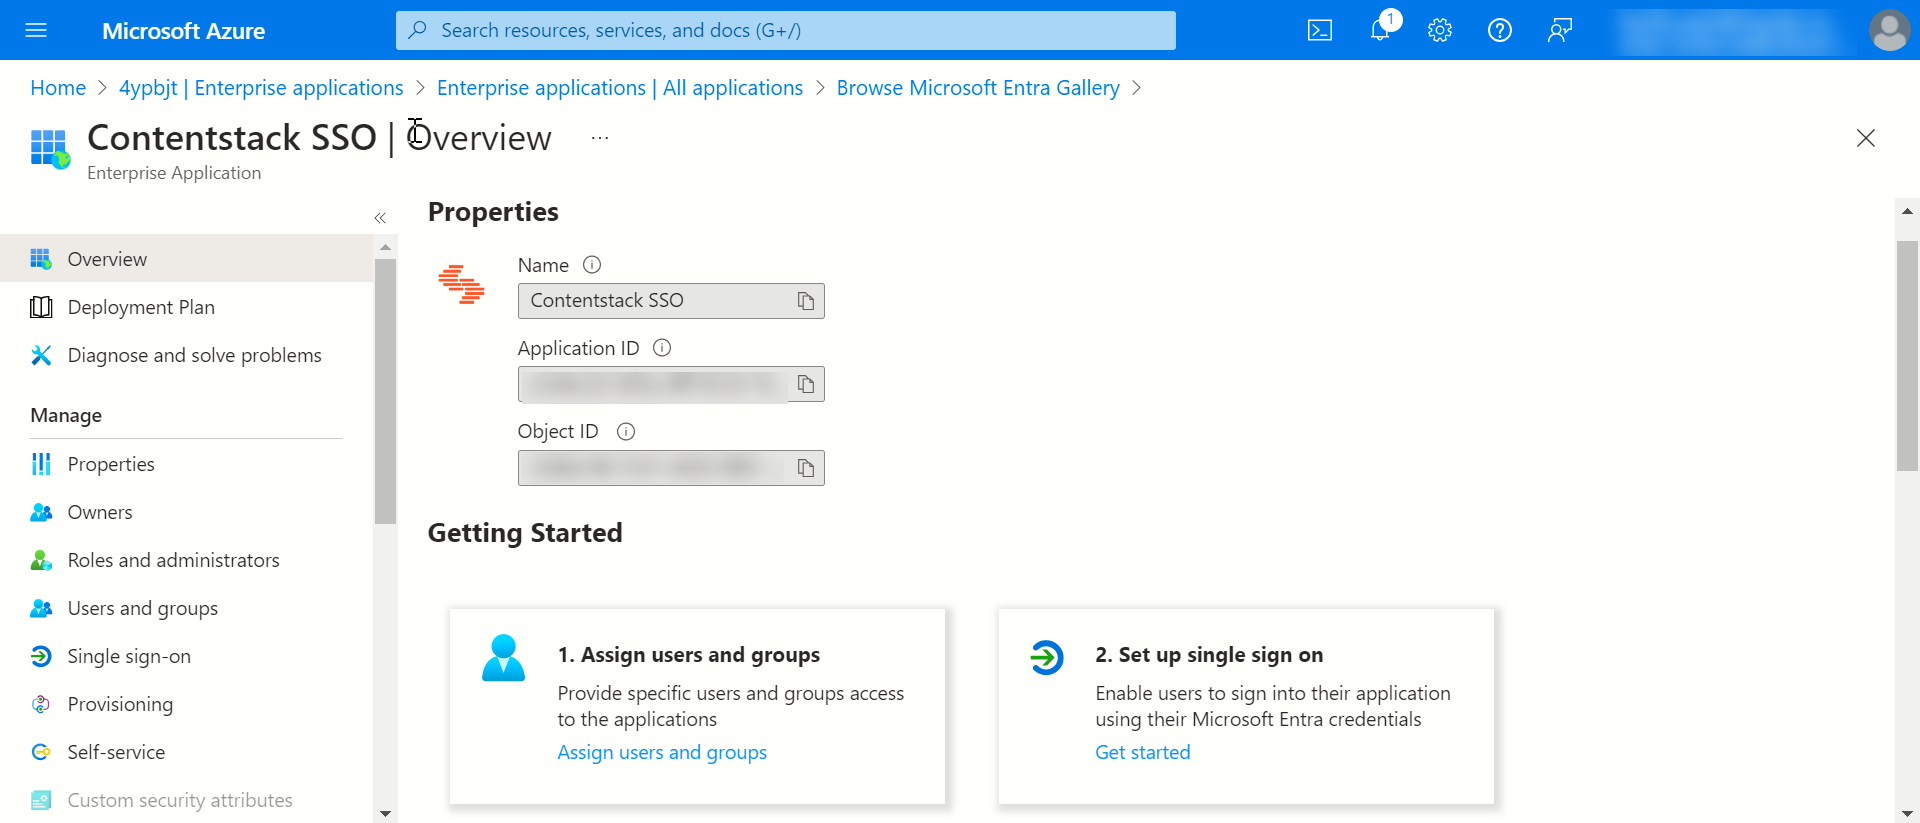
- Click the + Add user/group button.
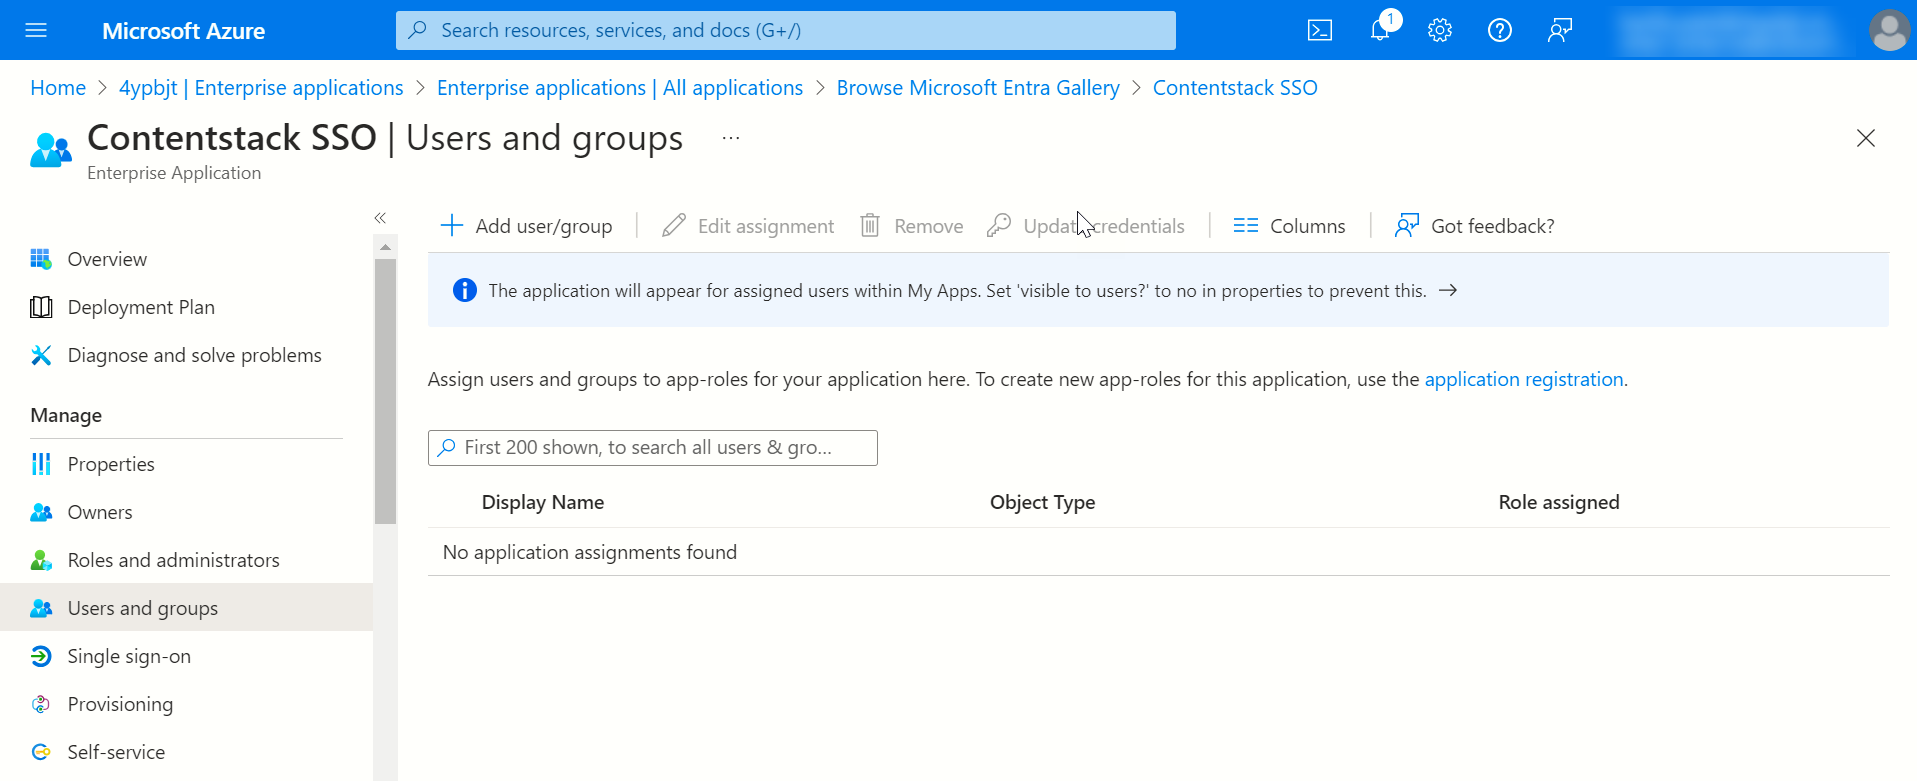
- Click Users and groups. You will find a list of users whom you can add into your application.
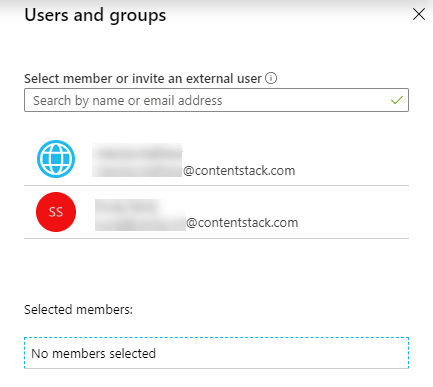
You can either select from the given list of users or you can invite and add new users by inviting them.
Add Users Roles in Your Application
Note: This is an optional step, but it”s mandatory if IdP Role Mapping is part of your Contentstack plan and you want to implement it.
Application Roles are defined under the application's registration manifest in the Microsoft Azure portal. To add user roles, perform the following steps:
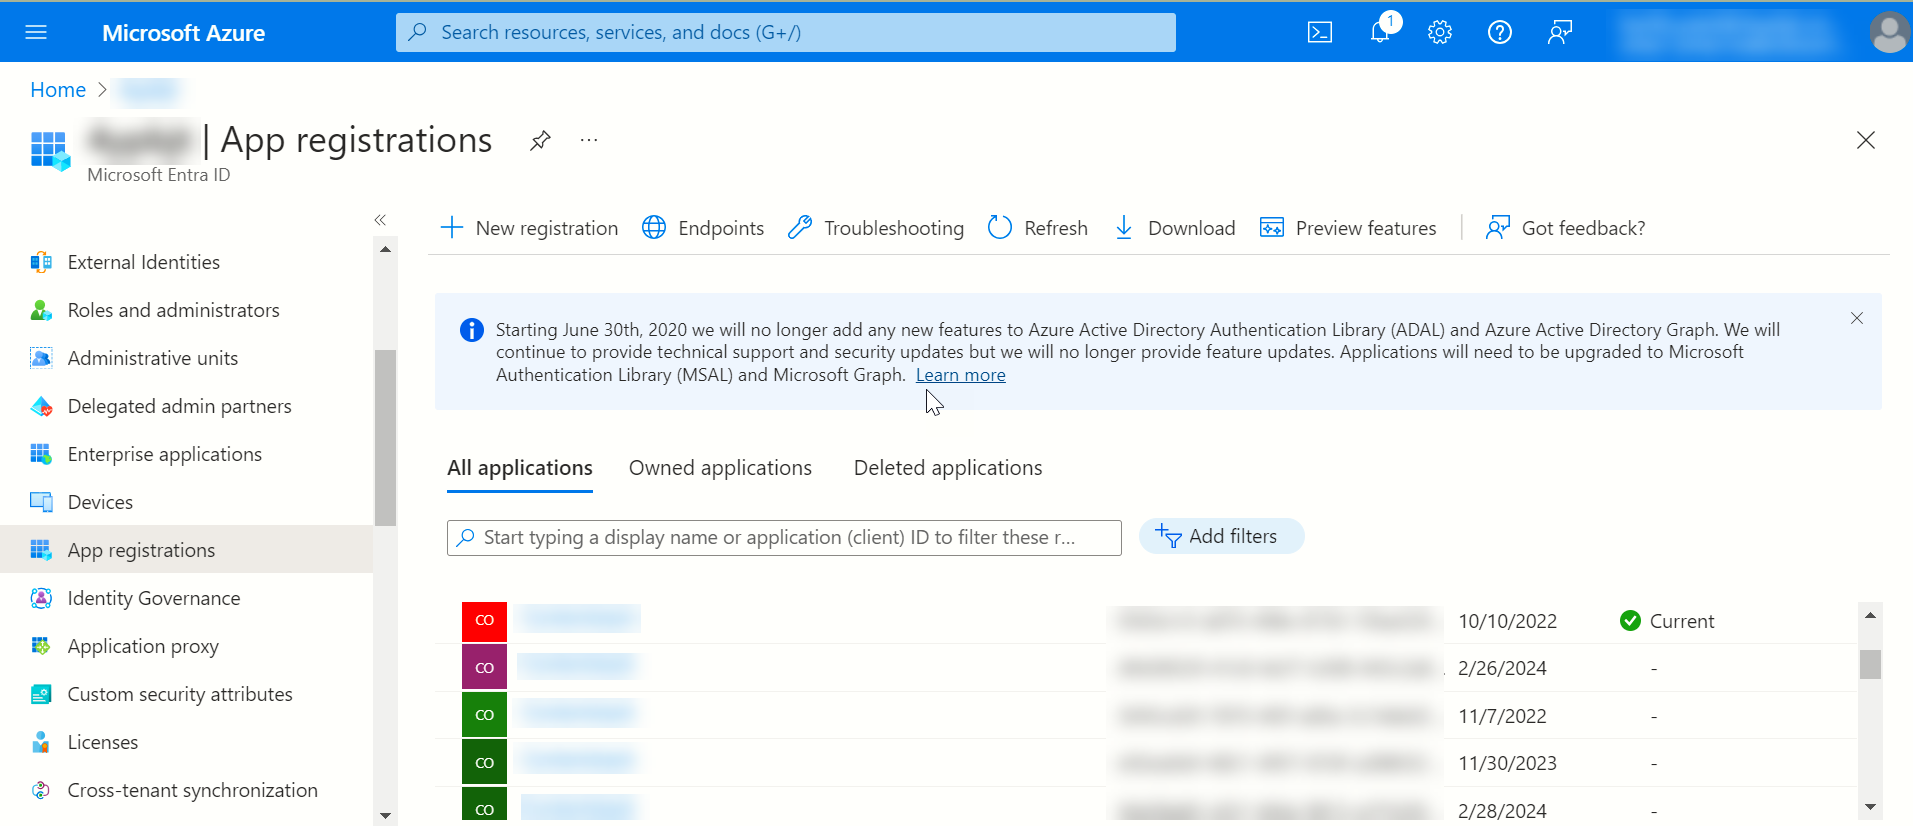
- In the left navigation, click App Registrations, and then click All applications. Locate your newly created application and click it.
- In your application blade, click Manifest. You will see the JSON representation of your application.
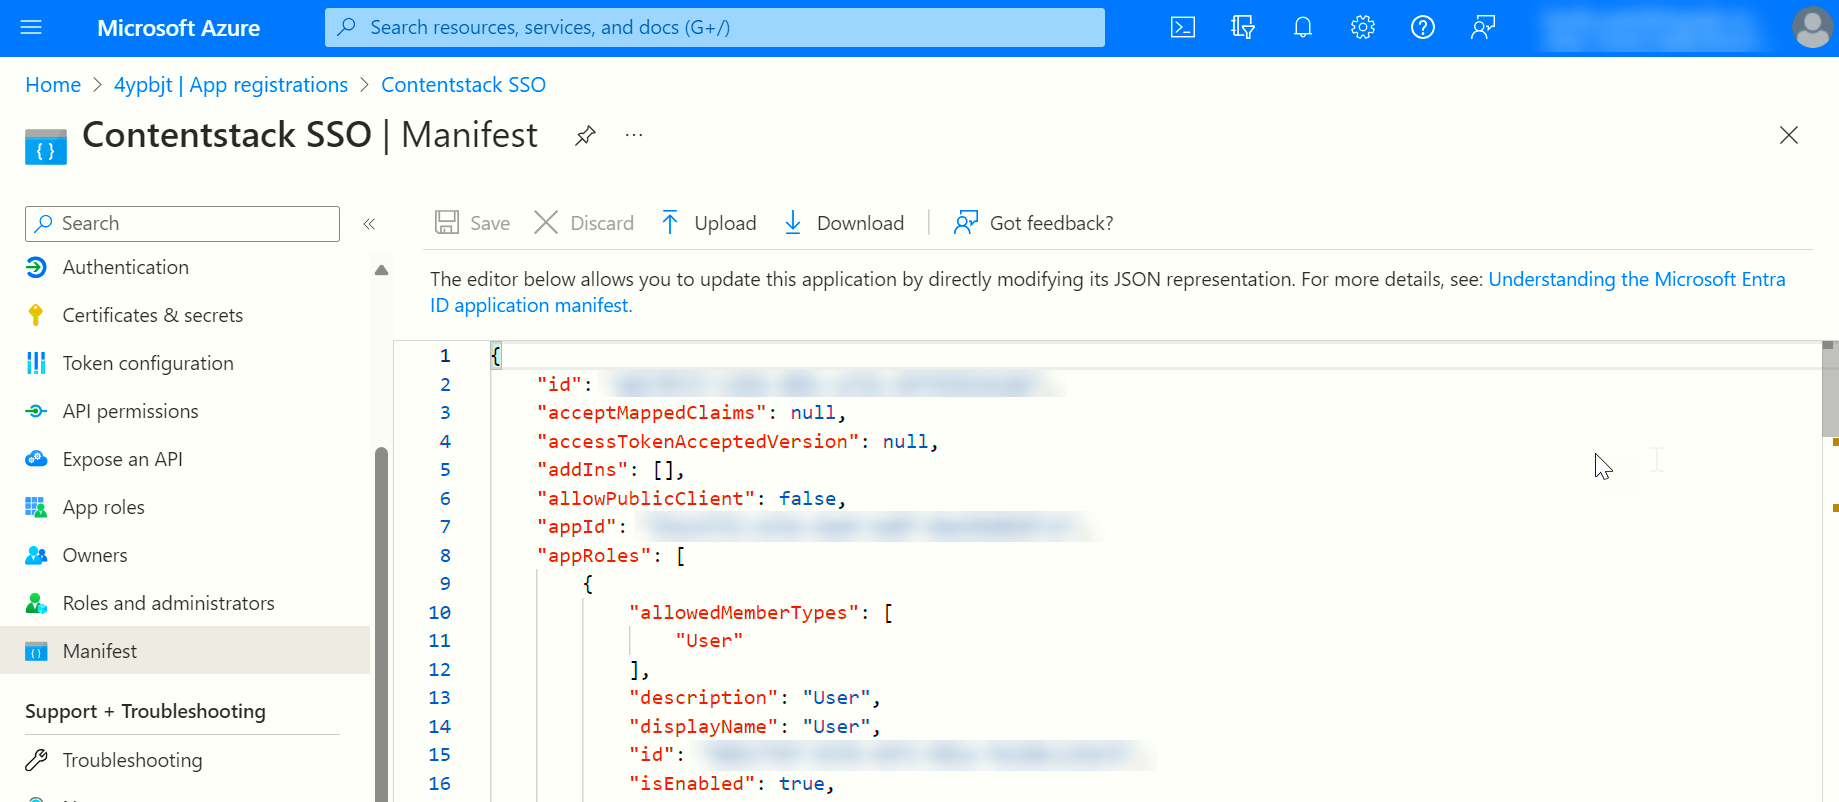
Add the following code snippet of a new role under appRoles:
{
 "allowedMemberTypes": [
      "User"
     ],
     "description": "Developer Role",
     "displayName": "Developer",
     "id": "18d14569-c3bd-439b-9a66-3a2aee02f15f",
     "isEnabled": true,
     "value": "developer"
}
The above code snippet is for adding a single role where the value provided to the value parameter is what you need to add in the IdP Role Mapping section of Contentstack. All the values provided in this snippet is user-defined.
For adding multiple roles, create similar snippets with the required role details. You can add multiple such IdP roles and add their mappings in Contentstack.
- Save the manifest.
You will be able to see all the roles that you created when you assign them to your application users.
- In the left navigation, click App Registrations, and then click All applications. Locate your newly created application and click it.
Assign Roles to Application Users for IdP Role Mapping
Note: This is an optional step, but it is mandatory if IdP Role Mapping is part of your Contentstack plan and you want to implement it.
This is an alternate way of managing users and permissions of your SSO-enabled organization. Performing this step lets you map your IdP roles to Contentstack roles while configuring SSO for your Contentstack organization.
To assign roles to application users, perform the following steps:
- Navigate to Azure Entra ID application, select Enterprise Applications, select All applications, then select your application.
- Under the Getting Started section, click the 1. Assign users and groups tab.
- To add a new user with a role, click the + Add User button.
- Click Users and groups. You will find a list of users whom you can add into your application.
- Next, click Select Role in the Add Assignment page of your application. In the Select Role panel on the right, you will see the role you created (in our case, developer).
- Assign the selected role to the application user.
You can now proceed to create role mappings in Contentstack for the IdP roles you created. Go to the User Management section of your Contentstack SSO settings.
Create Role Mappings in Contentstack
Note: You will only be able to view and perform this step if IdP Role Mapping is part of your Contentstack plan.
In the User Management section of Contentstack's SSO Setup page, you will see Strict Mode (authorize access to organization users only via SSO login) and Session Timeout (define session duration for a user signed in through SSO).
Below these options, you will see the Advanced Settings option.
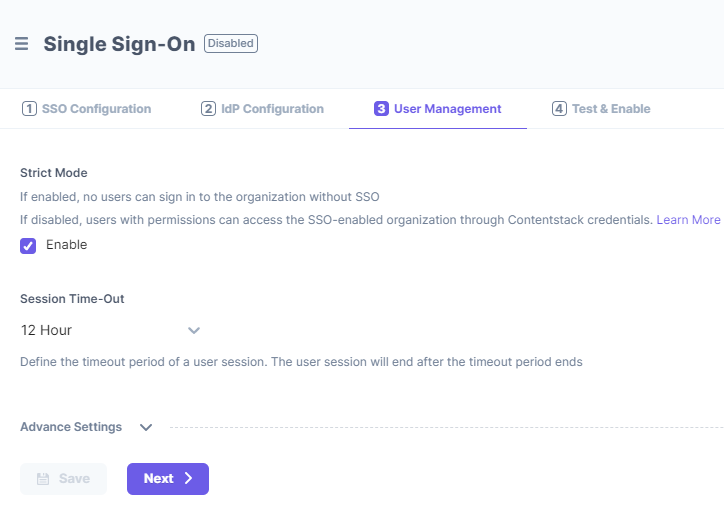
Click it to expand the IdP Role Mapping section to map IdP roles to Contentstack.
- In the Add Role Mapping section, click the + ADD ROLE MAPPING link to add the mapping details of an IdP role. The details include the following:
- IdP Role Identifier: Enter the IdP group/role identifier, for example, “developers.” You can use the value from your manifest.
- Organization Role: Assign either the ADMIN or MEMBER role to the mapped group/role.
- Stack Roles (optional): Assign stacks as well as the corresponding stack-level roles to this role.
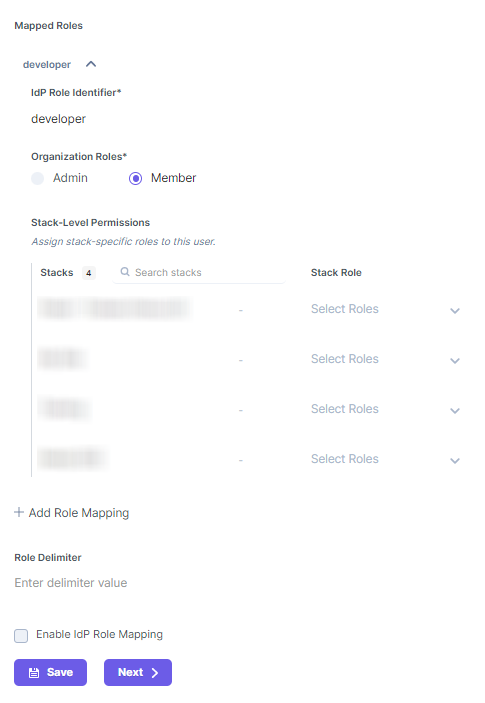
Likewise, you can add more role mappings for your Contentstack organization. To add a new Role mapping, click + ADD ROLE MAPPING and enter the details.
- Keep Role Delimiter blank as Microsoft Azure AD usually returns roles in an array.
- Finally, check the Enable IdP Role Mapping checkbox to enable the feature.
- Click Next to continue further.
While some details about these steps are given below, you can refer to our general SSO guide for more information.
- In the Add Role Mapping section, click the + ADD ROLE MAPPING link to add the mapping details of an IdP role. The details include the following:
Test and Enable SSO
Next, you can try out the “Test SSO” and “Enable SSO” steps in Contentstack.
Test SSO
Before enabling SSO, it is recommended that you test the SSO settings configured so far.
To do so, perform the following steps:
- Click the Test SSO button and it will take you to Contentstack’s Login Via SSO page where you need to specify your organization SSO name.
- Then, click Continue to go to your IdP sign in page.
- Sign in to your account. If you are able to sign in to your IdP, your test is successful.
On successful connection, you will see a success message as follows:
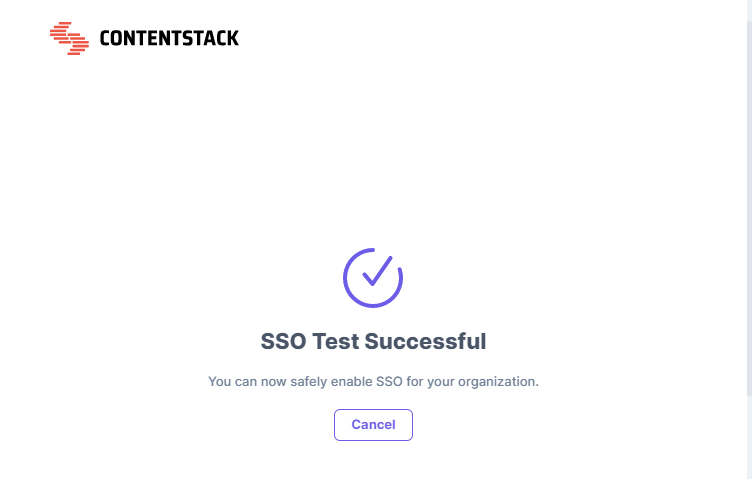
If you have enabled IdP Role Mapping, you’ll find the following details in a new page:
- SSO connection established successfully - A success message is displayed.
- IdP roles received - The list of all the roles assigned to you in your IdP.
- Contentstack-IdP role mapping details - The details of all the Contentstack Organization-specific and Stack-specific roles mapped to your IdP roles.
- Click the Close button. Now, you can safely enable SSO for your organization.
Note: While testing SSO settings with IdP Role Mapping enabled, the test will be performed only for the IdP roles of the currently logged-in user (i.e., the Owner performing the test).
Enable SSO
- Once you have tested your SSO settings, click Enable SSO to enable SSO for your Contentstack organization.
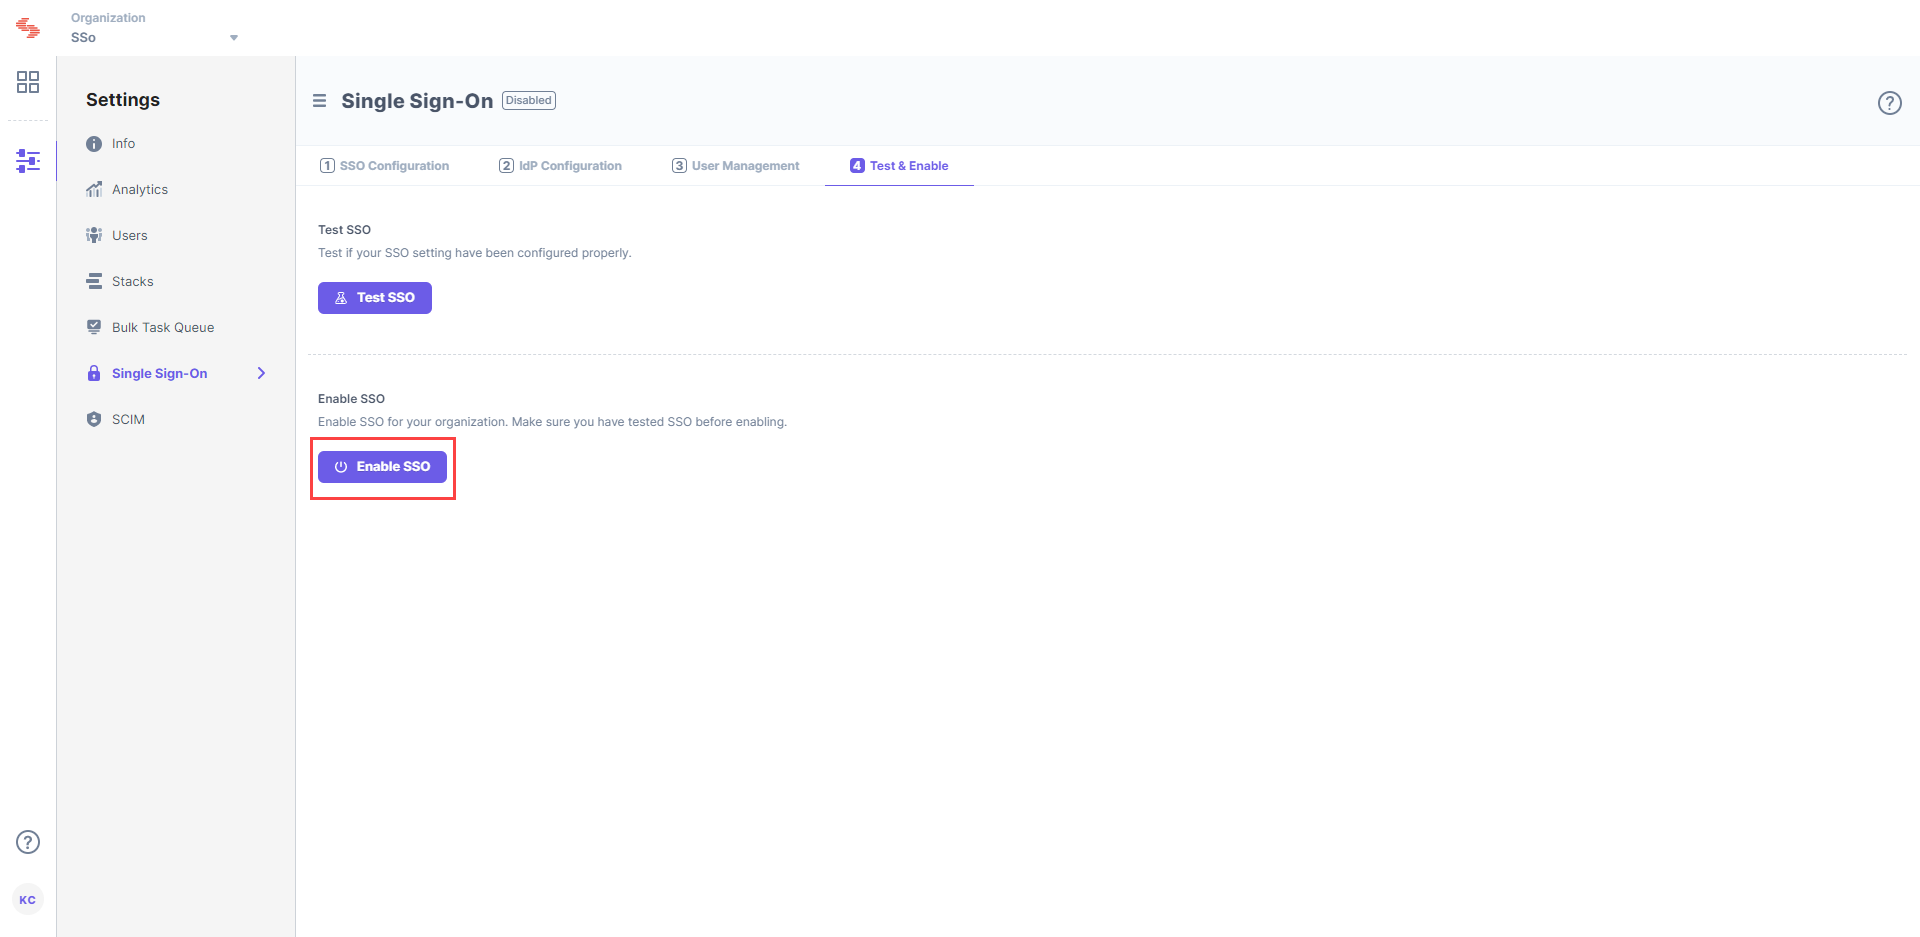
- Confirm your action by clicking Yes.
Once this is enabled, users of this organization can access the organization through SSO. If needed, you can always disable SSO from this page as well.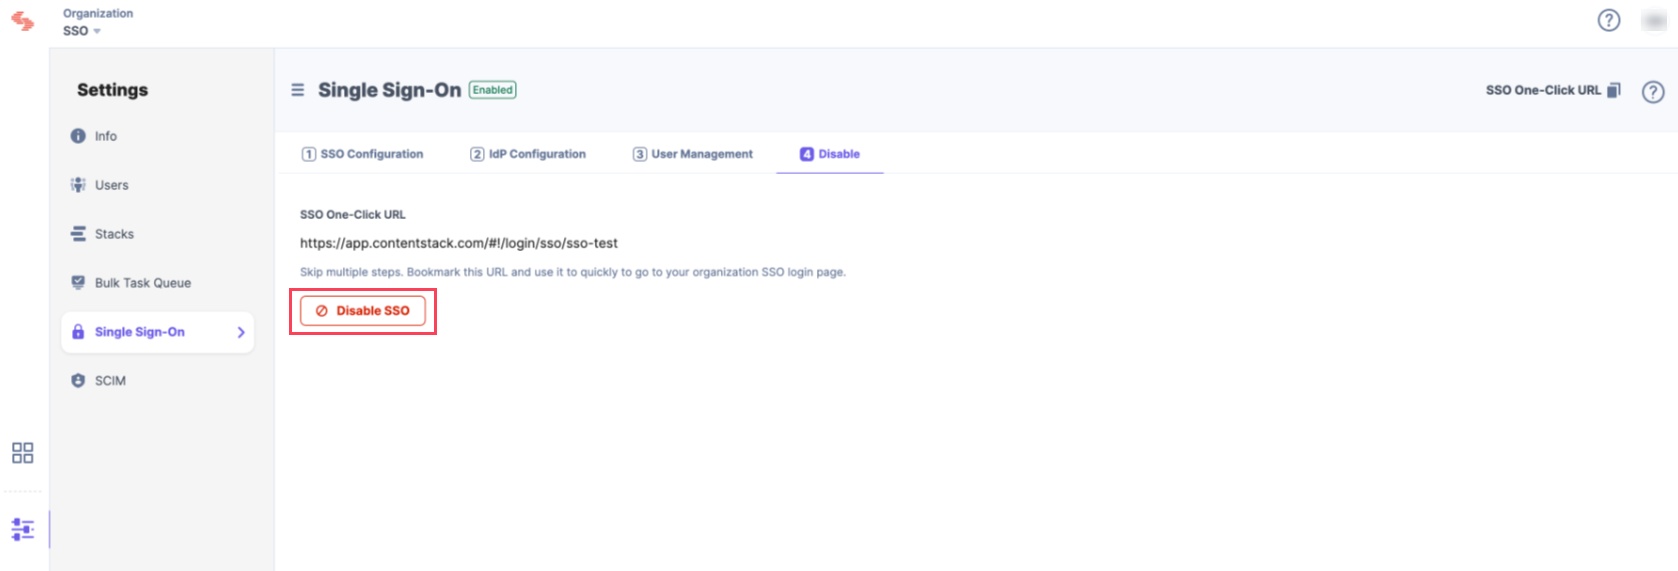
More articles in "SSO Guides"
